Installing and funding a wallet
To work with Tezos, you need a wallet, which is an application that maintains your accounts and signs Tezos transactions on your behalf. Wallets allow you to interact with dApps without exposing your account's private key.
Choosing a wallet
Which wallet you install is up to you and whether you want to install a wallet on your computer, in a browser extension, as a mobile app, or as a piece of hardware.
These are some wallets that you can use with Tezos:
- Temple mobile application and browser extension
- Umami standalone application for Windows, MacOS, and Linux
- Kukai federated identity application, which uses accounts linked to other accounts such as email or social media accounts
- Trust mobile application and browser extension
- Airgap standalone and mobile applications
- Ledger hardware wallets
The MetaMask wallet supports Tezos, but only its browser extension, and only on Mainnet.
Follow these steps to enable Tezos in MetaMask:
- Install the MetaMask browser extension.
- Go to https://metamask.tezos.com.
- Click Connect with MetaMask.
- Approve the installation of the Tezos snap in MetaMask.
Now you can connect to Tezos dApps with MetaMask. When a web application shows the octez.connect window to connect your wallet, you can select MetaMask. The page sends you to https://metamask.tezos.com to approve and manage the connection.
For more information about using MetaMask with Tezos, see MetaMask Now Supports Tezos: An Explainer.
Switching the wallet to a testnet
If you're doing development work, you're probably using a testnet instead of Mainnet. On testnets, tokens are free so you don't have to spend real currency to work with your applications.
The process for changing the network is different for each wallet type.
For example, to set the Temple browser wallet to use a testnet, follow these steps:
-
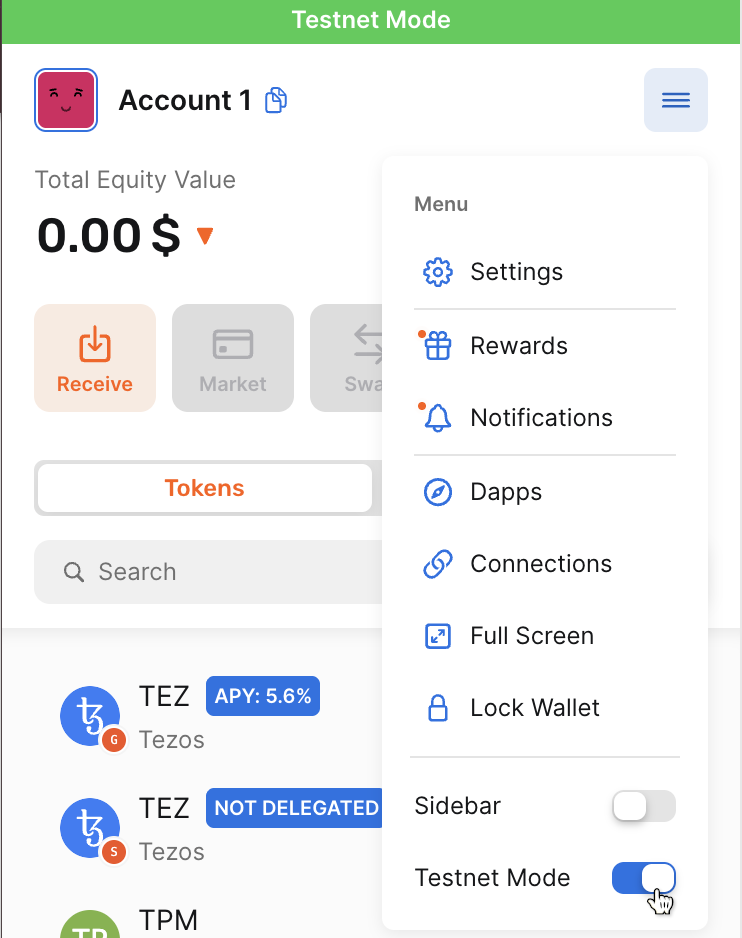
Expand the menu at top right and then turn on Testnet mode:
-
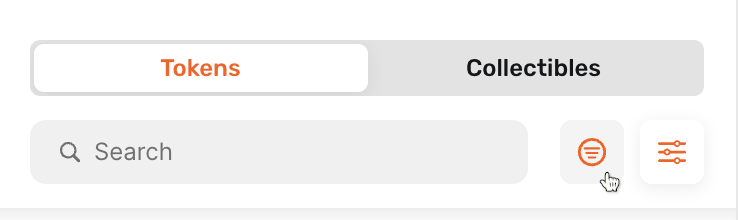
Above the list of tokens, click the display options button:
-
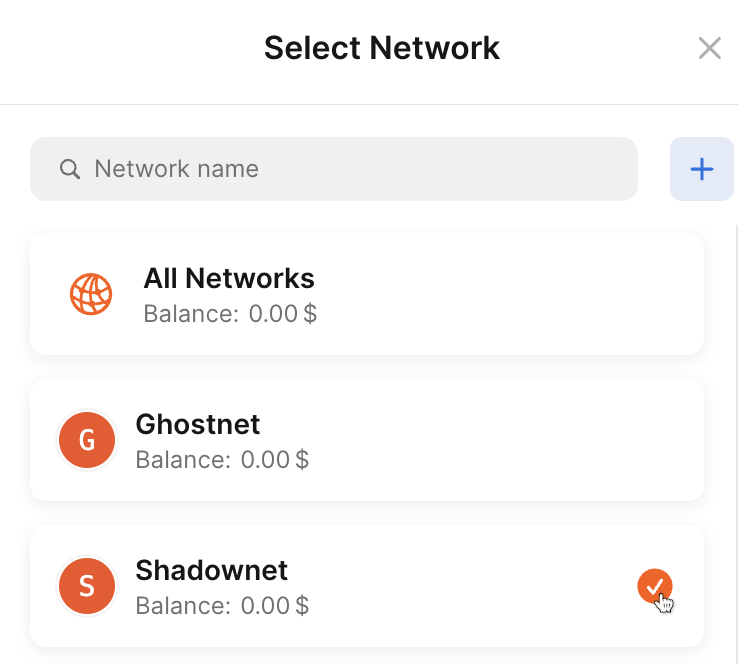
Under Filter by network, expand All Networks.
-
Select Shadownet:
-
Click the
Xbutton at top right of the Select Network page to close the list of networks. -
Click the
Xbutton next to the search box to close the display options.
Now the wallet displays your tokens on the testnet and sends transactions on the testnet instead of Mainnet.
If the wallet does not have built-in support for the testnet that you want to use, you may need to add the test network manually. For example, these steps are for the Temple wallet:
-
Go to https://teztnets.com/, which lists Tezos testnets.
-
Click the testnet to use.
-
Copy one of the public RPC endpoints for the testnet. These URLs accept Tezos transactions from wallets and other applications.
-
In the Temple app, click Settings > Networks.
-
Click the plus
+symbol to add a network. -
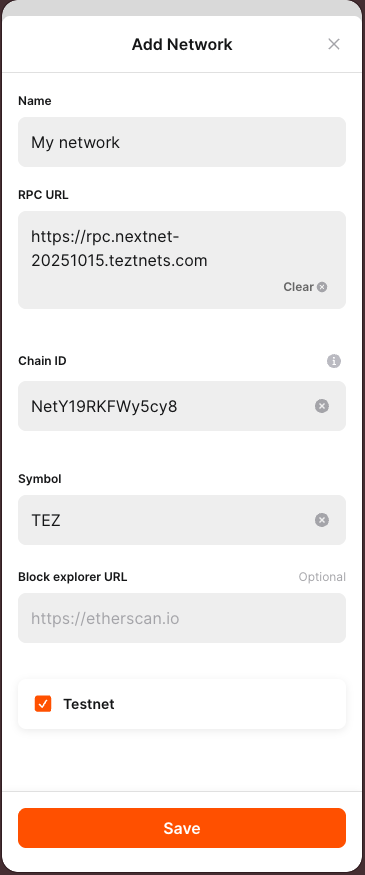
On the Add Network page, enter the name of the network, the RPC URL that you copied, and any other information about the testnet, as shown in this picture:
-
Click Save.
Now you can see your balances and send transactions to the network. You can also filter transactions to show only those on this network.
Funding a wallet
Follow these steps to get testnet tez for the wallet:
-
From your wallet, get the address of your account, which starts with
tz1. This is the address that applications use to work with your wallet. -
Go to the faucet for the testnet, such as https://faucet.shadownet.teztnets.com for Shadownet.
-
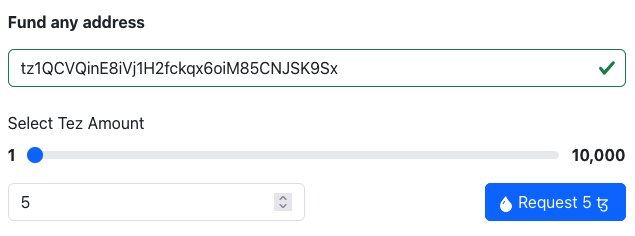
On the faucet page, paste your wallet address into the input field labeled "Fund any address" and click the button for the amount of tez to add to your wallet.
It may take a few minutes for the faucet to send the tokens and for those tokens to appear in your wallet.
You can use the faucet as much as you need to get tokens on the testnet, within the limits of what the faucet allows, but those tokens are worthless and cannot be used on Mainnet.