Tezos overview
Tezos is an open-source, decentralized blockchain created in 2014 by Arthur and Kathleen Breitman. It raised awareness and support in 2017 with its crowdfunding and launched the following year. Since its inception, Tezos has gone through multiple iterations of upgrades and development, staying true to its ethos -- "a blockchain designed to evolve".
Tezos has robust applications ranging from NFTs, DeFi, and gaming to enterprise and government use cases.
At its core, Tezos is a worldwide network of computers called nodes, which anyone can run.
The nodes all run the Tezos protocol, which is software that controls how the nodes communicate and agree on what to do.
The result is a decentralized computing platform that no one person or entity can control.
Scope of this site and other Tezos documentation
Several sites provide information about different parts of the Tezos ecosystem.
This site includes:
Tutorials that can help you start using Tezos
A presentation of the main Tezos concepts and features for technical users, including developers and bakers
For more details on installing, using, or contributing to the platform, see the Octez documentation at https://tezos.gitlab.io/index.html.
For interactive learning material (including exercises) about Tezos concepts, the underlying technology, application development, and the ecosystem, see https://opentezos.com.
For other sources of information, see Other resources and technical support.
For a single text file that you can use with large language models (LLMs) see Text files.
What can I do with Tezos?
Developers can imagine Tezos as a computing platform that is spread across many computers worldwide and is therefore transparent, independent, fair, automated, and controlled by its users.
They can do many of the same things with Tezos that they can with any other computing platform, but developers often use decentralized computing for these use cases:
Cryptocurrencies: Users can create digital objects known as tokens to be used as digital currencies and to make it easier to accept online payments.
NFTs: Non-fungible tokens (NFTs) are unique digital items that can represent anything that their creator wants them to represent, including ownership of art and real-world objects, identity-related credentials like licenses and certifications, and digital-only artifacts such as video game items.
DeFi: Decentralized finance (DeFi) allows innovative financial instruments such as automated loans and independent currency transfers.
DAOs: Decentralized autonomous organizations (DAOs) are online-managed organizations where members vote on activities and officers and use tokens to represent membership and voting power.
Authentication: The cryptographic nature of the Tezos blockchain allows users to digitally sign messages and transactions to prove their identity.
General decentralized computing: Decentralized computing allows developers to write programs called smart contracts and be assured that these programs will run as intended without censorship.
Cutting-edge developments on Tezos
With recent Tezos upgrades heavily focusing on scaling solutions, Tezos has been at the forefront of blockchain research. Up to 1 million transactions per second (TPS) are theoretically possible on Tezos with the advent of Smart Rollups, which have emerged as a strong scaling solution. With Smart Rollups (also known as optimistic rollups), transactions can be performed more quickly and cheaply and use other VMs that “roll up” their state changes onto Tezos.
Etherlink is another exciting technology that greatly enlarges the possible applications and versatility of Tezos.
Etherlink builds on Smart Rollups and combines them with the Data Availability Layer to provide an EVM-compatible Layer 2 solution which is truly decentralized, low-latency, and low-cost.
These innovations demonstrate the ongoing dedication of Tezos to foster innovation in the blockchain industry.
What are some example applications of Tezos?
Here are some of the ways that people use Tezos:
NFTs on Tezos
The rise of non-fungible tokens (NFTs) has become a core arena of activity and growth in the blockchain space, where new communities are growing around artists, musicians, and other creators with the use of blockchain tokens. NFTs allow collectors and fans to hold a piece of content produced by a creator, providing proof of ownership and secure exchanges on the blockchain.
Objkt, FxHash, Teia, DNS.xyz are some of the marketplaces for Tezos art and music NFTs.
They provide a platform for creators to mint and sell their work and for users to collect such works.
Tezos is also being used for other NFT-related projects, such as MoneyTrack, which is a payment platform that uses NFTs to control directed payment flows.
Enterprise and government uses of Tezos
Enterprises and regulatory bodies have been adopting Tezos as well.
Tezos is being used by the French Armies and Gendarmerie's Information Center to validate judicial expenses incurred during investigations and record them on Tezos.
In recent years, the concept of Central Bank Digital Currencies (CBDCs) has gained traction, with several countries around the world exploring their own CBDC projects. Société Générale carried out a series of successful tests using Tezos to explore the potential of CBDCs. In September 2020, the bank announced that it had completed a pilot program using a custom-built version of the Tezos blockchain to simulate the issuance and circulation of CBDCs. The pilot involved testing the technology's ability to handle transactions, make payments, and settle transactions in a digital environment.
The California DMV is also using Tezos for its project to put car titles on the blockchain.
Sword Group an international technology company, launched DigiSign, an open-source tool built on Tezos that enables users to digitally sign, certify, and verify the authenticity of digital documents.
Tezos in gaming
Recently, the Tezos Unity SDK promises to make blockchain game development easier and faster. It allows for the addition of web3 features such as allowing players to link their accounts across games, mint, and trade in-game items and currencies, and show off their ranks and accomplishments on public, on-chain leaderboards.
What makes Tezos different?
Here are some of the features that make Tezos different from other blockchains:
Tezos can upgrade itself
Tezos has a built-in capability to upgrade itself, which allows the network to evolve without requiring a hard fork. Anyone can propose an upgrade to the protocol and have it adopted by the network without compromising the platform's stability or causing fragmentation. This feature allows Tezos to adapt regularly to new technologies and to address user needs rapidly. For more information, see Governance.
Everyone can participate in governance
Anyone who holds XTZ — the chain's native token — can propose or vote about changes to how Tezos works, such as changes to gas fees and block times, new features such as Smart Rollups, or even major changes like how the consensus mechanism works.
Tezos uses proof of stake
The proof-of-stake consensus mechanism eliminates the need for high energy use, making it the "green" choice for blockchains. Instead of competing to achieve consensus as in proof-of-work mechanisms, Tezos nodes (called bakers) stake Tezos tokens to earn the right to create blocks and receive rewards. Users who want to participate without running a node themselves can delegate and stake tokens to a baker for a share of the rewards. Bakers and stakers keep control of their tokens in that they can unstake them later; and delegators keep complete control of their tokens.
Tezos's proof-of-stake mechanism improves scalability and encourages cooperation via incentives. It also increases the cost of consensus attacks and avoids environmentally wasteful proof-of-work. Tezos launched in June 2018 as one of the first major proof-of-stake networks.
For more information about how Tezos handles proof of stake, see https://tezos.gitlab.io/alpha/proof_of_stake.html.
For more information about delegating and staking, see Bakers.
Tezos accepts multiple languages
Tezos provides a few different languages for developers to choose from, according to their use case, including versions of Python and JavaScript/TypeScript. For more information, see Languages.
Tezos has a robust layer 2 ecosystem
Tezos provides tools that allow high scalability on a layer above the primary Tezos blockchain, known as layer 2. Smart Rollups can run large amounts of logic and handle large amounts of data in a separate environment without slowing Tezos itself down. The Data Availability Layer provides high-throughput data to Smart Rollups.
The framework for these layer 2 systems is enshrined in the layer 1 protocol. All layer 2 activity is secured by verifiable commitments and attestations on layer 1.
Other resources and technical support
If you don't find the information that you need on this site, there are many other places that you can look.
Documentation
This site is not exhaustive. It covers the main topics that concern Tezos developers and the main Tezos features in the form of documentation and tutorials.
More detailed developer and user documentation on Tezos in general or on specific tools in the Tezos ecosystem is available at these sites:
https://opentezos.com/ is a complete course for learning Tezos concepts, mainly for developers but also for bakers and other users, in the form of tutorials with exercises
https://tezos.gitlab.io/ is the official documentation of the Octez suite, which contains a complete implementation of the Tezos platform (including a node, a baker, a client, and other tools)
https://taqueria.io/docs/intro/ is the official documentation of Taqueria, a flexible framework for building Web3 applications on Tezos
https://tezostaquito.io/docs/quick_start is the official documentation of Taquito, a TypeScript library for developing Tezos applications faster and easier
https://ligolang.org/docs/intro/introduction is the official documentation of the LIGO language for writing Tezos smart contracts
https://smartpy.io/manual/introduction/overview is the official documentation of the SmartPy language for writing Tezos smart contracts
https://archetype-lang.org/docs/introduction/ is the official documentation of the Archetype language for writing Tezos smart contracts
https://docs.etherlink.com/ is the official documentation for Etherlink, an EVM-compatible layer-2 blockchain running on Tezos, implemented as a smart rollup
For a single text file that you can use with large language models (LLMs) see Text files.
Social media
For links to social media accounts and forums where you can get in contact with Tezos developers and users, see https://tezos.com/community/.
Architecture
The Tezos blockchain is composed of many Tezos nodes running around the world, complemented by other programs such as bakers and accusers.
These processes collaborate with the overall goal of maintaining the blockchain data in a decentralized manner.
The Tezos nodes are the most important piece in this architecture because they maintain the system and the blockchain data.
Users interact with nodes through many different clients, including command-line clients, wallets, and web applications.
For more information about nodes, see Nodes.
This diagram shows a high-level view of the Tezos system:
A high-level view of the Tezos system, including Tezos nodes, the blockchain data itself, an Indexer, and a few examples of clients
Tezos layer 1
When people talk about Tezos, they usually mean the primary Tezos network, which is referred to as Mainnet, and the fundamental processing layer, known as layer 1.
Tezos also has other networks used for testing, referred to as testnets.
Anyone can create new test networks if needed.
For example, before new versions of the Tezos protocol are enabled, users create networks that use that protocol so they can test it.
Other systems run on top of Tezos layer 1; these systems are referred to as layer 2.
These systems, based on Smart Rollups, complemented by the Data Availability Layer, allow Tezos applications to scale, running transactions and using data at a much higher rate than layer 1.
For more information about layer 2, see Layer 2.
The blockchain data
Although people often use the word "blockchain" to mean the entire system, strictly speaking, a Tezos blockchain is a series of blocks of data, each connected to the previous block in the chain, beginning with the genesis block.
The blockchain data is maintained by a network of Tezos nodes.
Nodes reach consensus on the next block before adding it to the chain.
As shown in the diagram, the data inside a Tezos block includes the hash of the previous block in the chain and many operations, such as transactions that transfer tez or call smart contracts.
Blocks also include operations that are necessary for the management of the chain, including nodes' attestations that blocks are valid, called consensus operations, and votes on changes to the protocol, called voting operations.
For more information on the operations that can be included in blocks, see Blocks and operations in the Octez documentation.
Tezos clients and servers
In addition to the functions of the protocol and shell, a Tezos node also acts as a server to respond to queries and requests from clients.
A client can query the chain’s state and can inject blocks and operations into a node.
Nodes share operations with each other, so the node that includes an operation in a block may not be the node that the client originally sent the operation to.
Tezos uses this client-server architecture for these main reasons:
It improves security by separating the node, which is exposed to the internet, from the baker, which has access to the client keys.
The node and the baker can be on different computers, which allows the node to manage communication and shields bakers from network attacks.
It allows bakers to have different implementations.
For example, different bakers may implement different transaction selection strategies.
It allows clients and other tools to interact with the node and inspect its state.
The node accepts calls from clients through its RPC interface.
It has control over which clients to accept calls from, which calls to accept, or whether to accept RPC calls at all.
Anyone can run a node and select which clients to run and which requests to accept from clients.
Some typical use cases for nodes are:
A node running by itself, which maintains a copy of the blockchain data and enhances the distribution of the network without actively baking blocks.
Optionally, this node can open its RPC interface to serve different kinds of requests.
A node along with a baker, an accuser, and a signer can be used to bake new blocks, activity which ensures that the blockchain progresses and yields rewards in tokens.
Here is a summary of the main Tezos clients:
Bakers: The baker is an Octez program that is responsible for creating and proposing new blocks based on the operations proposed by different clients.
For more information, see Bakers.
Accusers: The accuser is an Octez program that monitors new blocks and looks for problems, such as when bakers try to add more than one block at a time.
When it finds a problem, it submits a denunciation to other nodes to refuse the new blocks and punish the offending node.
For more information, see Accusers.
The Octez client: The Octez client is a command-line tool that developers can use for many Tezos-related tasks, including:
Deploying, calling, testing, and interacting with contracts
Deploying and interacting with Smart Rollups
Working with accounts
Calling RPC endpoints directly
Running Sapling transactions
Setting up baking operations for testing contracts
For more information about the Octez client, see The Octez client.
External clients: Many external clients can add operations to the network of nodes or use nodes to inspect the state of the blockchain, including:
Web applications that use SDKs such as Taquito to send and receive information from Tezos
Wallet applications
Indexers and block explorers: Indexers are off-chain applications that retrieve blockchain data, process it, and store it in a way that makes it easier to search and use.
They are an important part of block explorers, which are applications that provide data about the blockchain.
Layer 2
Layer 2 consists primarily of nodes that run Smart Rollups.
These nodes run logic that is separate from the layer 1 protocol logic; they can behave differently from how the Tezos protocol works, run at a different pace, use more data via the Data Availability Layer, and communicate with layer 1.
Smart Rollup nodes post data to layer 1 for verifiability with a bond for security; other systems can challenge the data to ensure that the Smart Rollup is running honestly.
One major use of Smart Rollups is to enable Etherlink, which is a Smart Rollup that runs an EVM-compatible protocol.
Users can work with Etherlink like any other EVM chain while taking advantage of the high scalability of Tezos layer 2.
Etherlink can also communicate with Tezos layer 1 and other EVM chains, allowing users to bridge assets in and out of Etherlink.
This diagram shows a high-level view of Tezos layer 2, including Etherlink:
A high-level view of Tezos layer 2, including some elements of layer 1, Smart Rollup nodes, Data Availability Layer nodes, Etherlink Smart Rollup nodes, and the connection to EVM chains
References
For more information about the architecture of Tezos, see:
Accounts and addresses
Tokens
Smart Optimistic Rollups
Governance
Indexers
Block explorers
Etherlink
Nodes
Tezos nodes are peer-to-peer programs running the Tezos protocol to participate in the Tezos network.
Anyone can run a Tezos node.
A Tezos node has three main roles:
It validates blocks and operations
It broadcasts blocks and operations to other nodes and receives them from other nodes over a peer-to-peer network
It maintains a copy of the blockchain data and its associated state (also known as the ledger), which includes accounts and their balances, among other things
Beside these technical roles, nodes must satisfy two other important requirements:
Support the governance of the blockchain
Ensure the extensibility of the blockchain with new clients of different kinds
In order to meet these requirements, the software that nodes run is structured according to two major principles:
It is separated into a protocol and a shell to make it easier to upgrade.
It implements a client/server architecture, to allow composition with many other tools in a safe way.
Nodes cooperate with clients and with each other through an RPC interface.
The Octez suite, which is an implementation of the Tezos node and other executables, instantiates these principles in the Octez software architecture.
For instructions on running a node, see the tutorial Run a Tezos node in 5 steps.
Protocol and shell
The software that runs Tezos nodes is split into two main parts:
The protocol, which interprets transactions and other operations in each block (also known as the economic protocol)
The shell, which handles low-level functions like data storage and peer-to-peer network communication
The relationship between the shell and the protocol is like the relationship between an operating system and an application.
The operating system stays stable while the application can update itself.
In this way, Tezos can update how it works (its protocol) without requiring nodes to accept major changes to the software that they run (the shell).
For example, nodes can update to a new protocol version without restarting the shell.
The protocol
The Tezos protocol is responsible for interpreting the operations in each block.
It also provides the logic that identifies erroneous blocks.
Unlike many other blockchains, Tezos is self-amending.
Its nodes can update the protocol that controls the possible operations and how they are processed; updates are performed via an online governance process.
These updates allow Tezos to adapt to new technologies and respond to user needs.
For example, protocol upgrades have added new features like Smart Rollups and have reduced the amount of time between blocks.
Users propose updates to the protocol through a voting process, using dedicated voting operations such as protocol proposals and protocol upvotes.
For information about the voting process, see Governance.
The shell
The shell is responsible for the fundamental functions of a distributed software application, including:
Peer-to-peer communication that lets nodes exchange information
Storage functionality that lets nodes store blocks, operations, and the current state of the chain
A synchronization heuristic that starts nodes and keeps them in sync with the network
A validator that checks that blocks are valid with help from the rules in the economic protocol
In particular, the validator is responsible for resolving the available blocks into a single linear sequence of blocks.
It chooses between the various blocks that baking nodes create, uses the protocol to verify and score them, and selects the tree head with the highest score.
Then it uses that linear chain in all of its work with the protocol, so the protocol is never aware of multiple branches.
The RPC interface
The Tezos RPC (Remote Procedure Call) interface is a specification for a REST API that clients use to interact with Tezos nodes and nodes use to communicate with each other.
You may want to know this RPC interface if you are developing tools that need to query the Tezos blockchain or to interact with it, such as wallets, indexers, or Web3 libraries.
Clients use this interface to submit transactions and get information about the state of the blockchain, such as account balances and contract storage.
Tezos nodes act as servers and accept HTTP requests from clients and other nodes via this interface.
Tezos RPC uses JSON to send and receive data, but it does not adhere to the JSON-RPC specification.
All the RPCs served by the Tezos node are described as an OpenAPI specification at Octez Node RPCs in the Octez documentation.
Public and private RPC nodes
All Tezos nodes run RPC servers, but the RPC interface is subject to an access policy.
By default, RPC servers are private and do not accept all requests from every client.
When you work with a Tezos client, such as the Octez command-line client or the Taquito SDK, you select a public RPC node to send transactions to, or you can use a private RPC node that you have access to.
If you're using a testnet, you can get a list of public RPC nodes for that network at https://teztnets.com.
Other sources of public nodes include:
Community RPC Nodes listed by ECAD Labs.
SmartPy nodes
RPC nodes in the Taquito documentation
Bakers
Baking is the process of creating new blocks in the Tezos blockchain.
Bakers are executables running alongside Tezos nodes that cooperate to achieve consensus about the next block to add.
Bakers validate pending operations, package them into a block, sign the block, propose the new block to other nodes, and verify that the blocks that other bakers propose are valid.
Baker executables are run on behalf of user accounts.
By extension, bakers also denote the users running baker daemons on behalf of their user accounts.
The baking process
The baking process includes many steps that Tezos users and developers don't need to think about, but at a basic level, baking a block follows these steps:
The protocol selects in advance a list of bakers for each block to create in a cycle, which is a certain number of blocks.
It also selects a list of bakers to act as validators.
These bakers are responsible for validating the blocks that other bakers create and publishing attestations that the block is valid.
The first baker on the list has a certain amount of time (called a round) to create the next block.
It packages pending operations into a block, signs it, and distributes it to other nodes.
If the first baker doesn't publish a block in time, the next baker on the list has a certain amount of time to bake a block (a new round), and so on until a block is created.
The validators verify the block and publish their attestations in future blocks.
The next list of bakers create the next block, until the end of the cycle.
Note that:
The presentation above is somewhat simplified; in reality, validation is done in two phases, called pre-attestation and attestation.
For any given block and round, only one baker has the right to create the block, and several bakers have the right to (pre-)attest the block.
Becoming a baker
To become a baker, you must create an account to act as a delegate, which is an account that is authorized to bake blocks and attest blocks that other accounts bake, and also to receive delegations (and stake) from other accounts, as explained later.
Delegates temporarily stake tez as a security deposit to ensure that they are acting according to the rules of the protocol.
Deposits can be "unstaked" later, either partially (at any time) or totally (when bakers stop baking).
There is a delay of a certain number of cycles from the moment when the tez are staked until the delegate can begin baking.
Similarly, when tez are unstaked, they are unlocked after a certain number of cycles.
Staked tez may be slashed by the protocol if the baker misbehaves (e.g., proposes or attests two different blocks for the same level).
A delegate participates in consensus in proportion to their baking power: the more baking power a delegate has, the more likely it is to be selected to bake or to validate blocks and thus receive the rewards.
The baking power of a delegate is computed from the amounts of tez staked (by its own and by all its stakers) and owned (by its own and by all its delegators), knowing that non-staked tez are weighted half as much as staked tez in the sum.
The delegate must have a baking power of at least 6,000 tez to be allowed to bake.
A delegate also participates in governance in proportion to their voting power.
The voting power of a delegate is computed in a similar way to the baking power except that no distinction is made between tez that are staked or not staked.
Bakers must run at least one Tezos node and a baker service to go with it.
These services must run at all times with a stable power source and internet connection, because periods of inactivity for a baker entail losses of rewards, and eventually being marked as inactive and temporarily excluded from baking.
Delegating to a baker
If you don't have enough tez to become a baker or don't want to run a baking node, you can choose a baker as your delegate, which makes you a delegator.
The delegate doesn't have control over your tez and you can spend your tez at any time or withdraw your delegation, but half of the tez that you delegate counts toward the baking power of the delegate. Also, delegated tez increase the voting power of your baker: a delegate's voting power is the sum of its own tez plus the tez delegated to it.
In exchange, delegates may share some part of their rewards with you, in proportion to the amount of available tez in your account (technically, the minimal balance during each cycle).
Check your delegate's conditions for distributing rewards.
Delegating incurs no risk for the delegator: the delegate has no control over the tez and the delegator is not punished if the delegate misbehaves.
Staking with a baker
If you want to get a bigger share of your delegate's rewards, you can temporarily stake any amount of tez from your account with your baker, provided your baker accepts staking.
All the tez you stake don't leave your account: they are frozen in your account,
but contribute to the baker's security deposit, and are locked under the same conditions as the baker's own staked tez. Hence, they are slashed if the baker misbehaves.
In exchange of agreeing to temporarily lock these tez and sharing the risks with your delegate, you get a bigger share of the delegate's rewards.
Staking rewards accrue automatically, and are allocated by the protocol: stakers earn rewards whenever their bakers do, and don't have to wait for the baker to distribute them (unlike delegation rewards).
Later on, you may choose to unstake part or all of the staked tez, that will be unlocked after a certain delay.
To stake tez, you start by delegating to a baker's account (which should accepts staking and not be "overstaked"), then you stake a certain amount of your tez to the baker.
Thus, you can earn staking rewards on some frozen tez while leaving some delegated tez liquid for immediate use.
Since you may have only one delegate, you can only stake with one baker at a time.
Summary
In summary, here is a comparison betwen the staking and delegating options above:
| Staking | Delegating
--- | --- | ---
Increase baking power | 100% | 50%
Increase voting power | 100% | 100%
Reward delay | None | 2 cycles (about 6 days)
Reward route | Direct to staker | To baker who manually sends to delegator
Funds availability | Frozen (locked) | Liquid (unlocked)
Unlock delay | 4 cycles (about 10 days) | None
Slashing exposure | Yes | No
References
To start delegating and staking, use the app at https://stake.tezos.com.
For more information about the different options to participate to the Tezos network (baking, staking, or delegating), see Running Octez in the Octez documentation.
For full details about baking, see Node and Baking on opentezos.com.
Accusers
Accusers are programs that monitor new blocks, look for problems, and denounce bakers that introduce blocks with problems.
Accusers ensure that bakers play by the rules and do not abuse the reward mechanism of the Tezos protocol.
Accusers look for:
Bakers that sign two blocks at the same level
Bakers that inject more than one attestation for the same baking slot
When they see one of these problems, they emit a double-baking or double-attesting denunciation operation, which cause the offending baker to lose some of its stake.
Some of the slashed stake goes to the accuser.
Anyone can run an accuser, and they don't have to stake any tez like bakers must.
Accounts and addresses
Accounts
Tezos uses these types of accounts:
User accounts (sometimes known as implicit accounts) store tez (ꜩ) and tickets.
Any wallet application or the Octez command-line tool can create user accounts.
Smart contract accounts (sometimes known as originated accounts) store immutable code, mutable storage, tez (ꜩ), and tickets.
See Smart contracts.
Revealing accounts
User accounts are unrevealed until they make a transaction.
They can store tez and tickets, but some services such as indexers may not see them.
To reveal an account, send any transaction from it, such as calling a smart contract or sending tez to any account, including itself.
Addresses
User accounts have addresses that start with "tz1", "tz2", "tz3" or "tz4."
Smart contracts have addresses that start with "KT1."
Smart Rollups have addresses, but are not accounts because they cannot store tez.
Their addresses start with "SR1".
They have a tree of commitments attached to them.
See Smart Optimistic Rollups.
Tokens
In a blockchain ecosystem, a digital asset that can be transferred between accounts is called a token.
Like other blockchains, Tezos relies on a native token in which transaction fees are paid.
The native token of Tezos is tez (also known as XTZ or represented by the symbol ꜩ).
But other tokens representing some value in digital form can be programmed in a blockchain, for instance using smart contracts.
Tokens fall in two broad categories:
Fungible tokens, which are interchangeable and represent the same value,
Non-fungible tokens (NFTs), which are unique digital assets that model the ownership of some digital or real object
Many types of fungible tokens are already implemented in Tezos, including:
Stablecoins, which are tied to the price of fiat currencies such as USD and EUR
Wrapped tokens, which represent tokens from another blockchain or another standard; see Wrapped tokens
Tezos is also used as a platform for owning and exchanging various types of NFTs.
In most cases, (non-native) tokens are managed by smart contracts.
They are not stored directly in accounts; instead, smart contracts keep a ledger of how many tokens each account holds.
However, Tezos also offers a built-in abstraction called tickets, which are fungible tokens that can be created by smart contracts in limited quantity (possibly only one), but whose ownership are directly tracked by the blockchain.
To start right away using tokens, see these tutorials:
Create an NFT
Build a simple web application
Fungible tokens
Fungible tokens are collections of identical, interchangeable tokens, just like one US dollar or Euro is the same as any other US dollar or Euro.
A contract that manages fungible tokens has a ledger that maps account IDs to an amount of tokens, as in this example:
Account address | Balance
--- | ---
tz1QCVQinE8iVj1H2fckqx6oiM85CNJSK9Sx | 5
tz1hQKqRPHmxET8du3fNACGyCG8kZRsXm2zD | 12
tz1Z2iXBaFTd1PKhEUxCpXj7LzY7W7nRouqf | 3
When an account transfers tokens to another account, it sends the transaction to the smart contract, which deducts the amount of tokens from its balance in the ledger and adds it to the target account's balance.
In practice, a single contract can manage multiple types of fungible tokens.
Therefore, its ledger uses a combination of the account address and token ID as the key, as in this example:
key | value
--- | ---
tz1QCVQinE8iVj1H2fckqx6oiM85CNJSK9Sx, token ID 0 | 10
tz1QCVQinE8iVj1H2fckqx6oiM85CNJSK9Sx, token ID 1 | 2
tz1QCVQinE8iVj1H2fckqx6oiM85CNJSK9Sx, token ID 2 | 1
tz1QCVQinE8iVj1H2fckqx6oiM85CNJSK9Sx, token ID 4 | 5
tz1hQKqRPHmxET8du3fNACGyCG8kZRsXm2zD, token ID 1 | 2
tz1hQKqRPHmxET8du3fNACGyCG8kZRsXm2zD, token ID 2 | 8
tz1hQKqRPHmxET8du3fNACGyCG8kZRsXm2zD, token ID 3 | 14
Non-fungible tokens (NFTs)
A non-fungible token represents something unique, and therefore it is not interchangeable with any other token.
An NFT can represent a specific piece of art, a specific seat at a specific event, or a role that can be held by only one person.
Therefore, a contract that manages NFTs has a ledger that shows the token ID and the owner's account, as in this example:
Token ID | Account address
--- | ---
0 | tz1QCVQinE8iVj1H2fckqx6oiM85CNJSK9Sx
1 | tz1QCVQinE8iVj1H2fckqx6oiM85CNJSK9Sx
2 | tz1Z2iXBaFTd1PKhEUxCpXj7LzY7W7nRouqf
When an account transfers an NFT to another account, it sends the transaction to the smart contract, which replaces the existing owner of the token with the target account as the new owner of the token.
Regulations
If you plan to create a token, make sure to check the regulations that govern tokens in your country.
These rules may include security requirements, information disclosure requirements, and taxes.
For example, the markets in crypto-assets (MiCA) regulation governs blockchain tokens in the European Union.
Risks
Always be cautious when creating, working with, and buying tokens.
Anyone can write smart contracts to create tokens and define how they behave, so you must evaluate tokens before buying or working with them.
Consider these questions:
Is the high-level language code of the smart contract open source?
Has the contract been audited?
Is there a limit on the number of tokens or can the contract create any number of tokens?
What are the rules for creating or transferring tokens?
Remember that holding a token usually means that the contract's ledger has a record that maps an account address to a balance of tokens.
Therefore, if the smart contract is malicious or has flaws, the ledger could be changed, erased, or frozen and the tokens could be stolen, destroyed, or made unusable.
Token standards
While you can create tokens that behave in any way that you want them to behave, it's best to create tokens that follow a standard.
Token standards in a blockchain ecosystem are important for many reasons, including:
They enforce best practices that improve the safety of the code that the tokens depend on
They provide an interface that makes it easier for applications to work with them, such as a consistent way of transferring tokens from one account to another
When a project issues a new token that is compatible with a standard, existing decentralized exchanges, tools, wallets, applications, and block explorers can work with it and display it appropriately.
For example, block explorers can detect a standard-compliant contract and automatically show the tokens in the contract.
Also, the Octez client has dedicated commands for working with FA1.2 tokens, including transferring them and checking account balances.
A token standard is an interface and set of rules that smart contracts must follow to be compatible with the standard.
In Tezos, smart contracts define how tokens behave, such as how to transfer them between accounts, so it's the smart contract that actually follows the standard, but people often refer to tokens that are compatible with a certain standard.
Tezos provides two standards for tokens.
The standard that you use for your tokens depends on the kind of tokens that you want to create.
These standards are named with the prefix FA, which stands for financial application.
FA1.2 tokens are fungible tokens
FA2 tokens can be multiple types of tokens, including fungible and non-fungible tokens, and a single smart contract that follows this standard can create multiple types of tokens
FA2.1 tokens can be multiple types of tokens like FA2 tokens, and they include features of FA1.2 tokens and of tickets
You can use templates for smart contracts adhering to these standards, instead of writing your own contract from scratch:
For SmartPy templates, see Tokens in the SmartPy documentation.
For LIGO templates, see the @ligo/fa package.
For Archetype templates, see Templates in the Archetype documentation.
Wrapped tokens
A wrapped token represents a token in a different context.
For example, tzBTC and ETHtz are Tezos tokens that represent tokens from the Bitcoin and Ethereum blockchains.
Tezos users can trade these wrapped tokens on Tezos and exchange them for the native Bitcoin and Ethereum tokens later.
:::danger
The wrapped version of a token has no formal or official relationship to the original token.
Instead, users create tokens that they call wrapped tokens and provide smart contracts to allow users to exchange the tokens for the wrapped tokens and vice versa.
You might imagine that the wrapped version of a token is the token with a wrapper around it that lets it operate in a new location or according to a new standard, but it is really an entirely different token.
Like all tokens, you must use caution when using a wrapped token.
:::
FA1.2 tokens
The FA1.2 standard is for fungible tokens, which are collections of identical, interchangeable tokens.
Tez are fungible tokens because each tez is the same as every other tez, though tez are not compatible with the FA1.2 standard.
Commonly used FA1.2 tokens include kUSD and Ctez.
Contracts that follow this standard keep a ledger that records how many tokens different accounts own.
They have entrypoints that allow users to transfer tokens and limit the amount that can be transferred.
They also have entrypoints that provide information such as the total amount of tokens and the amount of tokens that a specified account owns.
For the full details of the FA1.2 standard, see Tezos Improvement Proposal 7 (TZIP-7), which defines the standard.
You can verify that a contract follows the FA1.2 standard by running the following Octez client command, where $CONTRACT_ADDRESS is the address of the contract:
The Octez client also supports other interactions with FA1.2 contracts, such as transferring tokens or checking balances, as described at FA1.2 support in the Octez documentation.
Allowances
FA1.2 contracts keep track of how many tokens an account A permits another account B to transfer out of account A.
This limit is known as the allowance for account B.
In this scenario, account B is known as the spender for account A.
This feature allows an account to authorize another account to transfer a certain amount of tokens on its behalf.
For example, you might authorize an application to take a certain amount of your tokens, as part of one or several transactions, by setting the application's allowance for your tokens.
The spender must have an allowance from the owner of the tokens for a number of their tokens to transfer.
When a spender or token owner transfers tokens, their allowance decreases by the amount of tokens they transfer.
Allowances also apply to the token owner.
An account cannot transfer more tokens than its allowance, even if it has enough tokens and it sent the request itself.
This means that if you want to transfer some of your tokens, you must first set your account's allowance to the amount to transfer.
For security reasons, an allowance cannot be changed from a non-zero amount to another non-zero amount.
Therefore, transferring FA1.2 tokens from a source account to a destination account often involves these steps:
Set the spender's allowance for the source account to 0.
Set the spender's allowance for the source account to the amount of tokens to transfer.
Transfer the tokens from the source account to the destination account.
Set the spender's allowance for the source account to 0 to prevent errors if a future change in allowance doesn't set the allowance to 0 first.
Entrypoints
FA1.2 contracts must have these entrypoints:
approve: Sets the amount of tokens that an account can transfer on behalf of the token owner.
Its parameters are the address of the account that is authorized to transfer the tokens on behalf of the sender and the amount of tokens to allow.
If the request tries to change the allowance from a non-zero amount to a non-zero amount, it must fail and return an UnsafeAllowanceChange error message.
transfer: Transfers tokens from one account to another.
Its parameters are the address to take tokens from and a tuple that includes the address to give tokens to and the amount of tokens to transfer.
The transaction sender must be an address that has been authorized to transfer the tokens via the approve endpoint, even if the transaction sender and address that owns the tokens are the same address.
After the transfer, the sender's allowance is decreased by the amount of tokens transferred.
FA1.2 contracts must also have the following entrypoints providing information to other smart contracts.
These entrypoints accept a contract address as a parameter and send a callback transaction to that address with information about the current state of the contract.
These entrypoints must not change the storage or generate any operations other than the callback transaction.
getAllowance: Returns the allowance that the specified sender can transfer out of the specified source account
getBalance: Returns the amount of tokens that the specified account owns
getTotalSupply: Returns the total amount of tokens in the contract
FA1.2 contracts can add any other entrypoints in addition to the required entrypoints.
Storage
No specific storage is required by the standard, but FA1.2 contracts typically use these values:
A big-map named "ledger" where the key is the owner's address and the value is the amount of tokens it owns and a map of its allowances
A natural number named "totalSupply" that is the total amount of tokens
FA2 tokens
The FA2 standard supports several different token types, including fungible and non-fungible tokens.
Adhering to the FA2 standard allows developers to create new types of tokens while ensuring that the tokens work with existing wallets and applications.
The FA2 standard leaves enough freedom for developers to define rules for transferring tokens and for how tokens behave.
Because a single FA2 contract can define multiple types of tokens, such as multiple types of fungible tokens or multiple different NFTs, each token type has an ID.
If the contract has only one type of token, its ID must be 0, but if it has multiple types of tokens, the IDs can be any distinct values.
For the full details of the FA2 standard, see Tezos Improvement Proposal 12 (TZIP-12), which defines the standard.
Examples
For examples of FA2 contracts, see Sample smart contracts.
Metadata
Any FA2 token has some metadata that describes what the token represents.
The standard provides multiple options for the structure of the metadata and it refers to other standards for how the metadata is stored.
FA2 suggests that contracts store metadata according to TZIP-16.
For examples of working with metadata, see the NFT-related tutorials at Create an NFT.
Operators
Similar to allowances in FA1.2 tokens, FA2 token owners can allow other accounts to transfer tokens on their behalf.
Accounts that are authorized to transfer other accounts' tokens in this way are called operators.
For example, a user might want to sell a token on a marketplace, so they set the marketplace as an operator of that token type, which allows the marketplace to sell the token without getting further approval from the owner.
Unlike allowances in FA1.2 tokens, operators can transfer any number of the owner's tokens of the specified type.
Minting and burning
FA2 does not require contracts to provide entrypoints that mint (create) or burn (destroy) tokens, but it permits developers to add those entrypoints if they choose.
If the contract does not have a mint entrypoint, it can create tokens in some other way or developers can initialize its storage with all of the tokens that it will ever have.
Entrypoints
FA2 contracts must have these entrypoints:
transfer: Transfers tokens from a source account to one or more destination accounts.
Its parameters are the address of the source account and a list of destination accounts, each with the token ID and amount to transfer.
balance_of: Sends information about an owner's token balance to another contract.
Its parameters are a callback contract that accepts a list of token IDs and the amount that the specified account owns.
update_operators: Adds or removes operators for the specified token owners and token IDs.
Its parameters are a list of commands to add or remove operators for token owners and IDs.
The standard defines what happens when these entrypoints are called, the format of their parameters, and error cases (see below).
For information about these requirements, see TZIP-12.
FA2 contracts can add any other entrypoints in addition to the required entrypoints.
Errors
FA2 defines a list of errors that contracts must create, such as "FA2_TOKEN_UNDEFINED" if a transaction refers to a token ID that doesn't exist.
For a list of these errors, see TZIP-12.
FA2.1 tokens
The FA2.1 standard adds several features to tokens while remaining backward-compatible with the FA2 standard.
Like FA2 tokens, FA2.1 tokens can be fungible or non-fungible.
For the full details of the FA2.1 standard, see Tezos Improvement Proposal 26 (TZIP-26), which defines the standard.
Major changes from FA2
FA2.1 allows contracts to export tokens as tickets, use those tickets outside of the contract, and import those tickets back into the contract.
FA2.1 includes on-chain views that allow contracts to provide information to on-chain and off-chain applications.
FA2.1 includes events, which provide notifications of token-related activity to off-chain applications.
FA2.1 adds the concept of allowances from FA1.2 so contracts can use operators or allowances to control access to tokens.
Examples
For examples of FA2.1 contracts, see the Implementation section of the standard.
Metadata
Like FA2 tokens, each FA2.1 token has metadata that describes what the token represents.
The standard provides multiple options for the structure of the metadata and it refers to other standards for how the metadata is stored.
FA2.1 suggests that contracts store metadata according to TZIP-21, which is an extension of the TZIP-16 metadata standard used in FA2.
For examples of working with metadata, see the NFT-related tutorials at Create an NFT.
Tickets
A major change in FA2.1 is that contracts can optionally export tickets that represent tokens.
In this case, the contract decreases an owner's balance of tokens and creates a ticket that represents those tokens.
It keeps the total balance of the tokens in its ledger the same.
Then the ticket owner can transfer the ticket without using the original contract, similar to a wrapped token.
Then, contracts can import tickets by accepting the ticket, destroying it, and increasing the user's balance of tokens.
Exporting and importing tickets in this way allows users to bridge tokens between Tezos layers, such as how Bridging tokens works in Etherlink.
It's even possible for a contract to import a ticket created by another contract, though this is not the default case; in most cases, contracts import and export only their own tickets that represent their own tokens.
Access control
FA2.1 token contracts can implement neither, either, or both of two different methods for controlling token access: operators and allowances.
If it implements neither method, only token owners can transfer tokens.
Operators
FA2.1 contracts can implement operators, which behave like they do in FA2 contracts.
Accounts that are authorized to transfer other accounts' tokens are called operators.
For example, a user might want to sell a token on a marketplace, so they set the marketplace as an operator of that token type, which allows the marketplace to sell the token without getting further approval from the owner.
Unlike allowances, operators can transfer any number of the owner's tokens of the specified type.
Allowances
FA2.1 contracts can implement allowances, which are similar to allowances in FA1.2 contracts.
In this case, the contract keeps track of how many tokens an account A permits another account B to transfer out of account A.
This limit is known as the allowance for account B.
In this scenario, account B is known as the spender for account A.
The approve entrypoint changes allowances.
This feature allows an account to authorize another account to transfer a certain amount of tokens on its behalf.
For example, you might authorize an application to take a certain amount of your tokens, as part of one or several transactions, by setting the application's allowance for your tokens.
The spender must have an allowance from the owner of the tokens for a number of their tokens to transfer.
When a spender or token owner transfers tokens, their allowance decreases by the amount of tokens they transfer.
Allowances also apply to the token owner.
An account cannot transfer more tokens than its allowance, even if it has enough tokens and it sent the request itself.
This means that if you want to transfer some of your tokens, you must first set your account's allowance to the amount to transfer.
Unlike FA1.2 contracts, you can change an allowance from a non-zero amount to another non-zero amount.
Minting and burning
Like FA2, FA2.1 does not require contracts to provide entrypoints that mint (create) or burn (destroy) tokens, but it permits developers to add those entrypoints if they choose.
If the contract does not have a mint entrypoint, it can create tokens in some other way or developers can initialize its storage with all of the tokens that it will ever have.
Entrypoints
FA2.1 contracts must have these entrypoints:
transfer: Transfers tokens from a source account to one or more destination accounts.
Its parameters are the address of the source account and a list of destination accounts, each with the token ID and amount to transfer.
The core behavior of the transfer entrypoint is similar to that of the FA2 entrypoint but the FA2.1 version has different rules for who can transfer tokens, as described in Access control.
This entrypoint must emit the transfer_event, balance_update, and allowance_update events.
balance_of: Sends information about an owner's token balance to another contract.
Its parameters are a callback contract that accepts a list of token IDs and the amount that the specified account owns.
This entrypoint is the same as in FA2.
update_operators: Adds or removes operators for the specified token owners and token IDs.
Its parameters are a list of commands to add or remove operators for token owners and IDs.
This entrypoint is the same as in FA2.
approve: Sets the amount of tokens that an account can transfer on behalf of the token owner.
Its parameters are a list of commands to increase or decrease the allowances for token owners and IDs.
Unlike the approve entrypoint in the FA1.2 standard, this entrypoint accepts a batch of parameters.
This entrypoint must emit the allowance_update event.
export_ticket: Creates one or more tickets that represent an account's tokens and sends them to the specified addresses.
The contract deducts the tokens from the source account, but the contract's total supply of the tokens does not change; the get_total_supply view must return the same amount of tokens as before the entrypoint was called.
This entrypoint must follow the same access control rules as the transfer entrypoint.
For example, if the contract is using operators, only the token owner or their operators can call this entrypoint.
This entrypoint must emit the balance_update and allowance_update events but not the transfer_event event.
import_ticket: Accepts one or more tickets that represent tokens, destroys the tickets, and adds the tokens to the specified accounts.
This entrypoint is the converse of the export_ticket entrypoint.
This entrypoint must emit the balance_update and total_supply_update events but not the transfer_event event.
lambda_export: Creates one or more tickets and runs a lambda that determines what happens to them.
For security reasons, the contract runs the lambda in a separate sandbox contract.
This entrypoint must emit the balance_update and allowance_update events.
The standard defines what happens when these entrypoints are called, the access control for them, the format of their parameters, and error cases.
For information about these requirements, see TZIP-12.
FA2.1 contracts can add any other entrypoints in addition to the required entrypoints.
Views
Unlike FA2, the FA2.1 standard specifies that entrypoints implement views to provide information about tokens.
The standard recommends that views don't fail or return errors but instead return meaningful default values.
For example, if a caller requests the balance of a non-existent address or token ID, the view should return 0.
These are the views that FA2.1 contracts must implement:
get_balance: Returns the number of tokens of the specified token ID that the specified address owns.
get_total_supply: Returns the total amount of the specified token ID.
For contracts that implement tickets, this amount includes the amount of tokens tracked directly in the contract ledger and the amount of tokens exported as tickets.
is_operator: Returns true if the specified account is an operator of the specified account and token ID.
get_allowance: Returns the allowance for the specified spender, owner, and token ID.
get_token_metadata: Returns the metadata for the specified token ID.
is_token: Returns true if the specified token ID exists.
Events
Unlike FA2, the FA2.1 standard specifies that entrypoints emit events when they are called.
To avoid confusion about the order of events, the entrypoints must emit these events before other transactions.
These are the events that FA2.1 contracts must emit and the entrypoints that emit them:
transfer_event: Emitted when tokens are transferred, either by the transfer entrypoint or any other mechanism that transfers tickets.
However, the export_ticket and import_ticket entrypoints should not emit this event.
The event includes the source and target accounts, the token ID, and the amount of tokens.
balance_update: Emitted when the amount of tokens in an account changes, such as by the transfer, export_ticket, lambda_export, and import_ticket entrypoints.
The event includes the account, the token ID, the new balance, and the difference between the old and new balance.
total_supply_update: Emitted when the total number of a certain token type changes, such as by minting tokens.
The event includes the token ID, the new total supply, and the difference between the old and new amounts.
operator_update: Emitted when operators change, such as by the update_operators entrypoint.
The event includes the token owner, the operator, the token ID, and a Boolean value that is true if the operator is being added or false if the operator is being removed.
allowance_update: Emitted when a spender's allowance is changed, including when it is decreased as a result of a token transfer.
The event includes the token owner, the spender, the token ID, the new allowance, and the difference between the old and new allowances.
token_metadata_update: Emitted when a token's metadata changes.
The event includes the token ID and an option type that contains the new metadata or none if the token was burned.
Errors
FA2.1 contracts use the same errors as FA2 contracts plus additional FA2.1 errors for failures related to tickets and allowances.
For a list of these errors, see TZIP-26.
Smart Rollups
Smart Rollups play a crucial part in providing high scalability on Tezos.
They handle logic in a separate environment that can run transactions at a much higher rate and can use larger amounts of data than the main Tezos network.
The transactions and logic that Smart Rollups run is called layer 2 to differentiate it from the main network, which is called layer 1.
Anyone can run a node based on a Smart Rollup to execute its code and verify that other nodes are running it correctly, just like anyone can run nodes, bakers, and accusers on layer 1.
This code, called the kernel, runs in a deterministic manner and according to a given semantics, which guarantees that results are reproducible by any rollup node with the same kernel.
The semantics is precisely defined by a reference virtual machine called a proof-generating virtual machine (PVM), able to generate a proof that executing a program in a given context results in a given state.
During normal execution, the Smart Rollup can use any virtual machine that is compatible with the PVM semantics, which allows the Smart Rollup to be more efficient.
Using the PVM and optionally a compatible VM guarantees that if a divergence in results is found, it can be tracked down to a single elementary step that was not executed correctly by some node.
In this way, multiple nodes can run the same rollup and each node can verify the state of the rollup.
For a tutorial on Smart Rollups, see Deploy a Smart Rollup.
For reference on Smart Rollups, see Smart Optimistic Rollups in the Octez documentation.
This diagram shows a high-level view of how Smart Rollups interact with layer 1:
Diagram of Smart Rollup architecture
Uses for Smart Rollups
Smart Rollups allow you to run large amounts of processing and manipulate large amounts of data that would be too slow or expensive to run on layer 1.
Smart Rollups can run far more transactions per second than layer 1.
Smart Rollups allow you to avoid some transaction fees and storage fees.
Smart Rollups can retrieve data from outside the blockchain in specific ways that smart contracts can't.
Smart Rollups can implement different execution environments, such as execution environments that are compatible with other blockchains.
For example, Smart Rollups enable Etherlink, which makes it possible to run EVM applications (originally written for Ethereum) on Tezos.
Communication
Smart Rollups are limited to information from these sources:
The Smart Rollup inbox, which contains messages from layer 1 to all rollups
The reveal data channel, which allows Smart Rollups to request information from outside sources
The Data availability layer
These are the only sources of information that rollups can use.
In particular, Smart Rollup nodes cannot communicate directly with each other; they do not have a peer-to-peer communication channel like layer 1 nodes.
Rollup inbox
Each layer 1 block has a rollup inbox that contains messages from layer 1 to all rollups.
Anyone can add a message to this inbox and all messages are visible to all rollups.
Smart Rollups filter the inbox to the messages that they are interested in and act on them accordingly.
The messages that users add to the rollup inbox are called external messages.
For example, users can add messages to the inbox with the Octez client send smart rollup message command.
Similarly, smart contracts can add messages in a way similar to calling a smart contract entrypoint, by using the Michelson TRANSFER_TOKENS instruction.
The messages that smart contracts add to the inbox are called internal messages.
Each block also contains the following internal messages, which are created by the protocol:
Start of level, which indicates the beginning of the block
Info per level, which includes the timestamp and block hash of the preceding block
End of level, which indicates the end of the block
Smart Rollup nodes can use these internal messages to know when blocks begin and end.
Commitments
Some Smart Rollup nodes post commitments to layer 1, which include a hash of the current state of the kernel.
If any node's commitment is different from the others, they play a refutation game to determine the correct commitment, eliminate incorrect commitments, and penalize the nodes that posted incorrect commitments.
This process ensures the security of the Smart Rollup by verifying that the nodes are running the kernel faithfully.
Only Smart Rollup nodes running in operator or maintenance mode post these commitments on a regular basis.
Nodes running in other modes such as observer mode run the kernel and monitor the state of the Smart Rollup just like nodes in operator or maintenance mode, but they do not post commitments.
Nodes running in accuser mode monitor other commitments and post their own commitment only when it differs from other commitments.
Bonds
When a user runs a node that posts commitments, the protocol automatically locks a bond of 10,000 liquid, unstaked tez from user's account as assurance that they are running the kernel faithfully.
If the node posts a commitment that is refuted, they lose their bond, as described in Refutation periods.
Because nodes have the length of the refutation to challenge another node's commitment, the bond stays locked until the end of the refutation period for the last commitment that the node posted.
After that refutation period ends, the node operator can recover the bond, which unlocks their tez.
To simplify the process, node operators can switch to bailout mode, which does not post commitments but continues to defend previously made commitments until the last refutation period ends.
Reveal data channel
Smart Rollups can request arbitrary information through the reveal data channel.
Importantly, as opposed to internal and external messages, the information that passes through the reveal data channel does not pass through layer 1, so it is not limited by the bandwidth of layer 1 and can include large amounts of data.
The reveal data channel supports these requests:
A rollup node can request an arbitrary data page up to 4KB if it knows the blake2b hash of the page, known as preimage requests.
To transfer more than 4KB of data, rollups must use multiple pages, which may contain hashes that point to other pages.
A rollup node can request information about the rollup, including the address and origination level of the rollup, known as metadata requests.
Smart Rollup lifecycle
The general flow of a Smart Rollup goes through these phases:
Origination: A user originates the Smart Rollup to layer 1.
One or more users start Smart Rollup nodes.
Commitment periods: The Smart Rollup nodes receive the messages in the Smart Rollup inbox, run processing based on those messages, generate but do not run outbox messages, and publish a hash of their state at the end of the period, called a commitment.
Refutation periods: Nodes can publish a concurrent commitment to refute a published commitment.
Triggering outbox messages: When the commitment can no longer be refuted, any client can trigger outbox messages, which create transactions.
Here is more information on each of these phases:
Origination
Like smart contracts, users deploy Smart Rollups to layer 1 in a process called origination.
The origination process stores data about the rollup on layer 1, including:
An address for the rollup, which starts with sr1
The type of proof-generating virtual machine (PVM) for the rollup, which defines the execution engine of the rollup kernel; currently only the wasm_2_0_0 PVM is supported
The installer kernel, which is a WebAssembly program that allows nodes to download and install the complete rollup kernel
The Michelson data type of the messages it receives from layer 1
The genesis commitment that forms the basis for commitments that rollups nodes publish in the future
After it is originated, anyone can run a Smart Rollup node based on this information.
Commitment periods
Starting from the rollup origination level, levels are partitioned into commitment periods of 60 consecutive layer 1 blocks.
During each commitment period, each rollup node receives the messages in the rollup inbox, processes them, and updates its state.
Because Smart Rollup nodes behave in a deterministic manner, their states should all be the same if they have processed the same inbox messages with the same kernel starting from the same origination level.
This state is referred to as the "state of the rollup."
Any time after each commitment period, Smart Rollup nodes in operator mode or maintenance mode publish a hash of their state to layer 1 as part of its commitment.
Each commitment builds on the previous commitment, and so on, back to the genesis commitment from when the Smart Rollup was originated.
The protocol locks 10,000 tez as a bond from the operator of each node that posts commitments.
At the end of a commitment period, the next commitment period starts.
Refutation periods
Because the PVM is deterministic and all of the inputs are the same for all nodes, any honest node that runs the same Smart Rollup produces the same commitment.
As long as nodes publish matching commitments, they continue running normally.
When the first commitment for a past commitment period is published, a refutation period starts, during which any rollup node can publish its own commitment for the same commitment period, especially if it did not achieve the same state.
During the refutation period for a commitment period, if two or more nodes publish different commitments, two of them play a refutation game to identify the correct commitment.
The nodes automatically play the refutation game by stepping through their logic using the PVM to identify the point at which they differ.
At this point, the PVM is used to identify the correct commitment, if any.
Each refutation game has one of two results:
Neither commitment is correct.
In this case, the protocol burns both commitments' stakes and eliminates both commitments.
One commitment is correct and the other is not.
In this case, the protocol eliminates the incorrect commitment, burns half of the incorrect commitment's stake, and gives the other half to the correct commitment's stake.
This refutation game happens as many times as is necessary to eliminate incorrect commitments.
Because the node that ran the PVM correctly is guaranteed to win the refutation game, a single honest node is enough to ensure that the Smart Rollup is running correctly.
This kind of Smart Rollup is called a Smart Optimistic Rollup because the commitments are assumed to be correct until they are proven wrong by an honest rollup node.
When there is only one commitment left, either because all nodes published identical commitments during the whole refutation period or because this commitment won the refutation games and eliminated all other commitments, then this correct commitment can be cemented by a dedicated layer 1 operation and becomes final and unchangeable.
The commitments for the next commitment period build on the last cemented commitment.
The refutation period lasts for a set number of blocks based on the smart_rollup_challenge_window_in_blocks protocol constant.
For example, currently the refutation period lasts 120,960 blocks on Mainnet.
Mainnet has 10 seconds between blocks as of the Paris protocol upgrade, which means that the refutation period lasts 2 weeks.
Ghostnet has 5 seconds between blocks but its refutation period is twice as many blocks, so its refutation period is also two weeks long.
Triggering outbox messages
Smart Rollups can generate transactions to run on layer 1, but those transactions do not run immediately.
When a commitment includes layer 1 transactions, these transactions go into the Smart Rollup outbox and wait for the commitment to be cemented.
After the commitment is cemented, clients can trigger transactions in the outbox with the Octez client execute outbox message command.
When they trigger a transaction, it runs like any other call to a smart contract.
For more information, see Triggering the execution of an outbox message in the Octez documentation.
Bailout process
Nodes that do not post commitments can stop running at any time without risk because they do not have a bond.
Nodes that post commitments cannot stop immediately without risking their bonds because they will not be online to participate in the refutation game.
For this reason, nodes can switch to bailout mode to prepare to shut down without risking their bonds.
In bailout mode, nodes defend their existing commitments without posting new commitments.
When their final commitment is cemented, they can shut down safely.
For more information about node modes, see Smart rollup node in the Octez documentation.
Examples
For examples of Smart Rollups, see this repository: https://gitlab.com/tezos/kernel-gallery.
The Data Availability Layer
The Data Availability Layer (DAL) is a companion peer-to-peer network for the Tezos blockchain, designed to provide additional data bandwidth to Smart Rollups.
It allows users to share large amounts of data in a way that is decentralized and permissionless, because anyone can join the network and post and read data on it.
For a tutorial on how to use the DAL, see Implement a file archive with the DAL and a Smart Rollup.
Running DAL nodes
The DAL depends on individual people running nodes, just like Tezos layer 1.
If you are already a Tezos baker, you can add a DAL node to your setup with the instructions in Running a DAL attester node.
For step-by-step instructions on running a DAL node, accessible to anyone, see Join the DAL as a baker in 5 steps.
How the DAL works
The DAL relies on a network of DAL nodes that distribute data via a peer-to-peer network.
Layer 1 bakers verify that the data is available.
After the bakers attest that the data is available, the DAL nodes provide the data to Smart Rollups.
Smart Rollups that need the data must use it or store it promptly, because it is available only temporarily on the DAL.
The DAL works like this:
Users post data to a DAL node.
The DAL node returns a certificate, which includes two parts:
The commitment is like a hash of the data but has the additional ability to identify individual shards of the data and reconstruct the original data from a certain percentage of the shards.
The number of shards needed depends on how the data is spread across shards, which is controlled by a parameter called the redundancy factor.
The proof certifies the length of the data to prevent malicious users from overloading the layer with data.
Users post the certificate to Tezos layer 1 via the Octez client.
When the certificate is confirmed in a block, the DAL splits the data into shards and shares it through the peer-to-peer network.
Layer 1 assigns the shards to bakers.
Bakers verify that they are able to download the shards that they are assigned to.
Bakers attest that the data is available in their usual block attestations to layer 1.
Each Tezos network has a delay of a certain number of blocks known as the attestation lag.
This number of blocks determines when bakers attest that the data is available, so that the data is made available to Smart Rollups.
For example, if a certificate is included in level 100 and the attestation lag is 4, bakers must attest that the data is available in level 104, along with their usual attestations that build on level 103.
If enough shards are attested in that level, the data becomes available to Smart Rollups at the end of layer 104.
If not enough shards are attested in that level, the certificate is considered bogus and the related data is dropped.
The Smart Rollup node monitors the blocks and when it sees attested DAL data, it connects to a DAL node to request the data.
Smart Rollups must store the data if they need it because it is available on the DAL for only a short time.
The overall workflow is summarized in the following figure:
Overall diagram of the workflow of the Data Availability Layer
Data structure
Internally, the Data Availability Layer stores information about the available data in layer 1 blocks.
Each block has several byte-vectors called slots, each with a maximum size.
DAL users can add information about the available data as pages in these slots, as shown in this figure:
Two example blocks with different DAL slots in use in each
The data in a slot is broken into pages to ensure that each piece of data can fit in a single Tezos operation.
This data must fit in a single operation to allow the Smart Rollup refutation game to work, in which every execution step of the Smart Rollup must be provable to layer 1.
When clients publish data, they must specify which slot to add it to.
Note that because the DAL is permissionless, clients may try to add data to the same slot in the same block.
In this case, the first operation in the block takes precedence, which leaves the baker that creates the block in control of which data makes it into the block.
Other operations that try to add data to the same slot fail.
The number and size of these slots can change.
Different networks can have different DAL parameters.
Future changes to the protocol may allow the DAL to resize slots dynamically based on usage.
Getting the DAL parameters
Clients can get information about the current DAL parameters from the RPC endpoint GET /chains/main/blocks/head/context/constants or the Smart Rollup kernel SDK function reveal_dal_parameters.
These parameters include:
number_of_slots: The maximum number of slots in each block
slot_size: The size of each slot in bytes
page_size: The size of each page in bytes
attestation_lag: The number of blocks after a certificate is published when bakers attest that the data is available; if enough attestations are available in this block, the data becomes available to Smart Rollups
redundancy_factor: How much redundancy is used to split the data into shards; for example, a redundancy factor of 2 means that half of all shards are enough to reconstruct the original data and a redundancy factor of 4 means that 25% of all shards are required
Sending data to the DAL
Sending data to the DAL is a two-step process:
Send the data to a DAL node by passing it to its POST /slot endpoint, as in this example:
The DAL node returns the commitment and proof of the data, as in this abbreviated example:
Send an operation to include the commitment and proof in a block by running this Octez client command, where $ENDPOINT is an RPC endpoint served by a layer 1 node and $MY_ACCOUNT is an account alias or address:
For an example of sending larger amounts of data, see Implement a file archive with the DAL and a Smart Rollup.
Getting data from the DAL
Smart Rollups can use data from the DAL only after it has been attested by the bakers.
Due to the attestation lag, they cannot access DAL data published in the current level, because not enough blocks have elapsed to allow bakers to attest the data.
The most recent level in the past that Smart Rollups can access data from is the current level minus the attestation lag.
They can access the data in that level with the Smart Rollup kernel SDK function reveal_dal_page, which accepts the target level, slot, and page to receive, as in this example:
Reference
For more information about the DAL, see DAL overview in the Octez documentation.
Governance and self-amendment
Tezos incorporates a built-in, on-chain mechanism for proposing, selecting, testing, and activating protocol upgrades without the need to hard fork.
This mechanism makes Tezos a self-amending blockchain and allows any user to propose changes to the economic protocol, which defines the possible blockchain operations and how they are processed.
This self-amendment process is separate from the off-chain and less formal Tezos Improvement Process.
Amendment periods
The self-amendment process is split into 5 periods, whose scheduling and operation are automatically handled by the protocol, as follows:
Proposal period: delegates propose changes to the Tezos protocol by submitting proposals and upvoting protocol amendment proposals.
If a quorum is met, the top-voted proposal moves to the next period.
Exploration period: Users vote whether to consider the top-voted proposal
Cooldown period: If a proposal is selected in the Exploration period, a Cooldown period starts before the final election is made. The community can continue testing the new protocol proposal and preparing their infrastructure, before the final decision is made.
Promotion period: Users make a final vote on whether to apply the proposal
Adoption period: Users adapt their code and infrastructure to the proposal, and at the end of the period it is activated automatically
Each period lasts five blockchain cycles (40,960 blocks at 30-second intervals or roughly 14 days, 5 hours), comprising roughly 2 months and 10 days.
Only delegates can vote on proposals.
A delegate's voting power is the amount of tez that it has staked plus the tez that delegators have delegated to it, also called its staking balance.
1. Proposal period
The Tezos amendment process begins with the Proposal period, during which delegates can submit proposals to change the Tezos protocol.
The delegate submits the proposal by submitting the hash of the source code.
Each delegate can submit up to 20 proposals in a single Proposal period.
A proposal submission also counts as a vote, which is equivalent to the amount of tez in its staking balance at the start of the period.
Other delegates can vote for up to 20 proposals during this period.
At the end of the Proposal period, the network counts the proposal votes and if a quorum is met, the most-upvoted proposal proceeds to the Exploration period.
If no proposals have been submitted or if there is a tie between proposals, no proposal proceeds and a new Proposal period begins.
2. Exploration period
In the Exploration period, delegates vote on whether to consider the top-ranked proposal from the previous Proposal period.
Delegates can vote either "Yea", "Nay", or "Pass" on that proposal.
"Pass" means to "not vote" on a proposal.
As in the Proposal period, a delegate's voting power is based on the amount of tez in its staking balance.
At the end of the Exploration period, the network counts the votes.
To pass, the proposal must meet both of these standards:
Quorum: A quorum of all of the voting power in the system must vote either "Yea", "Nay", or "Pass."
The amount of the quorum changes dynamically based on previous votes, which allows the system to adjust to the amount of delegates that participate in voting.
Supermajority: The total voting power of the Yea votes must be greater than 80% of the total voting power of the Yea and Nay votes combined.
Pass votes are not counted in this equation.
If the proposal meets both of those standards, it moves to the Cooldown period.
If not, it fails and a new Proposal period starts.
3. Cooldown period
The Cooldown period is a delay in the process that gives users time to review and test the new version of the protocol.
The community sets up test networks that use the new version of the protocol.
Users verify that the protocol update works, see how their baking infrastructure works with it, and discuss the proposal.
4. Promotion period
At the end of the Cooldown period, the Promotion period begins, which is the last vote.
In this period, users decide whether to adopt the proposal into Mainnet.
The voting requirements are the same as in the Exploration period, including the quorum and supermajority.
If the proposal passes, it moves to the Adoption period.
If it fails, a new Proposal period starts.
5. Adoption period
The Adoption period is a delay in the process that gives developers and bakers additional time to adapt their code and infrastructure to the new protocol.
At the end of the Adoption period, Mainnet automatically enables the new protocol and a new Proposal period begins.
References
The Amendment (and Voting) Process in the Octez documentation
Amending Tezos on Medium
History of amendments
As presented in Governance, the Tezos blockchain is constantly evolving, through new amendments.
These approved amendments form the history of the Tezos protocol:
Athens (Pt24m4xiP)
Athens was autonomously activated in May 2019.
Athens was the first proposed protocol amendment for Tezos. Two proposals - Athens A and Athens B - were proposed by Nomadic Labs in February 2019.
Of the two proposals, Athens A sought to increase the gas limit and reduce the required roll size for baking from 10,000 tez to 8,000 tez. Athens B only sought to increase the gas limit. Athens A was voted and was autonomously activated into the protocol in May 2019.
For a full list of changes, be sure to read this corresponding blog post from Nomadic Labs and reflections by Jacob Arluck, and the reference documentation.
Brest A (PtdRxBHv)
Brest A was the first proposed amendment rejected during the Exploration Period. Submitted in June 2019, it received only 0.35% of the votes during the Proposal Period. But as it had no competition, the system promoted it. The amendment was then rejected in the Exploration Period with only 0.26% of favourable votes. The 80% Super-majority was not reached, and neither was the minimum Quorum required to validate it.
This proposal would have fixed a security breach linked to the rehashing push during the Athens protocol change. Moreover, it would have facilitated the amendment's invoice tracking. But the invoice for this proposal, 6,000 tez, was much higher than the usual cost.
Babylon (PsBABY5HQ)
Babylon was autonomously activated in October 2019.
The Babylon proposal was made of two proposals made in July/August 2019: Babylon and Babylon 2. After receiving feedback on the first Babylon proposal, the core teams proposed a new tweaked version in the same proposal period.
Notable changes included a new variant of the consensus algorithm (Emmy+). There were new Michelson features and accounts rehaul to aid smart contract developers. The accounts rehaul enabled a clearer distinction between "tz" and "KT" addresses. Furthermore, there was a refinement of the Quorum formula and the addition of the 5% threshold.
For a full list of changes, be sure to read the corresponding blog posts from Nomadic Labs, and Cryptium Labs (Metastate), and the reference documentation.
Carthage (PtCarthav)
Carthage was the first proposal to be rejected during the Proposal Period. Since the Babylon change, it now took a minimum of 5% approval to move to the Exploration Period and Carthage only obtained 3.5%.
The purpose of this proposal was to increase the gas limit per block and per operation by 30% to improve the accuracy of the existing formula used for calculating baking, endorsing rewards, and to fix various minor issues.
Carthage 2.0 (PsCARTHAG)
Carthage 2.0 was autonomously activated in March 2020.
Notable changes included increasing the gas limit per block and per operation by 30%, improving the accuracy of the formula used to calculate baking and endorsing rewards, as well as several minor improvements to Michelson. The main difference with Carthage was the new and more secure formula to calculate rewards.
For a full list of changes be sure to read the corresponding changelog and blog posts from Nomadic Labs and Cryptium Labs (Metastate). You may also check the reference documentation.
Delphi (PsDELPH1K)
Delphi was autonomously activated in November 2020.
Notable changes included improving the performance of the Michelson interpreter, improving gas costs by adjusting the gas model, reducing storage costs by 4 times, and various minor fixes.
For a full list of changes, be sure to read the corresponding changelog and blog post from Nomadic Labs. You may also check the reference documentation.
Edo (PtEdo2Zk)
Edo was autonomously activated in February 2021.
Edo added two major features to Tezos smart contracts:
Sapling and BLS12-381 to enable privacy-preserving smart contracts
Tickets for native on-chain permissions and assets issuance.
Among other features, Edo also updated the Tezos amendment process by lowering the period length to 5 cycles and by adding a 5th Adoption Period.
For more information check the reference documentation.
Florence (PsFLorena)
Florence was autonomously activated in May 2021.
Florence's notable bug fixes and improvements are the:
Increasing maximum operation size
Improved gas consumption for the execution of more complex smart contracts
Changing inter-contract calls to a depth-first search ordering, as opposed to breadth-first search ordering
The elimination of the test chain activation
Bakings Accounts was also included in the feature set. However, ongoing testing uncovered some important and previously undocumented breaking changes in the proposal with Baking Accounts. Hence, the feature was postponed until a thorough audit of the functionality was completed or an alternative implementation was produced. The version of Florence without Baking Accounts was considered a safer choice.
For more information, see the blog post from Nomadic Labs and Tarides, as well as the reference documentation.
Granada (PtGRANAD)
Granada was autonomously activated in August 2021.
Granada's main changes are:
Emmy*, a new consensus algorithm with reduced time between blocks (30s), and faster finality.
Liquidity Baking, increasing the liquidity of tez by minting some at every block into a CPMM (Constant Product Market Making smart contract).
The reduction of gas consumption of smart contracts by a factor of three to six, through a number of performance improvements.
For more information, see the blog post from Nomadic Labs and the reference documentation.
Hangzhou (PtHangz2)
Hanghzou was autonomously activated in December 2021.
Hangzhou's main changes are:
Timelock encryption, a feature that helps smart contracts protect against Block Producer Extractable Value
Views, a new kind of entrypoints that gives easy access to some internal data to other smart contracts.
Caching of regularly accessed data, to lower the associated gas cost.
A global table of constants, where constant Michelson expressions can be registered and made available to all contracts.
Context flattening, an optimized rewrite of the protocol's database internals.
For more information, see the blog post from Marigold and the reference documentation.
Ithaca (Psithaca2)
Ithaca was autonomously activated in April 2022.
Along with numerous minor improvements, Ithaca contained two major updates to the protocol:
Tenderbake, a major update to the Tezos consensus algorithm, that brings fast deterministic finality to the Tezos protocol. It also includes important changes:
bakers now receive rewards depending on their current stake instead of the number of rolls they own
the minimum number of tokens required to be selected as a validator is reduced from 8,000 tez to 6,000 tez
a rework of baking and endorsements rewards
a new security deposit mechanism requiring delegates to freeze 10% of their stake in advance, to obtain baking and endorsement rights.
an increase in the number of endorsement slots per block from 256 to 7,000
Precheck of operations: a new set of features that can be used by any Tezos shell, to avoid having to fully execute manager operations before gossiping them through the network
Adding approximately ten months to the liquidity baking sunset level.
For more information, see the blog post from Nomadic Labs and the reference documentation.
Jakarta (PtJakart2)
Jakarta was autonomously activated in June 2022.
Jakarta's main changes are:
Transactional optimistic rollups (or TORU), an experimental implementation of optimistic rollups on Tezos. TORU provide a way to enable higher throughput (TPS) of transactions by moving their validation away from the main chain, to 'Layer 2'.
A new improved design for the integration of Sapling transactions into smart contracts. The Sapling protocol uses advanced cryptography to enable the protection of users' privacy and transparency with regard to regulators.
A redesign and renaming of the Liquidity Baking Escape Hatch mechanism, now called "Liquidity Baking Toggle Vote".
Various improvements to type safety and performance of the Michelson interpreter, including decreasing gas costs for parsing and unparsing scripts. Furthermore, Michelson now ignores annotations.
A new mechanism was introduced to explicitly track ownership of tickets in the protocol. This adds extra protection against attempts to forge tickets and facilitates Layer 2 solutions that use tickets to represent assets that can be exchanged with the main chain.
The voting power of delegates is now defined directly by their stake expressed in mutez, and no more in terms of rolls. The minimal stake required to be assigned voting rights is kept at 6000 tez.
For more information, see the blog post from Nomadic Labs and the reference documentation.
Kathmandu (PtKathman)
Kathmandu was autonomously activated in September 2022.
Kathmandu's main changes are:
Pipelined validation of manager operations, increasing throughput, without compromising the network’s safety. This ongoing project reduces the need to fully execute time-expensive operations (like smart contract calls), before they reach a baker, resulting in a faster propagation of new blocks and operations across the network.
Improved randomness with the integration of Verifiable Delay Functions (VDF) into the protocol’s random seed generation, reinforcing the security of the rights allocation mechanism.
Event logging in Michelson smart contracts enabling DApps developers to send on-chain custom messages in order to trigger effects in off-chain applications (wallets, explorers, etc.).
A new operation for increasing paid storage of a smart contract allowing DApps developers to pay the storage fees on behalf of their users.
For more information, see the blog post from Nomadic Labs and the reference documentation.
Lima (PtLimaPt)
Lima was autonomously activated in December 2022.
In addition to improvements to enable higher Layer 1 throughput, the main feature of Lima is:
Consensus keys: bakers can now create a dedicated key for signing blocks and consensus operations without changing the baker’s public address.
For more information, see the blog post from Nomadic Labs and the reference documentation.
Mumbai (PtMumbai)
Mumbai was autonomously activated in March 2023.
Mumbai's main changes are:
Smart Rollups: Tezos enshrined rollups are enabled and provide a powerful scaling solution allowing anyone to deploy decentralized WebAssembly applications with dedicated computational and networking resources.
Minimal block time reduction from 30s to 15s.
Ticket transfers between user accounts.
For more information, see the blog post from Nomadic Labs and the reference documentation.
Nairobi (PtNairob)
Nairobi was autonomously activated in June 2023.
Nairobi's main changes are:
Increased TPS thanks to a new gas model for signature verification.
Renaming endorsements to attestations to specify the behavior of these consensus operations.
Smart Rollups can now be aware of protocol updates happening on the L1.
For more information, see the blog post from Nomadic Labs and the reference documentation.
Oxford (Proxford)
Oxford was autonomously activated on 9 February 2024.
Oxford's main changes are:
Refinement of Tezos PoS: Oxford introduces changes to slashing and an automated staking mechanism for bakers.
The latter aims to smoothen the transition towards a new staked funds management API and avoids manual bookkeeping to counter over-delegation.
Private rollups: Oxford introduces private Smart Rollups, allowing developers to choose between permissionless or permissioned deployments.
Additionally, Oxford simplifies the deployment of rollups both on protocol and periodic test networks, as well as on ad-hoc dedicated ones.
Timelocks are re-enabled: a new design and implementation of Timelocks addresses security concerns that led to their temporary deactivation in a previous protocol upgrade.
For more information, see the blog post from Nomadic Labs and the reference documentation.
Paris (PtParisB)
Paris was autonomously activated on 5 June 2024.
Paris's main changes are:
10-second block time: Lower latency and faster finality on layer 1 without compromising decentralization or security.
Data availability layer: Boosting throughput and scalability of Smart Rollups.
It enables Tezos Layer 1 to attest the publication of data living outside Layer 1 blocks, increasing by orders of magnitude the bandwidth of data attested by the Layer 1.
Adaptive issuance, staking, and adaptive slashing: A major overhaul of Tezos Proof-of-Stake, adapting the economics of tez to fit better with real-world usage, and to increase the chain security. The proposed mechanism ties the protocol’s regular issuance of tez to the ratio of staked tez over the total supply, in order to nudge the staked fund ratio towards a protocol-defined target.
Further proof-of-stake refinements: Simplified computation and faster updates of consensus rights.
For more information, see the blog post from Nomadic Labs and the reference documentation.
Tezos Improvement Process (TZIP)
A Tezos Improvement Proposal (or TZIP, pronounced "tee-zip") is a document that offers ways to improve Tezos via new features, tools, or standards (e.g. smart contract interface specifications).
Specifically, a TZIP is a design document proposed to the Tezos community, describing a feature for Tezos or for the related processes, tools, or artifacts (such as smart contracts).
Typically, TZIPs do not impact the Tezos protocol at all. They rather concern other parts of the Tezos ecosystem.
Therefore, TZIPs address a different and complementary need when compared to the formal online governance process for protocol amendments.
Any TZIP document should contain a concise technical specification and rationale that clearly articulates what the proposal is, how it may be implemented, and why the proposal is an improvement. It should also include an FAQ that documents, compares, and answers alternative options, opinions, and objections.
An explorer for all of the TZIPs, both past, prensent, and pending, can be found here.
Key TZIP Standards
TZIP-7: Fungible Asset (FA1.2)
TZIP-7, more commonly referred to as FA1.2, introduced an ERC20-like fungible token standard for Tezos. At its core, FA1.2 contains a ledger that maps identities to token balances, provides a standard API for token transfer operations, as well as providing approval to external contracts (e.g. an auction) or accounts to transfer a user's tokens.
For those familiar with ERC20, the FA1.2 interface differs from ERC-20 in that it does not contain transferfrom, which has instead been merged into a single transfer entrypoint.
The FA1.2 specification is described in detail in TZIP-7.
For implementations, see these templates:
For SmartPy templates, see Tokens in the SmartPy documentation.
For LIGO templates, see the @ligo/fa package.
For Archetype templates, see Templates in the Archetype documentation.
TZIP-10: Wallet Interaction
To enable the adoption of dApps in the Tezos ecosystem, a standard for the communication between these applications and wallets is needed. Tezos app developers shouldn't need to implement yet another wallet for each dApp, and users shouldn't need a multitude of wallets to interact with various services.
TZIP-10 is a Tezos Improvement Proposal that specifies a standard way for dApps to interact with wallets. This standard thus enables Tezos users to use their wallet of choice with any Tezos dApp. By using the TZIP-10 wallet standard, app developers maximize the reach of their product to all users of TZIP-10 wallets.
TZIP-12: Multi-Asset / NFT (FA2)
When implementing a token contract, many different factors must be taken into consideration. The tokens might be fungible or non-fungible, there can be a variety of transfer permission policies used to define how many tokens can be transferred, who can perform a transfer, and who can receive tokens. In addition, a token contract can be designed to support a single token type (e.g. ERC-20 or ERC-721) or multiple token types (e.g. ERC-1155), which could enable optimized batch transfers and atomic swaps of the tokens.
TZIP-12, more commonly referred to as FA2, is a standard that provides improved expressivity to contract developers to create new types of tokens, all while maintaining a common contract interface for wallet integrators and external developers.
A particular FA2-compatible contract implementation may support either a single token type or multiple tokens, including hybrid implementations where multiple token kinds (fungible, non-fungible, non-transferable, etc) can coexist (e.g. in a fractionalized NFT contract).
TZIP-16: Contract Metadata
Contract metadata provides information that is not directly used for a contract's operation, whether about the contract's code (e.g. its interface, versioning) or the off-chain meaning of the contract's data (e.g. an artwork corresponding to an NFT). Tezos smart contracts need a standard way to access such important data, facilitating access to useful information that is needed for a scalable integration of wallets, explorers, and applications.
TZIP-16 proposes to address this need and ease the integration, discoverability, and querying of Tezos smart contracts. TZIP-16 is a standard for encoding access to smart contract metadata in JSON format stored either on-chain using tezos-storage or off-chain using IPFS or HTTP(S).
TZIP-16 defines:
A basic structure to define metadata in a contract's storage.
A URI scheme to link to metadata stored on-chain (contract storage) or off-chain (web services or IPFS).
An extensible JSON format (JSON-Schema) to describe the metadata
Optional entrypoints to validate metadata information
TZIP-17: Permit & Meta-transactions
Transacting on the Tezos network requires users to pay gas in Tezos’ native token, tez. But what about those users who don’t have tez and want to complete a transaction on Tezos? Or users who want to avoid paying for individual contract calls (e.g. voting in a DAO) that could be batched?
TZIP-17 enables account abstraction: emulating multiple account types using standardized contract calls. This is done through pre-signing: a method to sign and submit Tezos transactions separately.
For instance, a “relayer” can submit a user’s pre-signed (meta) transaction and pay the tez fees on their behalf; a process called gas abstraction. This is especially convenient for subsidizing user onboarding, collecting multiple signatures when voting in a DAO, signing in a multisig, or batching transactions.
TZIP-17 enables developers to provide more native experiences for user onboarding and allows users to pay fees using the token (e.g. a stablecoin) used in the transaction. The relayer still pays transaction fees in tez at the protocol level and, because Tezos is Proof-of-Stake, these transaction fees accrue to stakeholders rather than just a small group of miners.
Ultimately, this brings the experience of using digital assets on Tezos more in line with that of traditional financial transactions and supports the use of Tezos as a settlement layer.
TZIP-21: Rich Contract Metadata
TZIP-21 is an extension of TZIP-16 and describes a metadata schema and standards for contracts and tokens.
This metadata standard aims to:
Simplify the creation of rich metadata for tokens and assets
Provide a commonly understood interface
Conform to existing and emerging standards
Allow global and international scope
Be extensible
Provide interoperability among ecosystem members (contracts, indexers, wallets, libraries, etc)
This standard also aims to be rich enough to describe a wide variety of asset and token types, from fungible tokens to semi-fungible tokens to nonfungibles.
TZIP-22: Vanity Name Resolution Standard
TZIP-22 is an extension of TZIP-016 describing a generic smart contract interface for resolving names to Tezos addresses and vice versa.
Previous to this standard, indexers and wallets used ad-hoc methods for associating addresses with human-readable names, including:
using pre-configured (in some cases hardcoded) lists of names and addresses;
making use of TZIP-16 metadata.
Such methods present some problems:
Pre-configured lists are hard to maintain and prone to breaking.
TZIP-16 metadata are published as part of a contract they relate to, which means the names are not globally unique nor authoritative.
Names and addresses for other types of uses, like personal wallets, cannot be resolved.
TZIP-22 proposes a name resolution interface based on off-line views (as defined by TZIP-16) that can be used by all products in the ecosystem to provide users with a consistent experience when associating names and addresses.
Developing on Tezos
Developing dApps on Tezos is not very different from developing other types of computer applications: you set up a development environment, develop the components of the application locally, test them locally, and then test them on a test network before deploying them to production.
Development tools
Wallets
Wallets maintain a user's credentials and signs transactions on their behalf.
In most cases, Tezos developers need a wallet to submit transactions to their dApps.
See Installing and funding a wallet.
The Octez client
The Octez client lets you work with accounts and smart contracts from the command line.
For more information, see The Octez client.
IDEs and extensions
You can work with Tezos from any IDE, but these IDEs have special features for working with Tezos:
VSCode
VSCode provides extensions for working with Tezos including these:
Taqueria
Archetype language
Michelson Syntax
Michelson debugger
VSCode also has extensions for the LIGO language, primarily these extensions offered by ligolang.org:
ligo-vscode
LIGO debugger
Online IDEs
These online IDEs let you write, test, and deploy smart contracts from your web browser:
LIGO: https://ide.ligolang.org
SmartPy: https://smartpy.io/ide
Development platforms
Taqueria is a development platform for Tezos that helps you work on smart contracts and dApps at the same time and keep them in sync as you work through your development cycle.
See https://taqueria.io/.
Test environments
To test smart contracts and dApps, you can use these test environments:
Test networks behave like Tezos Mainnet but have differences that make it easier to test on them, such as faucets that provide free tokens and reduced block times for faster testing.
Sandbox environments like Flextesa run Tezos nodes locally on your computer in a sandbox mode.
You can also set up your own private test network.
For more information about test environments, see Testing on testnets and Using a local sandbox.
LIGO and SmartPy also have built-in testing capabilities.
Installing and funding a wallet
To work with Tezos, you need a wallet, which is an application that maintains your accounts and signs Tezos transactions on your behalf.
Wallets allow you to interact with dApps without exposing your account's private key.
Choosing a wallet
Which wallet you install is up to you and whether you want to install a wallet on your computer, in a browser extension, or as a mobile app.
Mobile apps include Temple, Kukai, and Umami.
Browser extensions include the Temple browser extension.
Desktop wallets for Tezos include Kukai and Umami.
Tezos also supports the MetaMask wallet, but only its browser extension, and only on Mainnet.
Follow these steps to enable Tezos in MetaMask:
Install the MetaMask browser extension.
Go to https://metamask.tezos.com.
Click Connect with MetaMask.
Approve the installation of the Tezos snap in MetaMask.
Now you can connect to Tezos dApps with MetaMask.
When a web application shows the Beacon window to connect your wallet, you can select MetaMask.
The page sends you to https://metamask.tezos.com to approve and manage the connection.
For more information about using MetaMask with Tezos, see MetaMask Now Supports Tezos: An Explainer.
Switching the wallet to a testnet
If you're doing development work, you're probably using a testnet instead of Mainnet.
On testnets, tokens are free so you don't have to spend real currency to work with your applications.
The process for changing the network is different for each wallet type.
These steps are for the Temple wallet:
Go to https://teztnets.com/, which lists Tezos testnets.
Click Ghostnet.
Copy one of the public RPC endpoints for Ghostnet, such as https://rpc.ghostnet.teztnets.com.
These URLs accept Tezos transactions from wallets and other applications.
In the Temple app, open the settings and then click Default node (RPC).
Click the plus + symbol to add an RPC node.
On the Add RPC screen, enter the URL that you copied and give the connection a name, such as "Ghostnet," as shown in this picture:
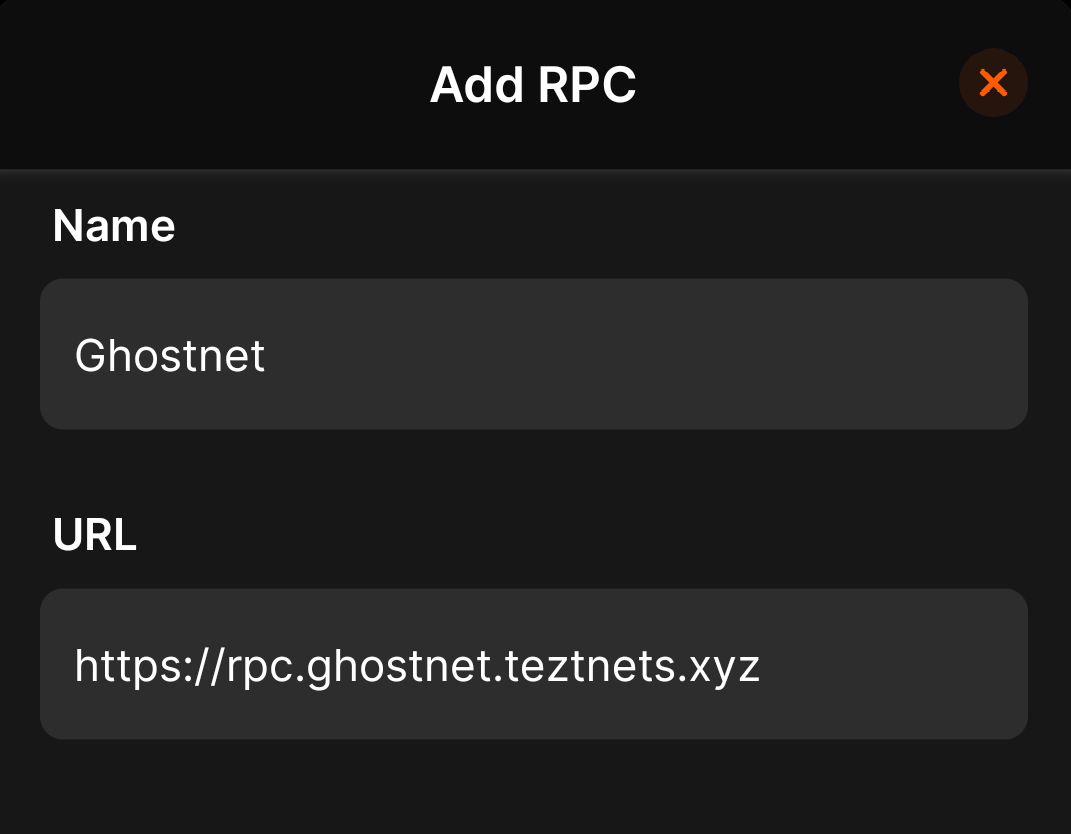 Click Add.
Make sure that the new RPC node is selected, as in this image:
Click Add.
Make sure that the new RPC node is selected, as in this image:
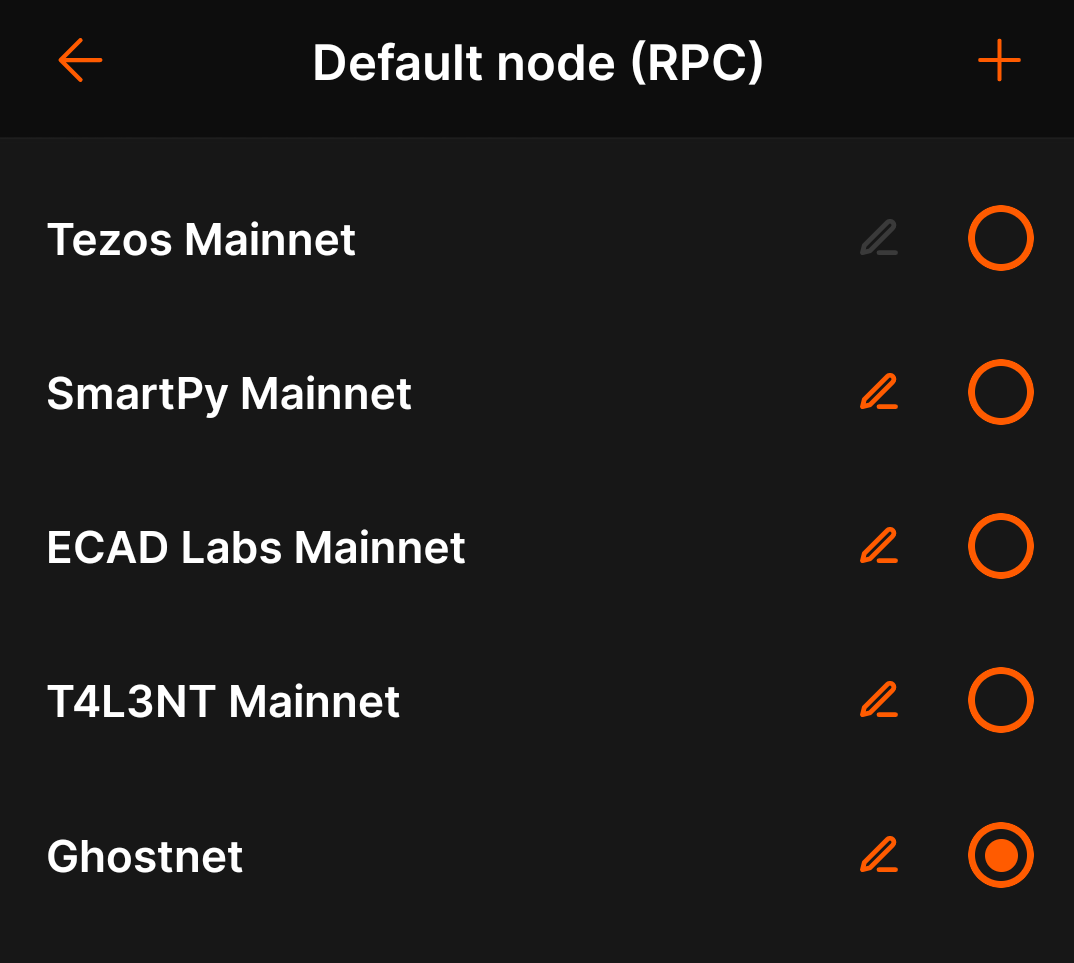 Funding a wallet
Follow these steps to get testnet tez for the wallet:
From your wallet, get the address of your account, which starts with tz1.
This is the address that applications use to work with your wallet.
Go to the Ghostnet faucet at https://faucet.ghostnet.teztnets.com.
On the faucet page, paste your wallet address into the input field labeled "Or fund any address" and click the button for the amount of tez to add to your wallet.
20 tez is enough to work with, and you can return to the faucet later if you need more tez.
It may take a few minutes for the faucet to send the tokens and for those tokens to appear in your wallet.
You can use the faucet as much as you need to get tokens on the testnet, but those tokens are worthless and cannot be used on Mainnet.
Fund your wallet using the Ghostnet Faucet
Testing locally
Tezos smart contracts are immutable after deployment, so you must rigorously test them before deploying them to ensure functionality, prevent errors, and avoid potential financial losses. Importantly, contract testing doesn't require any tokens or a wallet account to execute.
Tools for local testing
The Michelson interpreter is an OCaml function that can be used by tools to simulate a call to any entry point of any smart contract, given an initial value of the storage and parameters. Some programming languages like LIGO or SmartPy use this as part of their testing frameworks.
The mockup mode of octez-client can be used to test contract calls and other features such as some RPC calls, all without running an actual node, saving the time of going through the consensus mechanism and waiting to get blocks created and validated. Tools like Completium, built by the team behind the Archetype language, use this for their testing framework. Find out more in the documentation of the mockup mode.
For example, when you compile the contract in the tutorial Create a smart contract to Michelson, its first line defines the parameter type that the contract accepts:
You can call this contract in mockup mode by passing the compiled contract file, the storage value as a Michelson expression, and the parameter value to pass as a Michelson expression.
For example, this command sets the storage to 4 and passes 5 to the Increment entrypoint:
The response in the console shows the new value of the storage and any operations emitted.
Testing in high-level languages
High-level languages come with tools to help write tests locally, and some testing tools can be used independently of the language used to write the smart contract.
For example, SmartPy includes syntax dedicated to testing.
The following SmartPy test code snippet is for a Tezos smart contract that acts like a calculator. The code defines a series of tests to check the functionality of the calculator contract.
The test scenario runs these operations sequentially and would check if all operations execute as expected and if the final result matches the expected value.
Structure of a test scenario
A test scenario usually consists of the following steps:
Decide the smart contract's initial storage and balance
Valid calls to entrypoints, with different parameters and context information such as:
the address of the caller
the amount of tez sent
the timestamp of the block (value of now during the call)
the level of the block
Verify the contract's storage or balance changed the way you expected.
Invalid calls to entrypoints, and they are expected to fail.
Verification of the error caused by these invalid calls, making sure the error messages are the ones you thought would come up.
When executed, the test scenario is successful if all verifications are correct, and all invalid calls fail with the expected errors.
More advanced scenarios may involve a local sandbox deployment and calls to multiple contracts to test interactions.
Programming languages for testing
The test scenarios are usually written using a full classical programming language, such as JavaScript or Python, with a library that gives you access to special features to:
Deploy contracts
Make calls to entrypoints
Manipulate all the types/values supported by Tezos
Generate testing accounts, to simulate calls from multiple accounts
Perform cryptographic computations similar to the ones available in the contract
Rules for testing
Testing a contract thoroughly is not easy and requires experience.
Here are some tips to follow when getting started:
Write tests without looking at the implementation of the contract to avoid copying mistakes.
If possible, have another developer write the test to avoid testing semantic errors incorrectly.
Make sure to cover every possible execution path, whether it's valid or invalid.
Create many small tests, each checking something very specific, rather than a long test that tries to do many things at once.
Test around the limits
For example, if a value should be always above 10, include a call with the value 10 that should fail and a call with the value 11 that should succeed.
Test extremes
For more information about avoiding flaws in contracts, see Avoiding flaws on opentezos.com.
Implementation details
Michelson: Mockup mode
Archetype: Completium test scenario
SmartPy: Tests and scenarios
LIGO: Testing LIGO
Next steps
When you're done testing contracts locally, you can deploy them to a test network and test them there.
See Testing on testnets and Using a local sandbox.
Testing on testnets
:::note
The current testnets and details about them are at https://teztnets.com/.
:::
If you are a smart contract developer, testing contracts is a big part of your work. More time is spent testing contracts than writing them. You will often need to test new versions of your contracts and run many tests starting from their deployment to calling every entrypoint in all kinds of ways.
After you have tested contracts locally as described in Testing locally, you can deploy them to test networks to test them in a realistic environment.
Similarly, bakers often test their setups on test networks to ensure that they will work on new versions of the Tezos protocol.
Testing with public test networks
If you want to test your development in conditions that are close to those of Tezos Mainnet, you can use one of several public test networks.
These networks behave like Mainnet with a few differences:
You can use faucets to obtain tez for free on these networks, so you don't need to (and can't) spend actual tez.
They use different constants than Mainnet, such as reduced block times and shorter cycles for faster testing and reduced windows for inserting rejections in rollups.
Tools like public block explorers or indexers may or may not be available, depending on the network.
They either use a modified version of the amendment process or don't use it at all.
In some cases, you must use specific versions of tools such as the Octez suite to work with them.
Regardless of the type of network, if you intend to do intense testing, you can run your own nodes on these networks to avoid availability issues and limitations.
Types of test networks
Type | Longevity | Target users | Examples
--- | --- | --- | ---
Permanent test networks | Permanent | dApp developers and bakers | Ghostnet
Protocol test networks | During the protocol amendment process | Protocol developers | Nairobinet, Oxfordnet
Periodic test networks | Short-term | Protocol developers and bakers | Weeklynet
Permanent test networks
Permanent test networks are networks that are meant to run indefinitely. Just like Mainnet, they migrate to new versions of the protocol when proposals are adopted.
At the moment, the main such network is Ghostnet. It follows the currently active protocol on Mainnet and upgrades to the next protocol during the Adoption period on Mainnet, which is after the last round of voting but before the new version activates on Mainnet. The objective is to provide a rehearsal event for Mainnet migration.
For developers, using a permanent network like Ghostnet is convenient compared to other public networks because they can keep contracts running for a long time without having to set things up on a new network when the previous one gets shut down. Services such as indexers, explorers, or public nodes also tend to run more reliably on Ghostnet than on non-permanent networks.
Bakers often run tests on a permanent network because they are the closest environment to Mainnet. Ghostnet, in particular, can be used as a staging environment for testing new setups or new versions of software such as new Octez releases.
On the other hand, as transactions and blocks keep accumulating over time, synchronizing with this network can take some time, and the context size gets bigger. This means testing a restart and resynchronization can be time and resource-consuming.
Because the protocol on Ghostnet migrates to the newly adopted amendment a few days before Mainnet does, it can serve as a rehearsal for the actual migration on Mainnet. Both bakers and developers can check that they are ready for the migration and that nothing in their configuration breaks when it happens.
Protocol test networks
Protocol test networks are created for a specific version of the protocol.
They allow developers and bakers to anticipate the changes brought by upcoming protocol amendments.
When an amendment is proposed, a corresponding network is created. This network gets joined by more bakers as the proposal is selected and moves through the different periods of the self-amendment process. If the protocol passes the 3 votes of the amendment, joining a test protocol early gives you about 2.5 months to test all the changes that will be made to Mainnet. If the protocol is not adopted the network is discarded or sometimes remains active until a different protocol is adopted.
This means there is usually one or two such running networks: one for the current version of the protocol running on Mainnet, and possibly one for the proposed protocol that is going through the amendment process, if there is one.
Whether you are a developer or a baker, testing on the network for a new proposal before it gets activated enables you to check that all your software, smart contracts, dApps, and other tools work well with this new proposal.
It also enables you to test any new features of this proposal. Trying the features can help you form your own opinion about this proposal and discuss it with the community before voting on it.
When the protocol is activated, the corresponding protocol test network can be a good network for a baker to run tests with the current version of the protocol, because these networks are lightweight to bootstrap and have reduced context sizes.
On the other hand, these networks may be less convenient for smart contract or dApp developers to use because they have a limited life span and tend to be less supported by services like indexers and other tools.
Periodic test networks
Periodic test networks allow developers to test new features that are under development before those features become part of a proposal or reach Tezos Mainnet.
These networks are based on Alpha development versions of the Tezos economic protocol and the Octez suite.
The periodic network currently available is Weeklynet, which is named this way because it restarts every Wednesday, with the latest Docker build as a reference. It is the place to test upcoming new features. It is also a network to use if you are a big baker or a BaaS provider and you want to test tailored infrastructure.
Working with periodic test networks
To work with the periodic test networks, you must use exactly the same version of the Octez suite as the network.
For this reason, common wallet apps typically don't work with these networks.
For example, you can look up information about Weeklynet at https://teztnets.com/weeklynet-about.
This page shows the URL of a Weeklynet RPC endpoint to use and instructions for connecting to the network in different ways.
There are two main ways to use periodic test networks:
Run the Docker image with the correct version of the Octez suite
Build the Octez suite from the specific Git commit that is listed on the test network page
In either case, you must connect the Octez suite to the test network RPC endpoint.
For example, if the Weeklynet endpoint on https://teztnets.com/weeklynet-about is https://rpc.weeklynet-2024-01-17.teztnets.com, you can connect the Octez client by running this command:
Then you can create a local wallet by running octez-client gen keys my_account and fund it with the network faucet.
For convenience, teztnets.com provides information about the test networks at https://teztnets.com/teztnets.json.
You can use the data from this file to set up your environment, such as setting environment variables.
For example, to get information about Weeklynet, install the curl and jq programs and run this command:
You can use the response to set environment variables like the RPC endpoint, as in this code:
Here are some other tips for using the Docker images for periodic test networks:
The Docker images for each instance of the periodic test networks are listed on the information page for the network.
For example, Weeklynet information is here: https://teztnets.com/weeklynet-about.
The Docker images are based on Alpine Linux, which uses the apk package manager.
For example, to install the curl program, run sudo apk add curl.
The shell interpreter path is /bin/sh, not /usr/bin/bash as on many Linux distributions.
Public nodes and faucets
To connect to existing public nodes for these networks, or to get some testnet-only tez on these from a faucet, check https://teztnets.com.
Other sources of public nodes include:
Community RPC Nodes listed by ECAD Labs.
SmartPy nodes.
Testing with your own private network
In some special cases, you may want to run your own private network for your testing. This could be true if you are developing tools that you want to keep confidential until you put them into production, and if the sandboxed mode is not sufficient for your situation.
See the Private blockchain section on OpenTezos to learn how to set up your own network.
More information
Test networks by Nomadic Labs
Medium post: Introducing Ghostnet
Using a local sandbox
Local sandboxes allow you to test your work without sending any transactions to Tezos Mainnet or testnets.
They run a simulated version of the Tezos protocol locally so you can test contracts, dApps, or other projects while interacting with actual nodes, but without using a public test network or creating your own private network.
Sandboxes can be convenient if you want to run all your tests locally but still need a realistic Tezos environment, such as if you need to interact with nodes and the consensus mechanism.
Testing locally can also keep your work confidential until you decide to put it into production.
However, sandboxes lack some features that testnets have, such as indexers and block explorers.
If you want an indexer or block explorer for your sandbox, you must run it yourself.
Here are some options for running local Tezos sandboxes:
Octez sandboxed and mockup modes
The Octez client sandboxed and mockup modes run a local version of the Tezos network.
Sandboxed mode runs a local network with one or more nodes.
Mockup mode runs a light version of the network without nodes.
Tezbox
Tezbox is a simulated Tezos environment that runs in a container.
Tezbox provides different images that mirror versions of the Octez suite.
For example, to run Tezbox with Octez version 19.1 and the Paris protocol, run this command:
The container runs in the background and provides an RPC node at http://localhost:8732.
Then you can use the sandbox through that RPC node.
For example, you can configure the Octez client to use the sandbox by running this command:
Then you can use your local installation of the Octez client to interact with the sandbox, such as deploying contracts and sending transactions.
Tezbox provides sample accounts in the /tezbox/context/accounts.json file.
Flextesa
The Flextesa is also a simulated Tezos environment that runs in a container.
The Flextesa image has different scripts that start different versions of the Tezos protocol.
For example, to start a Flextesa sandbox with the Oxford protocol, run this command:
Then you can see the accounts that are available by running this command:
The Flextesa image comes with the Octez client pre-configured, so you can use it directly from the image.
These commands create an alias for the installation of the Octez client in the image and uses it from the host system:
Now you can use the Octez client to deploy contracts and send transactions to the sandbox.
Flextesa allows you to control baking manually, so blocks are only backed when you trigger them.
For more information, see the Flextesa documentation.
The Octez client
The Octez command-line client is part of the Octez suite of tools for interacting with Tezos and running nodes.
Developers use the Octez client for many tasks, including:
Working with accounts
Sending transactions and interacting with contracts
Originating smart contracts and Smart Rollups
Other parts of Octez allow you to host, manage, and monitor nodes, bake blocks, and host RPC nodes.
This documentation is an overview of the Octez client for Tezos smart contract and dApp developers.
For more detailed information, see the Octez documentation and opentezos.com.
Installing the Octez client
You can install the Octez client directly on your computer or use a Docker image that has the most recent version of the Octez tools installed.
Installing the Octez client locally
You can install the Octez client on your computer by using your package manager.
Then, initialize it to use the RPC node of your choice:
Install the client:
For MacOS, run these commands:
For Ubuntu, Windows WSL, and Linux distributions that use apt, run these commands:
For Fedora and Linux distributions that use Copr, run these commands:
For more local installation options, see How to get Tezos in the Octez documentation.
Verify that the Octez client is installed by running this command:
If you see a message with the version of Octez that you have installed, the Octez client is installed correctly.
For help on Octez, run octez-client --help or see the Octez documentation.
Initialize the client's configuration file by running this command:
This command creates a default configuration file in the location $HOME/.tezos-client/config.
Set the RPC node to use:
Get the URL of a public RPC node or a private node that you have access to.
For example, you can get the URL of a testnet node from https://teztnets.com/, such as https://rpc.ghostnet.teztnets.com for Ghostnet.
Set your Octez client to use this node by running this command on the command line, replacing the Ghostnet URL with the URL that you copied:
If you are using a testnet, Octez shows a warning that you are not using Mainnet.
You can hide this message by setting the TEZOS_CLIENT_UNSAFE_DISABLE_DISCLAIMER environment variable to "YES".
Verify that you are using the correct RPC URL by running this command:
The response from Octez includes the URL of the RPC node that you are using.
For a full list of Octez client commands, run octez-client man.
Using the Octez client in the Tezos Docker image
The Tezos Docker image contains the latest version of the Octez client and the other Octez tools.
To start a container from this image, run this command:
You can verify that the Octez client is available in the container by running this command:
Then set the RPC node for the client as described above.
For more information about using the Docker image, see Using Docker Images And Docker-Compose in the Octez documentation.
Creating accounts
You can create or import accounts into the Octez client just like you do so in wallet applications.
Octez keeps a local list of aliases for addresses, including user accounts, smart contracts, and Smart Rollups.
You can list the aliases that the Octez client is aware of by running the command octez-client list known addresses.
When you run transactions with Octez, you can use the alias in place of the account address.
Creating accounts
To create an account, run this command, replacing local_account with a local name for the new account:
You can see the address of the account by running this command:
The account address (technically the hash of the public key) starts with tz1, tz2, or tz3.
You can use this address to send tez to this account, such as from a faucet if you are using a testnet.
See Testing on testnets.
Importing pre-existing accounts
If you already have a Tezos account, you can import your private key to use the account in Octez:
Export the private key from your wallet application, being careful not to expose it to anyone.
Run this command, replacing $ALIAS with a local alias for the account and $PRIVATE_KEY with the private key:
Now you can use the alias in place of the address when you send transactions with Octez.
Interacting with contracts
Before sending transactions to contracts with the Octez client, make sure that your client is configured to use an RPC node for the network that you want to use.
To verify the RPC node that you are using, run octez-client config show and look at the value in the entrypoint field.
Sending tez
To send tez from a source account to a target account, use the octez-client transfer command, as in this example:
You can use addresses or local aliases for the source and target accounts, but Octez must have the private key for the source account to sign the transaction.
To check the balance of an account after a transaction, use the octez-client get balance for command and pass the alias or address of an account, as in this example:
Calling smart contracts
To call a smart contract, use the octez-client transfer command.
Contracts can have aliases in the Octez client like accounts.
This example calls a contract with the alias my-counter:
This command calls the increment entrypoint of the my-counter contract and includes 0 tez and up to 0.1 tez in fees with the transaction.
It passes the parameter "5" to the entrypoint.
You can use a local alias or the full address for the smart contract.
Because entrypoints accept parameters in Michelson code, you must encode the values that you send as Michelson values.
The high-level languages have tools to help you encode values in Michelson.
For example, if you are using LIGO to create an entrypoint that accepts an integer, address, and string as a parameter, you can pass the parameter values as a LIGO expression and get the Michelson version with this command:
The compiled parameter value looks like this:
Then you can use this value for the value of the --arg argument in the octez-client transfer command.
Originating (deploying) smart contracts
To deploy (originate) a smart contract to the current network, use the octez-client originate contract command, as in this example from the Deploy a smart contract tutorial:
This command accepts the compiled version of the contract as a Michelson .tz file.
See the documentation for the high-level language you are using for how to compile a contract.
Like the command to call a smart contract, this command accepts the initial value of the contract storage as a Michelson-encoded value.
After you originate the contract, you can use the local alias from this command to send transactions to its entrypoints.
You can see the aliases of contracts by running the command octez-client list known contracts.
Getting information about the blockchain
Developers and dApps can get information about the Tezos blockchain, such as account balances, from these sources:
The Octez client
The The Octez client provides information about accounts, addresses, and many other things.
For example, you can get the balance of an account with this command:
The RPC interface
The RPC interface allows nodes to cooperate with each other and with their clients.
In particular, many RPCs provide information about the blockchain.
This data is not always in the format that developers and dApps need.
For example, the RPC interface does not provide a way to get information about a specific operation by its hash.
You can get some information about accounts, contracts, and other things from RPC requests.
For example, this RPC request gets the current balance of an account:
Indexers
Indexers are off-chain applications that retrieve blockchain data, process it, and store it in a way that makes it easier to search and use.
For example, you can use the TZKT API to get the recent operations an account made with this request:
For more information, see Indexers.
Block explorers
Block explorers use data from indexers to show information in a human-friendly interface.
For example, this link shows information about a contract, including its current storage, entrypoints, and transaction history: https://better-call.dev/ghostnet/KT1R4i4qEaxF7v3zg1M8nTeyrqk8JFmdGLuu/operations
For more information about block explorers, see Block explorers.
Block Explorers
What is a blockchain explorer?
A blockchain explorer, also known as a block explorer, is an app that tracks activity on a blockchain. All transactions ever performed on a network can be viewed using such a tool.
Blockchain explorers are like search engines for blockchains.
You can think of it as a window into the blockchain world, allowing you to observe what's happening in it.
Cryptocurrency users and developers use such a tool to view the status of past or present transactions.
Some of the most basic information available on blockchain explorers includes (but are not limited to):
Block feed: This allows you to view all the confirmed and pending blocks on the blockchain.
Transaction feed: The transaction feed displays all the most recent and pending transactions.
Transaction viewer: Each transaction can be viewed individually to reveal the public addresses of the sending and receiving parties.
Wallet history: All past and present transactions of an individual wallet address.
Block Explorer use cases
Block explorers are not only made for casual users to check if their coins are still safe or for delegators to verify that their baker is not cheating with their earnings.
Block explorers are also used by:
blockchain engineers who develop and debug new features in sandboxes (e.g. new blockchain consensus).
app developers who need debugging tools and more visibility into the current and past state of their contracts running on internal testnets and Mainnet.
bakers and staking services who need reliable data about delegation and earnings history to calculate correct payouts, plan their bond pools and execute operations.
less technical user groups like auditors and regulators with strict requirements for data quality, as they need to access a trusted copy of the full on-chain history in a format that's easy to digest for their spreadsheets and compliance tools.
Here are some commonly used Tezos block explorers:
TzStats
TzKT
Arronax
Baking Bad
Better Call Dev
Explorus
Etherlink Explorer
TzFlow
TzKT Tezos blockchain explorer
import Figure from '@site/src/components/Figure';
TzKT explorer from the Baking Bad team is designed to improve experience for both newcomers and advanced Tezos Blockchain users. In this article we will reveal the main features of this explorer.
Main Page: Contains general information on the blockchain: current cycle and block, Governance status, accounts and transactions stats, current price chart. The dropdown tab in the header allows you to switch the explorer to the testnets.
Also, there is a Liquidity Baking tab, where you can interact with the Sirius DEX contract directly from TzKT. Sirius is an AMM tzBTC/XTZ DEX directly integrated into Tezos with a protocol subsidy.
API: Leads to the powerful API sub-site, where all API documentation is located, free for use by Tezos developers.
Tezos DAPPs: List of DAPPs present in Tezos ecosystem. Chart can be sorted by category or any parameters like TVL, Volume, Users, Interactions with a different timeframes (1D, 7D, 30D)
Stats: The entire ecosystem of Tezos, expressed in graphs. Useful to view the dynamics of the L1 protocol according to a wide list of indicators like transactions, volume, contract interactions, active users, total accounts and other.
Bakers: Provides a list of all Tezos Bakers. By default, this tab displays only active public bakers - this measure is to secure the newcomer delegators. Use filters or switch to “all bakers” tab for advanced search.
Blockchain: a wide range of tools for users to get specific data. Cycles and blocks list, accounts information, particular operations, governance events, software overview etc.
Search and bookmarks. On the header right side there is a search bar. The search is configured to find the right user or contract by name, address and Tezos Domain, as well as to prompt you with similar results. Bookmark any address to ease its use for you. Export and import it to easily set on other devices or share with your mates.
The tzStats blockchain explorer
import Figure from '@site/src/components/Figure';
In this chapter, we will use the TzStats explorer to illustrate the different features of an explorer, but similar features are usually available on others. Concerning the observation of smart contracts, the different aspects are discussed in the following chapter.
TzStats is developed by Blockwatch Data Inc. It is a block explorer for public and private Tezos networks and it is based on the TzIndex indexer.
Each Tezos network has its own TzStats version:
Mainnet: tzstats.com
Ghostnet: florence.tzstats.com
TzStats' main features
TzStats has a complete guide available here.
Main Dashboard: This page provides a quick view of all the main activity on the Tezos network, e.g. staking activity, gas price, tez supply, transaction volume, etc.
Cycle: This page provides general information about a specific cycle number. A cycle is a way of measuring time. Every cycle is equal to 4096 blocks.
Block: This page provides general information about a specific block number along with its technical details such as gas used, block health (Endorsed Slots, Missed Priorities and Missed Endorsements), etc.
Network Activity: This page provides a world map with the location of where new blocks are being baked. There is also the list of whale operations (i.e. a list of high-value transfers >= $100,000).
Bakers: This page provides the total number of Tezos bakers. Several lists are also available to gain an overview of the Tezos baker landscape. You can choose between several tabs, namely, Public, Private, Closing, and Leaderboard.
Protocols: This page shows the past and current protocol used by Tezos and the overall age of the Tezos blockchain. See History of amendments to understand each protocol.
Voting: This page shows the past and current elections and indicates when it ends. See Governance to understand the voting process.
Markets: This page provides an overview of the current market activity, e.g. list of exchanges, 1 day's volume, overall market capitalization, etc.
Here the main features have been presented and, in the next chapter, we will see how to check out your smart contract.
References
[1] https://tzstats.com
[2] https://tzstats.com/docs/guide
Indexers
Indexers are off-chain applications that retrieve blockchain data, process it, and store it in a way that makes it easier to search and use.
Indexers are an important component of Block explorers.
You can use indexers to provide the data that you need for your dApps.
Why indexers are needed
Tezos nodes store copies of blocks, but they provide only certain information about those blocks through the RPC interface.
For example, assume that you want information about an operation and all you have is its hash.
The RPC interface can't provide this information directly, so you would have to search each block until you found the block with this operation, which is very inefficient.
Instead, you can use an indexer that records information about each operation.
This kind of indexer can provide information about a specific operation by its hash or a list of operations sent by a certain account.
How indexers work
You can imagine indexers as the card catalog in a library.
Libraries typically sort books by genre and author name, so readers can find a book if they know its genre or author.
However, suppose a reader wants to find a poem about acacia trees, a story about a gas station architect, or every book written in 1962.
Without any other information, they must check all the books in the library until they find what they are looking for.
To simplify the process of searching for books, libraries add each new book they receive to their card catalogs.
Card catalogs list all of the books on a certain topic and provide other metadata such as the authors' names and publication dates.
Readers can look up a topic in the catalog and get a list of all books on that topic.
Libraries can index books in as many ways as are necessary to help people search for books more efficiently.
Similarly, relational databases can have indexes to speed up queries.
In the same way, blockchain indexers create a database with the blockchain data organized in certain ways.
Types of indexers
There are two main types of blockchain indexers: full and selective.
Full indexers
Full indexers process and write all data from blocks, from simple transactions to validator's node software versions.
Blockchain explorers commonly use them to provide users with advanced blockchain analytics and allow them to search for any type of on-chain data.
Also, those who host full indexers can offer public APIs that other projects can use without hosting the indexer themselves.
You can get data from these full indexers, which allow you to find almost any information in the Tezos blockchain:
TzKT
TzPro
TzIndex
Selective indexers
Selective indexers store only selected data, which means that they need less space and resources to maintain.
Creating a selective indexer requires you to write the logic for the indexes, including what data to fetch, how to process it, and how to store it.
Usually, they are used in projects that require only specific on-chain data, such as active user balances, balances of their smart contracts, and NFT metadata.
You can optimize a custom selective indexer for fast execution of specific project queries.
You can also use them to work with data in the way that you want to, such as storing token amounts with decimal places.
You can use these frameworks to create your own selective indexer to provide the data that you need in the format that you need:
Que Pasa
DipDup
Dappetizer
For example, Teia.art and other NFT marketplaces use their indexers based on DipDup, optimized for working with NFTs.
Setting up indexers
For information on setting up indexers, see the documentation for the indexer or Indexers on OpenTezos.
Using indexers
The exact list of tables, index schemas, and command syntax depend on the indexer and database it uses.
For information about how to use a specific indexer, see its documentation.
Some indexers provide information about networks other than Mainnet, so check the indexer's documentation for information about selecting a network.
For example, this TzKT query gets an account's balance of the USDT token:
For information about the TZKT indexer's API, see https://api.tzkt.io.
Indexers can organize data in custom ways.
For example, TzKT indexes FA1.2 and FA2 tokens and gives each an internal ID.
This ID can be faster and easier to work with and compare than using the contract ID and token ID.
This TzKT query gets information about an FA1.2 token based on its internal ID instead of its contract address and token ID:
The response provides information about the token:
Data available on indexers
The exact list of queries and filters depends on the selected indexer.
Here are some examples of information you can get from full indexers:
Account: Balance in tez, transaction history, address type, and status like "baker" or "delegator"
Block: Header, content, and metadata like address and socials of the baker who made the block
Contract: Description, entrypoints, balance, code in Michelson, storage, and the content of a specific big map
Bakers and delegators: Who earned how much, who endorsed a particular block, and how much users delegate
Protocol: What cycle is now, what is on the vote, how many tez are in circulation
For example, here are some examples for getting information from TzKT.
Follow the links and paste your address instead of tz1…9v4 into the address bar to get data about your account:
fxhash NFTs you own.
The fxhash contract address filters the query, so try to change the address to see your NFTs from other marketplaces.
Your balance history in tez.
Nodes and indexers display balances without decimals, and ""balance": 500000" means only five tez.
List of FA1.2 and FA2 token transfers where you were the sender. Change "from" to "to" in the query to see the list of transfers where you were a recipient.
TzKT provides information about Ghostnet.
For example, you can run any of the previous queries on Ghostnet by changing the host name in the URL to https://api.ghostnet.tzkt.io/.
Where indexers are used
Many applications that work with on-chain data use an indexer.
The simplest example of working with an indexer is a blockchain wallet.
For example, to display a user's token balances, Temple Wallet queries data from the TzKT indexer and gets tokens' tickers and logos from the contract metadata.
You can do the same thing by calling the GET tokens/balances endpoint of the TzKT API and including your address as the value of the account parameter, as in this example:
In the same way, Temple Wallet receives transaction details and displays NFTs, delegation rewards, the value of your tokens, and other data.
It uses other sources for other data.
For example, it requests the XTZ price from Coingecko.
Other blockchain applications use indexers in similar ways:
Decentralized exchanges use indexers to get historical data on the balances of each pool, transactions with them, and the value of tez.
Based on this data, they calculate the volume of transactions in tez and other currencies, as well as the historical prices of tokens in fiat currencies.
NFT marketplace websites index transactions with their contracts to display new NFTs, transaction history, and statistics of the most popular tokens.
Block explorers display data from all blocks with the help of indexers and allow users to find anything, like operation details by hash.
Thanks to this, users can find the information they need in a user-friendly graphical interface.
An introduction to smart contracts
import Figure from '@site/src/components/Figure';
A smart contract is a piece of code stored on the blockchain. It contains a set of instructions and rules to trigger them. Once deployed, it becomes immutable, but a user can trigger the execution of the code without modifying it.
Smart contract metaphor
Smart contracts can achieve different kinds of operations with coins and other smart contracts. They're comparable to snack vending machines:
Each machine has a contract saying "Give me cryptocurrency, then I give you a food item or drink."
Each machine can have a different smart contract for various food or drink items.
Other smart contracts can work with the machines behind the scenes, such as a contract that represents an employee gathering the money from the machines.
Each machine doesn't operate until enough currency is delivered (Gas). Note that the quantities of foods or drinks change while their types can't (ever).
Of course, smart contracts go beyond this metaphor. Thanks to transparency and immutability, they allow an agreement to be secured between two or more parties.
For example, it is common to create financial instruments like various tokens (usually worth a fraction of the blockchain's coin) with different usability and characteristics inside a multiple smart contracts system. Other more or less complex projects can propose lending, stablecoins, or crowdfunding.
In most cases, smart contracts remove intermediates and drastically reduce costs compared to classic paper contracts and their validations.
Notice that a smart contract can only run and interact with the blockchain it's stored on. It can't interact with the outside world. That's where decentralized applications or "dApps" come in, because they provide interfaces for the outside world.
Components of a smart contract
A smart contract is composed of three elements:
Its balance: a contract is a kind of account, and can receive and send tez
Its storage: data that is dedicated to and can be read and written by the contract
Its code: one or more entrypoints, which are a kind of function that can be called either from outside the chain or from other contracts
The smart contract code is in the Michelson language, but several high-level languages exist to make it easier to write the code.
See Languages.
:::note VisualTez
VisualTez allows you to visualize the fundamental logic of a smart contract without relying on any specific syntax.
:::
Limitations of smart contracts
All a contract can do can be summarized as:
Performing computations
Reading or updating the value of its own storage
Generating a list of operations, such as calls to other contracts (see Operations)
Smart contracts can't do these things:
Access programs outside the blockchain, including calling external APIs
Access other contracts' storage
Change their code
Catch and respond to errors (see Handling errors)
Features of Tezos smart contracts
Tezos smart contracts support these features:
Storage of data that the contract can read and write to
Entrypoints that users can call
Data types from simple to complex and logic that can be used on them, including Comparing values and Loops
Operations, which are calls to other smart contracts
Views, which expose data to other contracts
Handling errors, although error handling in Tezos is very different from other platforms
Constants that are available to all contracts
Sapling, a way to run private transactions
Lifecycle of a Tezos smart contract
Tezos contracts have a two-step lifecycle:
Deployment
Interactions through calls
Deployment of a Tezos smart contract
The deployment of a Tezos smart contract is called origination.
When a smart contract is originated, an address and a corresponding persistent storage are allocated to it. The smart contract address is like its identity and where it lives on the ledger.
After it is deployed, anyone or anything can call the smart contract, including contracts on the chain and applications off the chain, by submitting an operation to its address with arguments. This call triggers the execution of the pre-defined instructions in the contract's code.
The origination of a Tezos smart contract must define:
A complex parameter type in the low-level Michelson language, which is a list or tuple of each parameter type (see more below with high-level languages)
The storage type
The initial value of the storage
A set of instructions in Michelson
After the contract is deployed, it cannot be changed or removed from the blockchain.
For more information about deploying smart contracts, see Deploying smart contracts.
Call of a Tezos smart contract
A smart contract can be called by a classic account or by a smart contract account. The operation or transaction specifies one or more arguments. In the below example, we increase or decrease a value in the storage:
Users can call smart contracts from different platforms, including:
The Octez command-line program, which is provided by Tezos to send transactions to Tezos and interact with the chain in other ways, including hosting a node. For more information about the Octez client, see https://tezos.gitlab.io/.
Remote Procedure Calls (RPCs) via HTTP.
SDKs such as Taquito.
Sample smart contracts
Here are some places to find sample smart contacts:
Completed applications from the tutorials are in the repository https://github.com/trilitech/tutorial-applications
For conceptual examples of contracts, see https://opentezos.com/smart-contracts/simplified-contracts/
For examples of contracts in LIGO, see https://packages.ligolang.org/contracts
For examples of contracts in Archetype, see https://archetype-lang.org/docs/templates/overview
For examples of contracts in SmartPy, see https://smartpy.io/guides/examples/
For examples of FA2 smart contracts, see:
The SmartPy FA2 library
oxheadalpha/smart-contracts
Languages
You can write Tezos smart contracts in any of these high-level languages:
LIGO, which has versions with syntaxes similar to JavaScript/TypeScript and OCaml
SmartPy, which has a syntax similar to Python
Archetype, which is a high-level language developed specifically for Tezos
Each of these languages is eventually compiled to Michelson, the base language for Tezos smart contracts.
That means that the high-level languages have limitations caused by how Michelson works.
For information about Michelson, see Michelson.
LIGO
LIGO is a functional programming language that is intended to be both user-friendly and to avoid patterns that make formal verification difficult.
LIGO offers two syntaxes:
JsLIGO, a syntax that is inspired by TypeScript/JavaScript
CameLIGO, a syntax that is inspired by OCaml
You can use either syntax and compile to Michelson to run on Tezos.
To learn LIGO, see these tutorials:
Deploy a smart contract with CameLIGO
Deploy a smart contract with JsLIGO
Here are examples of straightforward LIGO contracts.
Each contract stores an integer and provides entrypoints that increase or decrease the integer or reset it to zero.
CameLIGO
JsLIGO
Further reading
LIGO documentation
LIGO tutorials
OpenTezos
SmartPy
SmartPy is a comprehensive solution for developing, testing, and deploying smart contracts on Tezos. With its easy-to-use Python syntax, developers can create contracts in a familiar and intuitive way, while SmartPy's type inference provides added safety.
To get started with SmartPy, see the tutorial Deploy a smart contract with SmartPy, the tutorial on smartpy.io, or Smart contract development with SmartPy on opentezos.com.
Test scenarios
SmartPy allows you test contracts in simulated scenarios, including complex cases with multiple interacting contracts. Then SmartPy compiles the contracts to Michelson for deployment. SmartPy can also automatically upload metadata and other files to IPFS directly from the test scenario.
FA2 library
SmartPy provides a library of classes that you can extend to create FA2 token contracts. The library provides basic functionality for NFTs, fungible tokens, and single-asset token contracts and mixins that change how the tokens work. For more information, see FA2lib in the SmartPy documentation.
Online IDE
The SmartPy online IDE offers a user-friendly interface for trying out the language directly in a web browser. It comes with an origination feature for deployment of contracts to the blockchain at the click of a button. For those who prefer to write smart contracts and tests in their favourite editor, you can also install SmartPy locally.
Explorer
The SmartPy explorer allows you to explore and interact with with already deployed contracts. It presents contract data as SmartPy values, such as records and variants, to make interacting with contracts easier.
Example
Here is a simple SmartPy contract and test scenario:
Further reading
SmartPy documentation
Online IDE
OpenTezos
Archetype
Archetype is an elegant generic-purpose language to develop smart contracts on the Tezos blockchain. It's a DSL (domain-specific language) for Tezos that facilitates formal verification and transcodes contracts to SmartPy and LIGO.
It supports all Michelson features but also provides exclusive high-level features for a precise and concise source code, that make contracts easier to develop, read and maintain.
Looking at a simple Archetype contract
Create a file hello.arl
The contract starts with the archetype keyword followed by a contract identifier.
For example:
Parameters
A contract may have parameters. A parameter value is not in the source code and is provided at deployment (origination) time. For example, the address of the contract owner is typically a contract parameter.
By default, a contract parameter is an element of the contract storage. It is defined by an identifier and a type. The list of parameters follows the contract's identifier between parenthesis and the parameters are separated by commas.
For example:
The seller and buyer addresses then need to be set at deployment time.
Deploy a contract with Completium:
The Completium CLI is the command line utility to install Archetype compiler and manage contracts (deploy, call).
To install and initialize Completium do:
Then you can deploy the contract with
Call contract's entrypoint input with argument "Archetype":
Further reading
Archetype documentation
OpenTezos
Medium article
How To Verify a smart contract with Archetype
Michelson
import Figure from '@site/src/components/Figure';
Michelson is the domain-specific language used to write smart contracts on the Tezos blockchain.
Users can write Michelson directly, but most of them use a high-level language for a more approachable syntax and for more user-friendly programming features; see Languages.
Features
Michelson is a Turing-complete stack-based language that includes common features of a programming language as well as some specific blockchain-related features:
It doesn't have variables but instead manipulates data directly on a stack, through a set of stack manipulation instructions. For example, the ADD instruction consumes two elements from the top of the stack and puts their sum on top of the stack.
It is strongly typed, with basic types such as integers, amounts of tez, strings, and account addresses, as well as complex types such as pairs, lists, key-value stores (big-maps), or pieces of code (lambdas).
It has limited access to data, and can only read data from its own storage, data passed as parameters during calls to its entrypoints, and a few special values such as the balance of the contract, the amount of tez sent to it during a call, and the creation time of the current block. It can also access a table of constants.
Michelson was designed to facilitate formal verification, allowing users to prove the properties of their contracts.
Michelson uses a stack rewriting paradigm, whereby each function rewrites an input stack into an output stack. (The meaning of this will be fully explained below.) This runs in a purely functional way and does not modify the inputs at all. Thus, all data structures are immutable.
What is a stack?
A stack is an abstract data type that serves as a collection of elements, with two principal operations: push (adds an element to the collection) and pop (removes the most recently added element that has not yet been removed). The order in which elements come off a stack gives rise to its alternative name, LIFO (last in, first out). Additionally, a peek operation may give access to the top without modifying the stack.
A diagram of the stack data structure, showing a stack of elements and the push and pop actions
Source: Hyperthermia on Wikimedia Commons.
Rewriting Stacks
To see what mean it means to rewrite stacks, we will run through a transaction in Michelson. First, before a transaction runs, the blockchain state at a certain hash is deserialized and put onto the stack as the variable storage. We have a from function that receives the transaction data amount, the amount of attached tez, and the parameter, the function's parameters.
After running the function, without any updates to the stack, the program will call a to function that has the parameters result, which is the result of the function, and the output storage that is serialized and stored on the blockchain.
In the example, Michelson only manipulates the stack functionally and a new stack is passed from function to function.
Entrypoints
Depending on the high-level language used, a smart contract deployment also defines its entrypoints using the complex Parameter Type. These are special functions used to dispatch invocations of the smart contract. Each entrypoint is in charge of triggering an instruction. Below is the same example as before, abstracting the complex Parameter Type:
Each type and position of a parameter in the list (or pair) allows you to define an entrypoint (a function). For instance, in our example, there are two parameters, hence two types. Both types are integers (to increase or decrease a value). Because the type is the same, its position (left, right, or index number) determines which entrypoint is correct.
It could be:
Left type: "Increment" entrypoint
Right type: "Decrement" entrypoint
Below is another illustration of this process:
For more information, see Entrypoints.
Further reading
Michelson documentation
Michelson Reference
Michelson tutorial series
Data types
See these pages for information about the data types that Tezos supports:
Primitive data types
Complex data types
Cryptographic data types
Higher-level languages may treat data types differently, but they all behave the same way when they are compiled to Michelson and run on Tezos.
Primitive data types
Tezos contracts support these primitive data types.
The high-level languages may implement these data types slightly differently, but they all behave the same way in the compiled Michelson code:
Numeric data types: int and nat
Token amounts: mutez and tez
Strings
Bytes
Booleans
Timestamps
Addresses
This list is intended for general information for developers and is not intended to be comprehensive.
For a complete list of data types that are available, see the reference information for the language that you are using:
Michelson: Types
LIGO: Introduction
Archetype: Types
SmartPy: Overview
Numeric data types: int and nat {#numeric}
Integers (int) are whole numbers that can be positive or negative.
Naturals (nat) are whole numbers that can only be positive or zero.
Tezos differentiates these two types to prevent problems such as performing operations that may not always return a positive number.
On Tezos, there is no hard limit to how large nat and int values can be.
The only limits are those associated with the storage and gas costs.
This means you never need to worry about overflow issues.
You can perform these ordinary arithmetic operations on int and nat or a mix of the two:
Getting the opposite of a number (NEG)
Adding (ADD), subtracting(SUB) or multiplying (MUL) two values
Performing an integer division between two values (EDIV), which returns a pair with the result and the remainder
The type of the output may not be the same type as the inputs.
In general, the output type depends on whether the result can be negative.
For example, subtraction always returns an int, but addition returns a nat if both inputs are nat and an int if either input was an int.
You can perform bitwise logical operations: the usual OR, AND, XOR, NOT.
You can also perform bitwise left and right shifts (LSL and LSR), with a parameter that indicates by how many bits you shift the value.
For information about comparing values, see Comparing values.
Finally, you can convert an int to a nat or vice versa:
To convert an int to a nat, use the absolute value function (ABS).
To convert a nat into an int, use the INT function.
You can also convert an int to an option on a nat (ISNAT).
Why are decimal numbers not supported?
Tezos does not support floating point or decimal numbers.
These kinds of numbers and their associated rounding errors cause many problems.
For example, Tezos protocol upgrades could cause inconsistencies with floating point numbers.
If this happens, different nodes may get different results for the same transactions, which would lead to inconsistencies on the blockchain.
Also, code that uses floating point numbers is much harder to run formal verification on.
Token amounts: mutez and tez {#token-amounts}
The mutez type (or micro tez) stores amounts of tokens from the native cryptocurrency of Tezos, the tez.
One mutez is equal to one millionth of a tez.
Some languages also support the tez type, but the internal type is always the mutez, so you can see a value of type tez as a shortcut for the corresponding value in mutez.
mutez values, like nat values, are whole non-negative numbers.
However, contrary to nat, they can't hold arbitrarily large values.
More precisely, mutez are stored as signed 64 bit values.
This means their value can only be between $$0$$ and $$2^{63} - 1$$, which is approximately $$9.223 \cdot 10^{18}$$ mutez, and corresponds to 9 trillion tez.
Although it is rare to work with mutez amounts this large, there is still a risk of overflow.
For example, if code performs intermediate computations such as squaring a number, it might reach the storage limit.
You can do these arithmetic operations on mutez:
Adding two mutez values (ADD)
Subtracting two mutez values (SUB_MUTEZ), which returns an option because the result could be negative
Multiplying a mutez value with a nat (MUL), which returns a result in mutez
Performing an integer division (EDIV)
For information about comparing values, see Comparing values.
Strings {#strings}
On Tezos, a string is a sequence of standard non-extended ASCII characters.
This means there are only 128 possible values for each character, which excludes any accented letters.
This limited list of characters prevents compatibility issues with unicode characters.
If you need to store unicode text, store it as bytes.
Like int and nat, there is no limit on the size of a string other than the indirect limits caused by the associated costs of storage.
You can do these operations on strings:
Concatenate two string types (CONCAT)
Get the size of a string (SIZE), which returns a nat
Extract a substring of a string (SLICE)
Compare two string types based on their lexicographical order; see Comparing values
Bytes {#bytes}
You can store any piece of information as a sequence of bytes.
This type has no limits on its size other than the indirect limits caused by the associated costs.
bytes have the same operations as strings:
Concatenate two bytes types (CONCAT)
Get the size of a bytes (SIZE), which returns a nat
Extract a substring of a bytes (SLICE)
Compare two bytes types based on their lexicographical order; see Comparing values
To save space, you can store most other data types in a bytes type.
To convert
Furthermore, bytes can be used to store values of most other valid types in an optimized binary representation.
To convert values to and from bytes, use these functions:
To convert any value of a supported type to bytes, use PACK
To convert bytes to the encoded type, use UNPACK
Serialization is also useful in applying cryptographic functions to data, as in these examples:
Computing a cryptographic hash of some data using one of several hash functions, such as Blake2b-256
Checking that a sequence of bytes has been signed with a given key
Applying elliptic-curve cryptographic primitives (BLS12-381)
For more information about serialization, see Serialization.
bytes are also used in Sapling.
Booleans {#booleans}
Boolean types on Tezos (bool) work the same way as in most programming languages.
A Boolean value can be True or False
Comparison operators produce Boolean values
Boolean values can be used in conditional statements or while loops
The usual logic operators are supported: AND, OR, XOR, NOT
Timestamps {#timestamps}
Dates are very important in smart contracts, such as verifying that a call is made before or after a given deadline.
The timestamp type represents the number of seconds since January 1st, 1970, also known as UNIX time.
Internally, timestamps are stored as an int, so like int types, timestamps can have arbitrarily large positive or negative numbers, representing times long before or after January 1st, 1970.
The special instruction NOW represents the timestamp of the current block.
The following operations are supported on timestamps:
Adding a number of seconds to a timestamp (ADD)
Subtracting a number of seconds from a timestamp (SUB)
Computing the difference in seconds between two timestamp values (SUB)
Comparing two timestamps (COMPARE); see Comparing values
Addresses {#addresses}
On Tezos, each account is uniquely identified by its address.
Internally, addresses take the form of a string type.
For user accounts, the string starts with "tz1", "tz2", "tz3" or "tz4".
For smart contract accounts, the string starts with "KT1".
| Type of Account | Example |
| --- | --- |
| User account | tz1YWK1gDPQx9N1Jh4JnmVre7xN6xhGGM4uC |
| Smart contract | KT1S5hgipNSTFehZo7v81gq6fcLChbRwptqy |
The next part of the string is a Base58 encoded hash, followed by a 4-byte checksum.
Data type implementations
See these links for technical information about how different languages handle different data types:
Michelson: int and nat, booleans, strings, timestamps, mutez.
Archetype: Types basics, Types, Arithmetic operators
SmartPy: Integers and mutez, Booleans, Strings and Bytes, Timestamps
LIGO: numbers and tez, strings & bytes, booleans
Complex data types
Tezos contracts support these complex data types.
The high-level languages may implement these data types slightly differently, but they all behave the same way in the compiled Michelson code:
Pairs
Records
Options
Big-maps and maps
Lists
Sets
Variants and Unions
Lambdas
Tickets
Unit
This list is intended for general information for developers and is not intended to be comprehensive.
For a complete list of data types that are available, see the reference information for the language that you are using:
Michelson: Types
LIGO: Introduction
Archetype: Types
SmartPy: Overview
Pairs {#pairs}
A pair is a complex type made of two other types.
For example, a pair of an int and a string can hold a value such as (42, "Hello").
Languages have instructions to create pairs and to extract the left or right value from a pair.
Pairs can be nested, which makes it possible to create more complex structures with many values of different types.
The two main ways to nest pars is by using right combs or binary trees:
Right combs
The most common way to nest pairs on Tezos is to create a right comb.
A right comb is a pair whose second element is a pair, whose second element is a pair, and so on.
For example, this right comb stores an int, a string, and a bool using nested pairs: {-42; {"Hello"; True}}.
To add another unit, the right value of the most nested pair becomes a pair, as in this example: {-42; {"Hello"; {True; 21}}}.
This is a way to create a Tuple (a sequence of elements of different types) using only pairs.
Because right combs are used often in Michelson, there are shorter ways to express them.
For example, the notation {42; "Hello"; True; 21} is equivalent to {-42; {"Hello"; {True; 21}}}.
Binary trees
Another way to use pairs to combine multiple values is to use a binary tree layout.
In this layout, both sides of the main pair contain a pair, then both sides of these pairs contain pairs, and so on.
Here is an example of a binary tree: {{-42; "Hello"}; {True; 21}}
The binary tree layout is more efficient than a right comb when accessing arbitrary elements.
For example, to access the last element, you can get the second element of the main pair ({True; 21}) and the second element of that pair (21).
If the tree is balanced, the number of operations to get to any element is
$$O(\log_2 (size))$$, whereas for a right comb, it's $$O(size)$$.
Implementation details
Michelson: Operations on pairs and right combs
LIGO: Tuples
SmartPy: Tuples and Records
Archetype: Composite types, Tuple
Records {#records}
To make it easier to create type that combine multiple elements, high-level languages provide the record data type.
The record data type assigns a name to each element, which makes it much easier to get the element that you need because you don't have to remember the location of the element in the data.
Records are similar to Python dictionaries and JavaScript objects.
Different high-level languages represent records in different ways, but here is a simple abstract representation of a record definition:
Here is an abstract example of a value of that record type:
When you compile the high-level code, Michelson represents records with nested pairs and annotations.
In most cases, you can nest records.
For example, if you have a record type named "address," you can add it as an element to the previous record like this:
Implementation details
Archetype: Record
LIGO: Records
SmartPy: Tuples and Records
Options {#options}
Options represent a value that may or may not be defined.
Primitive types do not provide the possibility of a null or empty value; for example, an int type must always contain a number.
If you want to include the possibility that a value is unknown, undefined, or nonexistent, you can make a type into an option.
For example, an option based on an int type can hold a number or no value at all.
You can create an option type based on almost any other type.
For example, an option type based on an int is denoted as option and can contain these values:
An int value, represented as Some(42)
No value, represented as None
Each time that you manipulate the value within an option you must check if it contains a value or not.
The features available for options are:
Creating an option that contains a given value (SOME)
Creating an option that contains nothing (NONE)
Testing if an option contains something or none (IF_NONE)
Getting the value contained in an option (IF_NONE)
Using options instead of failures
Options are used for operations that can't always provide a result, which allows the code to handle the situation without failing and leads to good programming practice.
Here are a few examples where an option is used:
Converting an int to a nat returns an option, which is None if the int is negative
Dividing (EDIV), returns None when trying to divide by zero
Extracting a portion of a string or a bytes value returns None if the extract is beyond the bounds of the value
Fetching a value for a given key in a big-map or map returns None if the entry doesn't exist
Fetching the contract that corresponds to an address returns None if the address is not a contract
Unpacking bytes returns None if the data is not valid
When not to use options
Using an option is convenient when you need it, but it makes the corresponding code harder to write and read and slightly slower and more costly.
When a value may be undefined only at the initial contract deployment, it may be more convenient and efficient to initialize the value instead of making it an option, as in these examples:
For a timestamp, consider initializing it with epoch: January 1st, 1970.
For an address, consider initializing it with the address of the owner of the contract.
Alternatively (but harder to understand without comments), you can use the special null address, "tz1burnburnburnburnburnburnburjAYjjX", which does not correspond to an actual account
Implementation details
Michelson: Operations on optional values
LIGO: Optional values
SmartPy: Options
Archetype: Options
Big-maps and maps {#big-maps}
Smart contracts often need to store a database of records where each record is identified by a key and can be fetched quickly.
For example, an NFT contract may store a database of NFTs, each identified by a unique numeric ID.
For each NFT it stores metadata, such as the current owner.
A big-map is a key-value store that associates values to different keys.
This example big-map uses int and string types to associate numbers with their names:
The main operations available for big-maps are:
Creating an empty big-map (EMPTY_BIG_MAP)
Checking if there is an entry for a given key (MEM)
Accessing the entry associated with a given key (GET)
Assigning an entry to a given key (UPDATE)
Deleting the entry for a given key (UPDATE)
Big-maps vs maps
Big-maps are a special type of map type that is optimized so that it can contain very large amounts of data without necessarily causing issues with gas limits.
This is because the content of a big-map is lazily deserialized; only the entries that are manipulated by a contract are deserialized/reserialized, as opposed to maps and all the other data types, where all of the content is deserialized/reserialized for each call of the contract.
This makes big-maps more useful in practice than maps, because using maps can quickly cause gas consumption issues if the number of entries gets large.
Maps support all the features of big-maps plus these:
Iterating through each element of the map, and applying some code to it (ITER)
Getting the size (number of elements) of the map (SIZE)
Furthermore, unlike big-maps, maps can be passed as parameters and included in records or big-maps.
You cannot pass big-maps as parameters or include them in records because doing so would require manipulating the serialized content of the big-map and defeat the purpose of big-maps.
In general, developers use big-maps unless there is a good reason to use maps because big-maps.
If you choose to use a map, take precautions and optimize your code.
Example contract using big-maps
Here is a table representing an example of a contract that uses two big-maps:
{
Implementation details
Michelson: Operations on big-maps
Archetype: Assets, Map
LIGO: Maps, Big-maps
SmartPy: Maps and big-maps
Lists {#lists}
Lists can store and iterate through values of the same type.
For example, they can do these operations:
Inserting an element at the beginning of a list (CONS)
Getting the first element and the rest of a list (IF_CONS)
Iterating through a list (ITER)
Getting the number of items in a list (SIZE)
:::note High-level language list methods
Some high level languages may offer additional features such as getting an extract of a list.
Refer to the language documentation to see what is supported.
:::
:::warning List security considerations
To prevent attacks, make sure that the number of elements in a list can't be increased arbitrarily.
An attacker could make the list increase and cause problems.
In general, use big-maps to store large amounts of data.
:::
Implementation details
Michelson: Operations on lists
SmartPy: Lists
Archetype: List
LIGO: List
Sets {#sets}
Like lists, sets contain elements of the same data type, but in sets, each element can be present only once.
Sets are ordered, and the order is the natural order of the values in the set; see Comparing values.
The main operations available on sets are:
Creating an empty set (EMPTY_SET)
Adding an element to the set (UPDATE)
Removing an element from the set (UPDATE)
Checking if an element is present in the set (MEM)
Iterating through the set in the order of the value of the elements (ITER)
Getting the number of items in the set (SIZE)
Implementation details
Michelson: Operations on sets
Archetype: Set
SmartPy: Sets
LIGO: Set
Variants and Unions {#variants}
A variant (or union) can hold values of multiple types.
For example, a variant can hold either an int or a string.
When you use a variant, you can check which of the types it holds and run corresponding code.
Variants are used internally as a way to implement entrypoints
Some high-level languages use variants to implement enumerations, which is a type that has a list of valid named values.
Implementation details
Michelson: Operations on unions
LIGO: Variant types
SmartPy: Variants
Archetype: Enum
Lambdas {#lambdas}
A lambda is a piece of code that is also a value.
It can be stored or passed as a parameter to an entrypoint.
The code of a lambda takes parameters and returns a value but it has no side effects.
Unlike other code, it doesn't have access to the contract storage and cannot modify the storage.
Here are some common uses for lambdas:
Lambdas allow you to reuse code in multiple places when the language does not support reuse.
In high-level languages, you can reuse code with functions or similar structures, but in Michelson, you may need to use a lambda for the same purpose.
Lambdas can make parts of a contract upgradeable.
For example, the contact can store some of its logic in a lambda and an admin can call an entrypoint to change the lambda to change how the contract works.
Note that the ability to upgrade the contract can cause users to worry about the trustworthiness of the contract.
You can use lambdas to implement a generic multi-sig or DAO contract where a proposal takes the form of a lambda that performs some action and people vote on whether to execute the action or not.
Implementation details
Michelson: Control structures
Archetype: apply_lambda
SmartPy: Lambdas
LIGO: Anonymous functions
Simplified DAO contract
Tickets {#tickets}
A ticket is a data type that includes security mechanisms that make it suitable for issuing new tokens or granting portable permissions.
Tickets cannot be duplicated, so a single contract is always in control of a ticket.
In this way, a ticket can represent control over something or permission to do something.
A ticket contains three pieces of information:
The address of the contract that created it, called the ticketer
Some data with a type and value assigned by the contract, called the wrapped value or the payload of the ticket
An amount in the form of a natural number
Tickets have a type, which is based on the type of the data.
For example, a ticket with a payload of a string value is referred to as a "string ticket."
The ticket's information is public and can be read by any contract that holds the ticket.
Passing tickets
Contracts can pass tickets to entrypoints to change which contract is in control of the ticket.
If contract A passes a ticket to contract B, contract A loses all access to the ticket.
Contracts can pass tickets to other contracts via entrypoints accepting a ticket of the correct type; contracts can also pass tickets to user accounts.
Ticket features
There are three main features at the core of tickets, each associated with one of its three pieces of information:
Guaranteed origin
The ticketer address always refers to the contract that created the ticket.
Contracts can't change the ticketer address or create tickets that reference other contracts as the creator.
Immutability of the wrapped value
The data stored in a ticket (the wrapped value) can't be changed after the creation of the ticket, even by the contract that created it.
Splitting and joining tickets
The contract that creates the ticket sets the initial amount to any natural number.
From then on, contracts that control tickets can change them in the following ways:
SPLIT_TICKET: A contract splits a ticket into two tickets.
Both new tickets have the same ticketer address and payload, but the amount of the initial ticket is split between the two.
The initial ticket is destroyed.
JOIN_TICKETS: A contract merges two tickets into a single ticket.
The tickets must have the same ticketer address and payload.
The new ticket has the same ticketer address and payload as the originals, and its amount is the sum of the amounts of the joined tickets.
The two initial tickets are destroyed.
For example, a contract can create a single ticket with a large amount and send it to another contract.
The other contract can split the ticket and send the resulting tickets to other contracts, which can split and join the ticket.
Eventually, many contracts may have a ticket that was split from the original or one of its descendants.
The ticketer address and payload stays the same for all of these tickets and the sum of the amounts is always the same as the amount of the original ticket.
:::note Differentiating tickets
Because the only identifying information of a ticket is the address of the contract that created it and its payload, it is possible to create multiple indistinguishable tickets.
For example, a contract can create multiple tickets with the same payload.
After other contracts split and join these tickets, there is no on-chain way to tell which descendant ticket can from which original ticket.
For this reason, your code should verify the address of the contract that mints tickets before trusting them.
:::
Benefits of tickets used as tokens
The key benefit of tickets is that they continue existing independently of the contract that issued them.
This is very different from how tokens are usually managed, such as tokens that use the FA 1.2 or FA 2 standards.
Such tokens are fully under the control of the issuing contract; for example, transferring such a token may only be done by calling the smart contract that issued it.
Wrapping can be used as a way to work around this, but this is not technically transferring the token itself.
This helps bring extra trust in the value of the tokens represented by tickets, because there is no risk of the tokens suddenly becoming unusable if the issuing contract fails.
Tickets increase the decentralization of tokens and make them behave more like the native tez token, but with many more features and additional trust.
Operations on tickets
Contracts can run these operations on tickets:
Creating a new ticket with a given content and amount, and the current contract as the ticketer (TICKET)
Reading a ticket, which returns the three values contained in the ticket plus the ticket itself (READ_TICKET)
Splitting a ticket into two tickets with the same content and ticketer, but splitting the amount (SPLIT_TICKET)
Joining two tickets that have the same content and ticketer into a new ticket with the sum of the amounts (JOIN_TICKETS)
Implementation details
Michelson: Operations on tickets
LIGO: Tickets
Archetype: create_ticket and related
SmartPy: Tickets
Unit {#unit}
In Tezos, the unit type contains a single value that holds no information.
Smart contracts use unit values as placeholders where a variable is required but no other information is needed.
It is the input type of functions taking no input, the output type of functions producing no output, and the storage type of contracts storing no information.
For example, if a LIGO entrypoint receives no parameter, the data type of the entrypoint's parameter is unit:
Similarly, if you call this entrypoint with the Octez client and omit the --arg argument to pass no parameter, the client passes unit in the background.
Unit is a concept that Tezos inherits from OCaml; see Side-Effects and the unit Type in the OCaml documentation.
Implementation details
LIGO: Unit
Archetype: Unit
SmartPy: Unit
Cryptographic data types
Tezos provides hash functions for cryptographic purposes.
By default, use BLAKE2B, which computes a cryptographic hash of the value contents using the Blake2b-256 cryptographic hash function.
These other hash functions are available:
KECCAK: Compute a cryptographic hash of the value contents using the Keccak-256 cryptographic hash function.
SHA256: Compute a cryptographic hash of the value contents using the Sha256 cryptographic hash function.
SHA512: Compute a cryptographic hash of the value contents using the Sha512 cryptographic hash function.
SHA3: Compute a cryptographic hash of the value contents using the SHA3-256 cryptographic hash function.
Checking signatures
Tezos lets you check that a given piece of data, a sequence of bytes in a bytes data type, has been signed by the holder of the private key corresponding to a given public key.
The primitive CHECK_SIGNATURE takes as parameters the sequence of bytes, the signature and the public key, and returns a Boolean that indicates if the signature is indeed a signature of that sequence of bytes, by the holder of ths key.
BLS12-381 primitives
BLS12-381 is the name of an elliptic curve, a cryptographic primitive that can be used for digital signatures and zero-knowledge proofs.
It has the particularity of being pairing-friendly, which makes it possible to create short digital signatures that can be efficiently aggregated.
It can also be used for identity-based cryptography, single-round multi-party key exchanges, or and efficient polynomial commitment schemes such as KZG commitments.
Implementation details
Michelson: Cryptographic primitives, BLS12-381 primitives
LIGO: Crypto
Archetype: Blake2b and related, Elliptic curves
SmartPy: Cryptography
Taquito: Signing data
Time-locks
A timelock is a cryptographic primitive that can be used as part of a commit-and-reveal scheme, to provide a guarantee that the information associated to the commit is eventually revealed.
For information about using time-locks, see Timelocks.
Implementation details
Michelson: Time-lock
Archetype: Timelock
LIGO: Timelock
Comparing values
The ways that you can compare values depends on the types of those values.
Many types allow the usual comparison operators: =, !=, <, >, ≤ and ≥.
The syntax depends on the language.
Comparing values in this way produces a Boolean type that you can use in conditional instructions or to continue or terminate loops.
How values are compared depends on the type of the values:
nat, int, mutez and timestamp values are compared numerically.
Strings, bytes, key_hash, key, signature and chain_id values are compared lexicographically.
Boolean values are compared so that false is strictly less than true.
Address are compared as follows:
Addresses of user accounts are strictly less than addresses of smart contracts.
Addresses of the same type are compared lexicographically.
Pair values (and therefore records) are compared component by component, starting with the first component.
Options are compared as follows:
None is strictly less than any Some.
Some x and Some y are compared as x and y.
Values of union types built with or are compared as follows:
any Left x is smaller than any Right y,
Left x and Left y are compared as x and y,
Right x and Right y are compared as x and y.
Values of type Unit are all equal.
In Michelson, comparisons are done in two steps:
A COMPARE instruction consumes the values and produces a value that is 0 if the two elements are equal, negative if the first element in the stack is less than the second, and positive otherwise.
The instructions EQ (equal), NEQ (not equal), LT (lower than), GT (greater than), LE (lower or equal) and GE (greater or equal) consume this value and return the corresponding Boolean value.
Implementation details
Michelson: Generic comparison
Archetype: Comparison operators
SmartPy: Comparing sp.int and sp.nat
LIGO: Comparing values
Loops and iterations
A smart contract can contain loops, which take two general forms:
Conditional loops, which keep iterating as long as a given condition is true, such as while loops
Loops that iterate through every element of a data structure such as a list, map, or set
:::warning
When using loops, be careful of attacks that could increase the number of iterations in the loop.
:::
In many cases, it is possible to avoid performing loops in the contract itself by doing most of the computations off-chain.
Implementation details
Michelson: Control structures
Archetype: Asset - iteration, for, while, iter
LIGO: Iteration
Operations
The execution of the code of an entrypoint can have only two effects:
Changing the value of the storage of the contract
Generating new operations that run after the entrypoint execution is over
These operations can include:
Transferring tez to an account or to a smart contract entrypoint (TRANSFER_TOKENS)
Originating a new smart contract (CREATE_CONTRACT)
Setting the delegate of the current smart contract (SET_DELEGATE)
Only the first type is technically a transaction, but the terms "operation" and "transaction" are often used interchangeably in courses, documentation, and tools.
Don't worry too much about the difference.
Order of execution
The code of a contract never directly executes an operation or a transfer of tez.
Instead, it adds operations to a list and the list is added to a stack of operations to run after code of the entrypoint is complete.
The operations generated by a contract are executed in the order that they are added to the list.
All the operations generated by a contract and the operations these end up generating are executed before any other operations previously added to the stack.
For example, if a contract generates operations A and B, and operation A generates operation C, operation C runs before operation B.
Operation examples
For example, assume three contracts named A, B, and C that each have an entrypoint named "Start."
Contract A's storage has a value named "text," which is a string.
Contract A also has an entrypoint named "Add," which adds text to the storage string based on a string that the sender passes.
This table shows the logic of the entrypoints:
{
Operation Walkthrough
If a user calls A.start(), the following happens:
A.start() runs:
Replaces its storage text with "Start A,"
Adds operation B.start() to the list of operations
Adds operation C.start() to the list of operations
Adds "End A," to its storage, which becomes "Start A, End A"
Pushes the operations from the list [B.start(), C.start()] to the stack; B.start() is on the top
B.start() runs:
Adds operation A.add("Start B,") to the list of operations
Adds operation A.add("End B,") to the list of operations
Pushes the operations from the list [A.add("Start B,"), A.add("End B,")] to the top of the stack; the operation stack is now [A.add("Start B,"), A.add("End B,"), C.start()]
A.add("Start B") runs:
Replaces its storage with "Start A,End A,Start B,"
A.add("End B") runs:
Replaces its storage with "Start A,End A,Start B,End B,"
C.start() runs:
Adds operation A.add("Start C,") to the list of operations
Adds operation A.add("End C,") to the list of operations
Pushes the operations from the list [A.add("Start C,"), A.add("End C,")] to the top of the stack
A.add("Start C") runs:
Replaces its storage with "Start A,End A,Start B,End B,Start C,"
A.add("End C") runs:
Replaces its storage with "Start A,End A,Start B,End B,Start C, End C,"
At the end of all operations, A's storage is "Start A,End A,Start B,End B,Start C, End C,".
To summarize:
All of the code in an entrypoint runs before the operations it generates run
If a contract A generates a call to a contract B then a call to a contract C, all of the operations generated by B run before contract C runs.
If any of these operations cause a failure, everything is cancelled, including operations that have already completed.
Implementation details
Michelson: Operations on contracts
Archetype: Operation
LIGO: Inter-contract invocations
SmartPy: Operations
Handling errors
Unlike in many programming languages, there is no exception management on Tezos.
More precisely, there is no way to catch or intercept problems and trigger some alternate behavior when problems happen.
Instead, Tezos uses failures, which immediately cancel operations.
When code introduces a failure, all of the operations are canceled and any completed operations are reverted, as if the initial call to the contract never happened.
To reduce the risk of bugs, there is no way to catch or prevent a failure after code introduces it.
What happens after a failure?
On Tezos, a failure causes several things to happen:
The execution of the contract is immediately stopped and all of its potential effects are cancelled.
All prior effects of the contract are reverted, as if they never happened, like a database rollback.
Any changes to the storage are reverted.
The contract's balance is restored to what it was before execution started.
Furthermore, if the contract was called by another contract, or if it generated a call to another contract, all of these operations are cancelled as well.
The entire execution of everything, from the initial contract call by a user to the failure, is undone.
This is a double-edged sword that you must keep in mind when designing a contract:
positive impact: If something doesn't happen as intended and a single failure happens somewhere during a contract call or subsequent calls it produces, nothing at all happens, and you don't end up in an inconsistent state corresponding to a partial execution.
negative impact: It takes only one small issue in one of the contracts called as a consequence of your initial call for everything that you wanted to happen to be undone.
In some cases, this can mean that your contract becomes unusable.
Automatic failures
Some instructions automatically cause a failure.
Here are a few examples:
Causing an overflow on a mutez type, such as when adding or multiplying
Trying to do a bitwise left shift or right shift of a nat type by more than 256
Generating a transaction where the amount of tez transferred is greater than the balance of the contract that creates the transaction
Generating a transaction for an address that doesn't exist
There aren't too many of these cases, as most instructions that could cause an error use options as their return values, which allows (and also forces) you to explicitly handle the error case.
For example, integer division (EDIV) returns an option; if the division is successful, it returns Some and if the code tried to divide by zero, it returns None.
Raising failures
If your code encounters a problem, you can raise a failure.
The failure includes an error value that can help users or tools of a contract understand what went wrong.
See the documentation for your language for how to raise a failure.
Error values
The error value is meant to be used off-chain as information to identify the cause of the error.
Nothing can be done with it on-chain, because nothing at all happens on-chain when an error is produced.
The typical error value is a string with an error message, such as Error: deadline has expired.
Internally, all kinds of error values can be produced, such as integers or records.
The types supported depend on the language.
In particular, the error value is often used when testing contracts, where the test verifies that a specific invalid call produces a specific error.
Implementation details
Michelson:
Failures
Control structures
FAIL
Assertion macros,
Archetype: require, fail if
SmartPy: Exceptions
LIGO: Exceptions
Creating smart contracts
This documentation provides step-by-step instructions for creating smart contracts on Tezos. After creating the contract, you can find the resources on testing and deploying.
Choosing your smart contract language
Tezos supports a variety of smart contract languages: Michelson, SmartPy, LIGO, Archetype.
You can select a language based on your familiarity with programming paradigms, the complexity of the contract you want to deploy, and the specific features you require. Here's a more detailed table for each language:
| | Michelson | SmartPy | LIGO | Archetype |
|:----------------:|:----------------------------------------------------------:|:-----------------------------------------------------:|:-------------------------------------------------------------------------------------:|:---------------------------------------------------------------------------------:|
| Complexity | High (stack-based, low-level) | Low (Python-like, high-level) | Moderate (various high-level syntaxes) | Moderate (includes formal specification features) |
| Capabilities | Full control over contract, optimal for gas efficiency | Easy to write, automatically manages stack operations | Statically-typed, strong error checking | Specialized for formal verification and correctness |
| Use Cases | Optimized contracts, developers with blockchain experience | Python developers, rapid prototyping | Developers familiar with static typing, variety of mainstream programming backgrounds | High-security contracts, developers looking for formal proof of contract behavior |
For beginners, we recommend SmartPy or LIGO for their higher-level more abstracted approach.
Making a strategic choice
Before writing your code, take some time to consider whether your project is suitable for starting with a pre-existing template or if it would be better to start from scratch. Essentially, this depends on the type of contract you are building. For example:
FA2 contract: it’s better to use a template to start.
Others: build it from scratch.
Coding your contract
Before coding, you should clearly outline the purpose of your smart contract, define the problem it addresses, detail the functions it will perform, and specify any external interactions or transactions it will manage.
Starting with online IDE
The online editor is the quickest and easiest way to get started.
For example:
For smartpy user, we recommend to use the SmartPy online IDE
For LIGO user, we recommend to use the LIGO online IDE
Defining contract storage
Contract storage holds the persistent state of your smart contract. It’s important to carefully design your storage since storage is expensive on-chain. You should avoid storing any data that the contract will not use.
SmartPy: Use Pythonic classes and types to represent storage. SmartPy provides a straightforward way to map these into Michelson storage requirements.
LIGO: Choose the most suitable syntax flavor and use the type definitions to lay out the storage structure.
In Tezos, big maps are a storage optimization feature for large sets of data, especially when handling large datasets that don't need to be fully loaded into memory at once. Big maps are ideal for ledger applications with numerous accounts, as they load data lazily, fetching only necessary parts on demand. In contrast to regular maps, suitable for smaller collections, and lists, which order data, big maps save costs when the dataset is large.
In SmartPy, you can define a big map using sp.big_map, and in LIGO, you use big_map keyword for the type declaration.
Defining entrypoints
Entrypoints serve as methods to receive external communication in Tezos.
SmartPy: Entrypoints are defined as methods within a Python class that extends sp.Contract. They use decorators like @sp.entry_point to denote entrypoints
LIGO: Entrypoints in LIGO are defined as functions that manipulate storage. The function keyword is used, and each entrypoint function must be explicitly marked for export in the contract interface
You should clearly define the parameters and storage interaction for both languages.
Each entrypoint's parameters must be well-specified, with types that match the expected inputs. For example, if an entrypoint is supposed to accept an integer and a string, the parameter list should reflect this.
The contract storage is usually passed as an argument to the entrypoints. In SmartPy, the storage is accessed through the self.data attribute inside the entrypoint methods. In LIGO, storage is a parameter of the function, and it's often the last parameter by convention.
Deploying smart contracts
In Tezos, deploying a smart contract is often referred to as “origination”. This process essentially creates a new account that holds the smart contract's script. Contracts originated in this manner have addresses that start with KT1, which distinguishes them from the user accounts with addresses beginning with tz1, tz2, or tz3.
Prerequisites
Compile your contract and its initial storage
Set up an wallet account on Tezos with some tez to pay the fees
Deploying a smart contract
Generally, there are two methods for deploying your smart contracts: either using the command line in your terminal or deploying through an online IDE.
Deploying via terminal
The first one is to deploy through your terminal. Here is the syntax for the Tezos command line to deploy a smart contract:
where:
CONTRACT_NAME is the name given to the contract.
MICHELSON_FILE is the path for the Michelson smart contract code (.tz file).
AMOUNT_TEZ is the quantity of tez being transferred to the newly deployed contract. If a contract balance reaches 0 then it is deactivated.
FROM_USER account from which the tez are taken (and transferred to the new contract).
INITIAL_STORAGE is a Michelson expression. The --init parameter is used to specify the initial state of the storage.
GAZ_FEE is a specified maximal fee the user is willing to pay for this operation (using the --burn-cap parameter).
Deploying via online IDE
As for deploying through your online IDE, if you are using LIGO or SmartPy programming languages, you can deploy your smart contracts through their respective online IDEs.
SmartPy online IDE
LIGO online IDE
Compiling the initial storage value
When you deploy a contract, you initialize its storage.
The initial value of the storage must be a Micheline value, which is the format for variables in Michelson smart contracts.
The high-level languages provide tools to compile the initial values of smart contracts into Micheline values.
Compiling LIGO storage values
For LIGO smart contracts, you can use the ligo compile storage command.
For example, assume that a JsLIGO contract has a storage value that includes a list of integers, a string, and an integer:
When this contract is compiled to Michelson, the storage line of the contract looks like this:
To compile an initial value to this format, you can pass a JsLIGO value to the ligo compile storage command, as in this example:
The result is the Micheline value, as in this example:
Then you can use this Micheline value as the initial storage value for the contract:
Compiling SmartPy storage values
SmartPy lets you set the initial value of the contract storage in the smart contract code in the __init__ function.
For example, this contract defines three storage variables and sets their initial values:
Now you can compile and deploy the contract via the online IDE with these starting values.
If you want to deploy the contract with the Octez client, add a test to the contract and run the test with the command python MyContract.py.
One of the files this command creates ends in storage.tz and contains the Micheline value of the initial storage, as in this example:
Then you can use this Micheline value as the initial storage value for the contract:
Interacting with the contract
When you have successfully originated the smart contract and it is included in a baked block, there are two ways to interact with it: through command lines or through a block explorer.
Interacting through command lines
The first method involves interacting with the contract's entry points using command lines.
For example, suppose you have a smart contract with an entrypoint called update_data, which takes an integer as an argument to update some data in its storage. Here's how you might invoke this entrypoint:
Where:
CONTRACT_NAME: Identifier or the address of the contract that you want to interact with.
YOUR_ACCOUNT_ADDRESS Your own account address that will initiate the transaction.
--arg: Argument that you're passing to the entrypoint, in this case, an integer value. You need to format this according to the expected input in the contract's Michelson code.
--entrypoint: Method in the smart contract that you're calling.
--burn-cap: The maximum fee you are willing to spend for this transaction to be included in the blockchain.
Here's an example with hypothetical values filled in:
Where:
KT1Vsw5kh4P1Vn...: Contract address.
tz1VSUr8wwNhLAzempoch5d6hLRiTh8Cjcjb: User's account address.
'42': New integer value you wish to pass to the update_data entrypoint.
0.05: Maximum amount of tez you're willing to pay in fees.
:::note
Always ensure that you check the documentation specific to the smart contract you are interacting with, as the expected arguments (--arg) and the name of the entrypoint (--entrypoint) can vary widely depending on the contract's design and purpose.
:::
Interacting via blockchain explorers
A blockchain explorer is an efficient and user-friendly tool that enables you to interact with deployed contracts. In the Tezos ecosystem, there are two main blockchain explorers:
Better Call Dev
TzKT
To interact with a contract, copy its address into one of these blockchain explorers. Below is the user interface for interacting with a contract through Better Call Dev:
UI for Better Call Dev
Entrypoints
The entrypoints of a contract represent the different ways that it can be called, similar to a method or function in many programming languages or an endpoint of an API.
The entrypoints in a Tezos smart contract must meet these specifications:
Contracts must have at least one entrypoint.
Each entrypoint must have a name.
Entrypoints may accept parameters, which can be of almost any data type that Tezos supports.
Unlike functions and API endpoints, entrypoints do not return a value directly to the caller.
To return data from a smart contract, you can use one of these methods:
Use Views to return data to smart contracts or off-chain applications
Use Events to return data to off-chain applications
Include a callback parameter that sends information to another smart contract, as in the getAllowance, getBalance, and getTotalSupply entrypoints of FA1.2 contracts
For an example of a simple contract, see the tutorial Create a smart contract.
For examples of more complex contracts, see Examples of contracts on opentezos.com.
Entrypoint logic
An entrypoint may run logic based on:
The contract storage
The parameters that senders pass
Transaction context values such as the address of the caller
The table of constants
Entrypoints cannot access information outside of Tezos, such as calling external APIs.
If an entrypoint needs information from outside Tezos it must use oracles; see Oracles and Using and trusting Oracles on opentezos.com.
The only effects that an entrypoint can have are changes to its storage and new operations that are run after the entrypoint completes.
An entrypoint can call other entrypoints in its contract or entrypoints in other contracts.
Example entrypoints
The contract in the tutorial Create a smart contract has three entrypoints:
| Entrypoint | Description |
| --- | --- |
| increment | increment takes an int as a parameter and adds it to the previous value of the storage |
| decrement | decrement takes an int as a parameter and subtracts it from the previous value of the storage |
| reset | reset takes "Unit" (no value) as a parameter and sets the storage to 0 |
Implementation details: the default entrypoint
Even though your higher-level code may have separate codeblocks for each entrypoint, the compiled Michelson code uses a single codeblock with a single entrypoint, known as the default entrypoint.
This default entrypoint uses the parameter that clients pass to decide which code to run.
In most cases, developers can ignore the default entrypoint and imagine that the compiled Michelson code has multiple entrypoints like the higher-level code.
However, in some cases, you may need to consider how the contract actually decides which code to run and how clients trigger this code.
For example, when you compile the contract in the tutorial Create a smart contract to Michelson, its first line defines the parameter type that the contract accepts:
To call the reset entrypoint, clients technically call the default entrypoint and pass the Michelson-encoded parameter Left Unit.
This parameter value means that the left value of the parameter type, which is annotated %reset, is set to the value Unit, which means no value.
In its logic, the compiled Michelson code uses the IF_LEFT command to check if the left value of the parameter is defined and if so, it runs the reset entrypoint code.
In this way, the following Octez client commands are equivalent; one passes Unit to the reset entrypoint and the other passes Left Unit to the default entrypoint:
Developers need to know about the default entrypoint only when they encode parameters for smart contracts manually.
Most Tezos clients, including Octez and Taquito, encode parameters automatically.
Working from the previous example, they convert a call to the increment entrypoint with the parameter 5 as a call to the default entrypoint with the parameter Right (Right 5).
Different languages have different ways of indicating entrypoints.
For information about coding entrypoints in specific languages, see these links:
Michelson: Entrypoint
Archetype: Entrypoint
SmartPy: Contracts
LIGO: Main function and Entrypoints
Storage
Each contract has associated storage, which is persistent internal data that it can read and write to.
Contracts can access only their own storage; they can't access the storage of other contracts.
To provide information to other contracts, use Views.
However, the content of the storage of a contract is public, like everything else in the state of the blockchain.
Therefore, you can see the current value of the storage of any contract using an explorer such as Better Call Dev.
The type of the storage is fixed by the code of the contract and cannot change.
It can be any type, from a basic primitive type such as a nat, to a complex type that includes lists, sets, big-maps, and variants.
See Examples of contracts on opentezos.com for ideas about how storage can be used.
Implementation details
Michelson: Semantic of contracts and transactions
Archetype: Storage
SmartPy: Contracts
LIGO: Main function
Special values
The code of a contract can access some special values.
See the reference for your language for information about accessing these values:
caller: The address of the direct caller of the current entrypoint.
This value is often used for these reasons:
To check that the caller is allowed to call the entrypoint.
For example, only a member of a DAO may call its vote entrypoint.
Only the owner of an NFT may call an addToMarket entrypoint of a marketplace to put the NFT on sale.
To assign or transfer resources to the caller or to store information about them.
For example, a user may call a buy entrypoint of an NFT marketplace and the contract assigns ownership of the NFT to them.
The contract assigns ownership by storing the caller address in the record that is associated with the NFT.
source: The address of the initiator of the sequence of calls that led to this entrypoint.
For example, assume that user A called contract B that in turn called contract C:
A -> B -> C
When C runs, source is the address of A, while caller is the address of B.
:::warning Access permissions
It is best practice to implement permissioning based on caller instead of source because any user account can call any entrypoint on Tezos.
:::
self: The address of the contract itself.
For example, you can ensure that an entrypoint is called only by the contract itself by verifying that caller = self.
balance: The amount of tez (in mutez) in the contract, including any tez that have been transferred to the contract by the current transaction.
amount: The number of tez that have been transferred to the contract during the current transaction.
These tez are added to the balance, except if the execution ends in a failure.
Some languages refer to this amount with the name transferred.
:::note Rejecting tez
By default, an entrypoint automatically accepts any tez that is sent to it.
If the contract should not accept tez, it can reject tez by verifying that the amount is zero.
:::
now: The timestamp of the current block.
This value is the same during the execution of all of the contract calls from the same block.
Technically, this value is equal to the timestamp of the previous block plus the minimum block delay (the expected duration between two blocks).
This prevents the baker of the current block from manipulating this value, while keeping it predictable to everyone.
This value is often used to check deadlines, for example, if someone has to vote before a certain date.
level: The level of a block corresponds to the number of blocks in the chain since the beginning of the chain (genesis block) until that block.
It increments by one for each new block.
Implementation details
Michelson: Special operations, Operations on contracts
Archetype: Constants
SmartPy: Timestamps
LIGO: Tezos, Tezos specific built-ins, Tezos.now
Global table of constants
Tezos provides a feature that lets user store data in a global table of constants.
This makes it possible to reuse code or data between contracts, and by doing so, reducing the size of these contracts.
It is a write-only key-value store, where anyone can add data as long as they pay for the storage costs.
When you register a piece of data in this table, you obtain its address, which is a Base58-encoded Blake2b hash of the binary serialization of the data.
The data can then be referenced anywhere in your code.
It can be used to store code, types, or data.
Implementation details
Michelson: Global constants
LIGO: Global constants
Archetype: Global constants
Serialization
Between contract calls, the code of a contract, as well as its storage, are stored as a serialized sequence of bytes, for efficiency purposes.
Every time the contract is called, the serialized code and storage are deserialized, unless the deserialized version is still cached.
Similarly, after the execution of the contract, the storage needs to be serialized to be stored again as a sequence of bytes.
This takes CPU time, which means that when you call an entrypoint, on top of paying for the gas for the execution of the code of the entrypoint itself, you also need to pay for this serialization/deserialization.
The cost to call a very simple entrypoint may get large if there is a lot of data in its storage.
Remember that unlike the rest of the storage, big-maps are not entirely serialized/deserialized for each call.
Instead, only the values that are read are deserialized, and only the values that are added or updated are serialized.
This makes using big-maps more efficient in these cases.
PACK and UNPACK
Tezos provides the ability to serialize and deserialize data or code yourself:
The PACK instruction takes a value of (almost) any type, and serializes it into a bytes value.
The UNPACK instruction takes a bytes value, and deserializes it into its original value.
As the deserialization may be impossible if the sequence of bytes doesn't represent valid serialized data, it returns an option type.
Serializing your own data in this way may be useful if you want to apply operations that are only available on bytes values.
For example, you may want to compute the hash of some data.
You can do so by packing it first and then applying a hash function such as BLAKE2B on the resulting bytes value.
Formatting
The Tezos PACK instruction prepends this metadata to the serialized value:
One byte to indicate the data format, usually 05 to indicate a Micheline value.
One byte to indicate the data type, such as string, int, nat, or address.
Four bytes to indicate the length of the data in bytes.
The rest of the serialized value is the original value converted to hexadecimal.
This metadata allows Tezos to compress data such as addresses into fewer bytes than ordinary byte-encoded strings.
For example, if you pack the address tz1QCVQinE8iVj1H2fckqx6oiM85CNJSK9Sx, the resulting bytes are 0x050a00000016000032041dca76bac940b478aae673e362bd15847ed8, but if you pack the string value tz1QCVQinE8iVj1H2fckqx6oiM85CNJSK9Sx, the resulting bytes are longer: 0x050100000024747a3151435651696e453869566a31483266636b7178366f694d3835434e4a534b395378.
Because of this metadata, you can't use other byte serialization functions to pack and unpack data on Tezos.
Many Tezos tools include functions to pack and unpack data, including LIGO, SmartPy, and the Octez client.
For example, to pack the address tz1QCVQinE8iVj1H2fckqx6oiM85CNJSK9Sx with the Octez-client, run this command:
To unpack the resulting bytes, use the unpack michelson data command to remove the metadata and then the normalize data command to get the original value, as in this example:
For more information about the format that Tezos uses to pack and unpack data, install the octez-codec program and run this command:
Implementation details
LIGO: Pack and Unpack
SmartPy: Packing and Unpacking
Archetype: pack, unpack
Private transactions (Sapling)
Sapling is a protocol that enables transactions of fungible tokens while increasing privacy.
It hides transactions from the public, but allows specific entities to view them to comply with regulations.
The key steps are as follows:
A shielded pool is created within a contract which a number of users can call to perform transactions whilst keeping details private.
The users send tokens to this shielded pool, which is called shielding tokens.
Information about these transactions is public.
Users perform shielded transactions, in such a way that the amount, sender of receiver of each transactions are not revealed publicly.
Only the origin and destination of each transaction have access to the transaction information.
Later, users may get some or all of their tokens out of the pool by unshielding their tokens.
Information about these transactions is public.
If a regulator needs access to the transactions of a user, this user may share a viewing key, which gives access to all the transactions made by this user.
Note that using the Sapling protocol in a shielded pool and expecting a high degree of privacy requires taking a number of precautions, including:
Making sure there are enough members in the pool to ensure anonymity.
For example, if there are only two members, it becomes very easy to identify the source and destination of transactions.
Adding dummy transactions, or dummy inputs and outputs of transactions, to hide the actual number of parties involved in each transaction.
Making sure to use shielded tokens in multiple transactions.
For example, if a user shields exactly 16.32 tokens and another user later unshields exactly 16.32 tokens, the transaction may be traceable.
Being careful about information that can be deduced from the timing of transactions.
The internals of Sapling are quite technical.
The system is based on an UTXO (bitcoin-like) transaction system, where each transaction consumes some unspent output and produces new unspent outputs.
It uses a system of cryptographic commitments in place of public amounts and addresses, that can then be "consumed" using a system of nullifiers.
The process uses a mix of cryptographic tools including SNARKs, incremental Merkle trees, and Diffie-Hellman key exchanges.
Implementation information
Michelson: Sapling integration
Archetype: Sapling
LIGO: Sapling
Views
Views are a way for contracts to expose information to other contracts and to off-chain consumers.
Views help you get around a limitation in smart contracts: a smart contract can't access another contract's storage.
Smart contracts can provide information via callbacks, but using a callback means calling entrypoints, which is an asynchronous action.
By contrast, views are synchronous; a contract can call a view and use the information that it returns immediately.
Like entrypoints, views can accept parameters, access the contract's storage, and call other views.
Unlike entrypoints, views return a value directly to the caller.
However, views can't cause side effects, so they can't create operations, including calling smart contracts and transferring tez.
Views also can't change the contract storage.
Off-chain users can run a view without creating a transaction, which is a convenient way to get information from a smart contract.
For example, you can use the Octez client run view command to run a view from the command line.
Types of views
Contracts can store the source code of their views either on-chain or off-chain:
The code of on-chain views is stored in the smart contract code itself, like entrypoints.
The code of off-chain views is stored externally, usually in decentralized data storage such as IPFS.
The contract metadata has information about its off-chain views that consumers such as indexers and other dApps use to know what off-chain views are available and to run them.
On-chain and off-chain views have the same capabilities and limitations.
Examples
Views can provide information about tokens.
You can use views to provide an account's balance of a token type or the total amount of a token in circulation.
DEXs can provide the exchange rate between two tokens or the amount of liquidity in the pool.
Instead of repeating certain logic in multiple places, you can put the logic in a view and use it from different smart contracts.
Creating views in JsLIGO
Views in LIGO look like entrypoints because they receive the input values and storage as parameters, but they have the @view annotation instead of the @entry annotation.
They return a value instead of a list of operations and the new value of the storage.
This JsLIGO view returns the larger of two numbers:
This view returns a value from a big-map in storage:
Calling views in JsLIGO
This JsLIGO code calls the get_larger view from the previous example by passing the target contract address, parameters, and view name to the Tezos.call_view() function:
If the view takes no parameters, pass a Unit type for the parameter:
Creating views in SmartPy
Views in SmartPy look like entrypoints because they receive the self object and input values as parameters, but they have the @sp.onchain_view annotation instead of the @sp.entrypoint annotation.
This SmartPy contract has a view that returns a value from a big-map in storage:
Calling views in SmartPy
In SmartPy tests, you can call views in the contract just like you call entrypoints.
However, due to a limitation in SmartPy, if the view accepts multiple parameters, you must pass those parameters in a record.
For example, to call the get_larger view in the previous example, use this code:
To call a view in an entrypoint, pass the view name, target contract address, parameters, and return type to the sp.view() function, as in this example:
If the view takes no parameters, pass () for the parameter:
Calling views with Taquito
Calling a view with Taquito is similar to calling entrypoints.
When you create an object to represent the contract, its contractViews property has a method for each view, which you can call as in this example:
Calling views with the Octez client
To call a view with the Octez client, use the run view command, as in this example:
If the view takes no parameters, you can pass Unit or omit the with input.
Implementation details
Octez: On-chain views
Archetype: View
SmartPy: Views in testing
LIGO: On-chain views
Taquito: On-chain views
Events
Events are a type of internal operation on Tezos.
Smart contracts emit events and off-chain applications can listen for events to know when things happen on the chain.
Event data
An event includes data about the call to the smart contract that triggered the event, including the hash of that operation and the level of the block that included the operation.
The event can also include these optional fields:
A tag that can identify the type of event or help clients filter the stream of events.
A payload of data in Michelson format
The Michelson data type of the payload
Emitting events
Each high-level language has its own way of creating events.
The compiled Michelson code uses the EMIT command to emit the event.
For example, this contract stores a number and emits events when that amount changes:
JsLIGO
SmartPy
When a client calls the reset entrypoint, it emits an event that is tagged with "reset" and includes the address that called the entrypoint and the amount that the storage was before it was reset to 0.
Responding to events
Smart contracts cannot respond to events.
Off-chain applications can listen for and respond to events by monitoring the event operations in blocks.
For example, Taquito includes tools to listen for and respond to events.
For example, this code listens for events from the contract with the address contractAddress and the tag tagName:
Both the tag and address parameters are optional in the subscribeEvent function, but most clients are interested in events from a specific contract address or tag.
The event data is in Michelson format, so an event from the reset entrypoint of the previous example contract might look like this:
Note that the address field is returned as a byte value.
To convert the bytes to an address, use the encodePubKey function in @taquito/utils.
You can see the complete content of the event operation by looking up the operation hash in a block explorer.
For example, to see the operation in the previous example, look up the operation onw8EwWVnZbx2yBHhL72ECRdCPBbw7z1d5hVCJxp7vzihVELM2m.
Implementation details
Michelson: Contract events
LIGO: Events
SmartPy: sp.emit
Archetype: Events
Taquito: Contract Events
Delegation
Placing your tez in a smart contract means you can't stake them towards baking or delegate them to get rewards.
However, the smart contract itself can delegate the tez it holds and distribute the rewards to the original owners of the tez or keep them in its balance.
To manage delegation, you can implement these features:
Set, update, or remove the address of the baker that you want the contract to delegate its tez to (SET_DELEGATE).
Obtain the voting power of a contract (a delegate), which is based on its total staking balance as computed at the beginning of the voting period (VOTING_POWER).
Obtain the total voting power of all contracts (TOTAL_VOTING_POWER).
In practice, both the voting power of a contract and the total voting power of all contracts are expressed as a number of mutez, but this may change with time as the protocol evolves.
Implementation details
Michelson: Operations on contracts
Archetype: Total voting power, Voting power, set_delegate
SmartPy: Operations
Multi-signature contracts
Multi-signature (or multisig) contracts require multiple accounts to authorize operations before running them.
They have many applications, including:
Governance: DAOs and other groups can use them to vote on the actions that the organization takes.
Funds distribution: Accounts can vote on where funds are sent.
Security: Requiring multiple signatures can prevent a single compromised wallet from doing malicious things.
As with any contract, a single account must originate multisig contracts, but that account does not necessarily have any special privileges on the contract.
The contract originator does not even need to be one of the accounts that can authorize operations.
Using proposals
One common way to create a multisig contract is to allow authorized users to submit a proposal that other authorized users can vote on.
For example this multisig contract stores tez and allows users to propose and vote on the account that should receive the tez.
It stores a big-map of proposals, each with an amount to pay, the account to pay, and information about who has voted for the proposal:
The submit_proposal entrypoint allows authorized users to submit a payment amount and an account address, which adds a proposal to the storage:
Authorized accounts call the vote_on_proposal entrypoint to vote for the currently active proposal:
Accounts that don't want to vote for the proposal don't need to do anything.
When the necessary number of votes have been reached, the vote_on_proposal entrypoint automatically sends the tez to the account in the proposal:
Using multi-signature operations
You can also require operations to be signed by multiple accounts.
For example, the Octez client has a built-in multisig contract that you can use.
The contract requires signatures from multiple accounts before running transactions such as :
Distributing tez
Changing the threshold
Changing the accounts
Setting the delegate of the contract
Running arbitrary Michelson code
To originate the contract, you specify the accounts to include as authorized signers of the contract and the threshold, which is the number of accounts that are needed to authorize a transaction.
This example creates a contract with three members and a threshold of 2:
To initiate a transaction, use the octez-client prepare multisig transaction command.
For example, this command initiates a transfer of 10 tez from the contract to Bob's account:
The response includes a string of bytes that the other accounts must sign, as in this example:
To sign the bytes, the other accounts run the octez-client sign bytes command.
For example, this code assigns the bytes to the TO_SIGN variable and signs them with two accounts:
Then you can use the two accounts' signatures to run the transaction:
The contract uses a counter to ensure that the signatures work only once.
For more information, run the command octez-client man multisig and see Built-in multisig contracts in the Octez documentation.
Setting up multi-signature wallets
Some tools create wallets that can store tez and other tokens and manage the process of signing transactions.
For example, TzSafe provides a front-end application that lets you:
Create a multisig wallet and store tez, FA1.2 tokens, and FA2 tokens in it
Create proposals to transfer tokens
Sign or reject proposals
Run approved proposals
For more information about TzSafe, see https://docs.tzsafe.marigold.dev.
Securing multisig contracts
Like all contracts, you must ensure ensure that multisig contracts won't become compromised or permanently blocked.
Control the list of voters, how accounts can be added or removed, and how many votes are needed to approve a proposal
Prevent users from blocking the contract by setting a time limit for proposals
Prevent users from clogging the contract with too many proposals or submitting a new proposal before other users have time to vote on the current proposal
More information
For more information on multisig contracts, see examples in the repository https://github.com/onedebos/multisig and an explanation in this video: https://www.youtube.com/watch?v=r9QrrSfJuVg.
Timelocks
Timelocks are a way to prevent exploits known as front-running, or more properly, extractable value (EV) attacks.
In general, these attacks happen when a client uses information about an upcoming transaction to make a profit at its expense.
:::note
Within decentralized finance, the term "front-running" can be misleading because it implies a relationship between clients and block producers where none may exist.
In traditional finance, front-running often relies on malicious brokers profiting from advance, nonpublic information about their clients' trades.
For example, a malicious stockbroker may buy a security for themselves before they execute a client's large buy order, knowing that the client's buy order will drive the price of the security up.
In decentralized finance, anyone can see incoming transactions, so front-running does not always mean that block producers are acting maliciously or sharing private information with clients.
EV attacks can come from bots that watch for incoming transactions and insert their own transactions before the incoming transaction runs.
However, block producers may still be able to profit from advance information about transactions.
For example, they may craft blocks that include a client's transaction and one of their own in an order that guarantees a gain to the block producer.
This type of attack is called a block producer extractable value (BPEV) attack.
:::
For more information about this kind of attack, see An analysis of Ethereum front-running and its defense solutions.
Preventing EV attacks with timelocks
Tezos developers can prevent EV attacks with timelock encryption, which encrypts a message so it can be decrypted in two ways:
The author of the encrypted message provides the unencrypted message and proof that it matches the encrypted message.
Anyone else can decrypt the message with a certain number of operations.
With timelocks, an author can encrypt a message in such a way that anyone else can reveal the message, but only after a certain amount of time.
This duration is based on the time it takes for a single computer to decrypt the commitments because the decryption algorithm can’t be parallelized.
That means that computers can’t easily work together to decrypt it and that adversaries cannot break it even with significant computing power.
dApps that use timelocks to prevent EV attacks work in this general way:
A user sends a timelock-encrypted transaction or operation to the dApp.
The dApp adds the transaction to its queue before anyone can see what the transaction is.
To everyone else, including bakers, bots, and the dApp itself, the transaction is encrypted and unreadable.
No one else can decrypt the transaction quickly, so they can’t take advantage of it in an EV attack.
In the background, the dApp begins decrypting the transaction.
One of two things happen:
The user submits the decrypted transaction and the proof that the decryption is accurate to the dApp before the dApp decrypts the transaction.
The dApp decrypts the transaction before the user submits the decrypted transaction, such as if prices changed and the user doesn't want to execute the transaction anymore.
In this case, the dApp takes a penalty charge from the transaction for making it waste processing power on decrypting it.
The dApp fulfills the decrypted transactions in its queue in the order that they were submitted.
In practice, DeFi users nearly always submit their decrypted transactions before anyone else decrypts them.
They don’t want to pay the penalty and they know how long it will take the dApp to break the transaction’s encryption.
Flow of timelocks in a typical commit-and-reveal scheme
Timelocks are often used to ensure that a group of users each submit information while keeping their submissions secret for a certain amount of time.
Sometimes this process is called a commit and reveal scheme because all users commit to their choice without seeing the others' choices.
This is the typical usage pattern of a timelock:
In the first time period, a contract collects timelock encrypted values from users along with some valuable deposit, such as tez.
In the second time period, after the values are collected, users submit a decryption of the value they submitted with a proof that the decryption is correct.
This prevents users from changing their values.
In the third time period, if any value isn't decrypted, anyone can claim some of the deposit by submitting a decryption of the value.
This prevents users from profiting by not revealing their decrypted values or blocking the process.
This period needs to be long enough so that people have enough time to perform the timelock decryption.
Finally, the contract runs some logic based on the decrypted data.
For example, it might distribute funds to a winner or run an operation that the majority of the users secretly voted for.
Contracts can assess different penalties for not revealing, depending on whether the user merely failed to submit a decryption for their value or if they also intentionally encrypted invalid data.
They can also distribute different rewards for submitting a correct decryption.
Because it's possible to reveal the data eventually, all participants have an incentive to reveal because they will eventually lose their deposit when someone else cracks and reveals the data.
In this way, timelocks work as a deterrent; in practice, participants nearly always reveal rather than forcing someone else to crack the encryption.
However, the second period needs to be long enough so that bakers cannot easily censor submission of the decryption in a bid to later claim the reward.
Also, contracts should burn part of a deposit when another user submits a decryption of someone else's value.
Burning a part of the deposit limits attacks where a user gets back their whole deposit by providing the decryption, but in a way that delays everyone else.
Example
Timelocks make it possible to prove that a certain decision was taken before some information was revealed.
This information may be the decision of other participants or some external independent information.
As an example, imagine that two players want to play the game rock, paper, scissors via a smart contract.
If one player can see another player's choice before they choose, they will win every time.
Because it is impossible to force and verify that the two players reveal their choice simultaneously, they can use a commit-and-reveal scheme.
During the first step, they pick their choice and put it in a pair with some random data.
Then they compute a hash of the result to create a timelock and send this value to the contract as a commitment.
After both players have sent their commitment, they can reveal by sending the actual data to the contract including the random data.
The contract can verify that the hash of this data matches the previous commitment.
When the two players have revealed their data, the smart contract determines the outcome of the game and distributes rewards accordingly.
References
Timelock puzzles and timed release Crypto
Not protecting against bots (BPEV attacks)
How Tezos timelocks help protect DeFi transactions
Oracles
Oracles provide data to smart contracts that they wouldn't be able to access otherwise.
Because smart contracts can't access data from outside the blockchain, including calling external APIs, you can use oracles to provide the data.
At a basic level, oracles have two parts:
The off-chain part provides external data to the on-chain part via ordinary smart contract transactions
The on-chain part stores the data on the chain and provides it to consumer smart contracts
How the oracle works is up to the designer.
Generally speaking, oracles allow smart contracts to call them for information and charge a fee or subscription in exchange.
An example of an oracle is Harbinger, which provides information about currency exchange rates.
Trusting oracles
The difficult part of setting up oracles is ensuring that the data they provide is accurate and authoritative so it can be trusted.
For example, oracles can average multiple sources of data like currency prices to prevent manipulation of the data and ensure that it does not rely on a single source.
They can use encryption to sign data and prove that it it authoritative.
For ways to set up oracles to be trustable, see Using and trusting oracles on opentezos.com.
Decentralized applications (dApps)
One of the main features of blockchains is decentralization: each transaction is verified by multiple nodes and its validation process does not rely on a single trusted third party.
Decentralized applications (dApps or Dapps) take advantage of these features to create applications that are independent, transparent, and trustless.
In general, dApps have these parts:
Frontend: An off-chain component that can act as a user interface to simplify interaction with the on-chain component, run off-chain processing, and get information from sources that are not available to the on-chain component
Middleware: Optionally, an indexer to interpret the backend information and provide it in a more convenient format for the front-end component
Backend: An on-chain component that consists of one or more smart contracts
The off-chain component can be nearly any kind of program, including a web application, mobile or desktop app, or command-line interface.
It relies on wallets and tools to interact with the smart contracts on behalf of a user's Tezos account.
Fundamental diagram of dApps, showing the frontend, indexer, and backend
Some of these tools that allow an off-chain component to interact with smart contracts include:
Taquito, an SDK for JavaScript/TypeScript applications
The Tezos Unity SDK, a toolkit for the Unity game development platform
Taqueria, a development platform for dApps
The next pages in this section illustrate dApps with examples, detail the main steps when developing dApps such as Connecting to wallets and Sending transactions, and introduce some best practices
Tutorials
These tutorials cover dApps of different complexities:
For a simple dApp, see Build a simple web application
For a dApp that mints NFTs, see Mint NFTs from a web app
For a large dApp that allows users to buy and sell NFTs, see Build an NFT marketplace
Sample dApps
Here are some sample web applications that access Tezos:
Completed applications from the tutorials on this website are in the repository https://github.com/trilitech/tutorial-applications
Example applications that use Taquito: https://tezostaquito.io/docs/contracts_collection/
A sample application that uses Taqueria: https://taqueria.io/docs/scaffolds/taco-shop/
Connecting to wallets
dApps must connect to user wallets to view the tokens in the account and to submit transactions on behalf of the wallet's owner.
The primary tools that dApps use to connect to wallets are:
Beacon: A JavaScript/TypeScript SDK for connecting to wallets, signing transactions, and sending information about this connection between connected apps
Beacon supports many Tezos wallets seamlessly, including TZIP-10 and WalletConnect2.0 wallets, so you don't have to write different code for each wallet that you want to support.
Beacon also implements the TZIP-10 proposal, which describes an interaction standard between wallets and dApps.
By using this standard, a dApp that uses Beacon can send messages over a peer-to-peer communication layer to a wallet, such as allowing a user to connect with an app on one platform, such as by scanning a QR code on a mobile app, and then use the dApp with the connected wallet on another platform, such as a desktop browser.
Beacon can remember the connections that have been established and the accounts that have connected to the app.
It also includes default UI elements for connecting wallets and showing the status of a transaction.
For more information about Beacon, see https://www.walletbeacon.io.
Taquito: A JavaScript/TypeScript SDK for sending transactions
Taquito provides a wrapper for Beacon so dApps can interact with wallets and with Tezos with the same code.
For more information about Taquito, see Taquito.
Beacon and Taquito
Most of the time, dApps use Beacon and Taquito together for a straightforward way to connect to wallets and submit transactions.
For an example, see the tutorial Build a simple web application.
Connecting to wallets
That tutorial connects to the wallet using the Taquito BeaconWallet object, which is a wrapper around Beacon's wallet functionality, with code like this example:
When this code runs, Beacon opens a popup window that guides the user through connecting their wallet.
Then the application can send transactions to Tezos.
See Part 3: Sending transactions in the tutorial Build a simple web application.
Reconnecting to wallets
As with using Beacon on its own, you can detect whether a user has previously connected their wallet and reconnect automatically.
For example, this code checks to see if the user has connected and if so, it automatically reconnects to the wallet:
Disconnecting wallets
It's good programming practice to allow a user to disconnect their wallet, such as if they want to connect with a different wallet.
To disconnect the active wallet, call the clearActiveAccount method, as in this example:
Beacon by itself
You can also use Beacon without Taquito.
Connecting to wallets
To connect to a wallet with Beacon, import the Beacon package and use the getDAppClientInstance function to get an instance of the Beacon DAppClient object.
Using this function ensures that you have only one instance of the Beacon client because it returns an instance if one already exists or creates one if it does not.
Creating multiple instances or copies of the Beacon DAppClient object can lead to unexpected behavior.
Then, use this object to send a permission request to prompt the user to connect a wallet:
When this code runs, Beacon opens a popup window that guides the user through connecting their wallet.
Reconnecting to wallets
Beacon can detect users that return to the dApp after connecting previously.
The getActiveAccount method returns an address if the user has previously connected a wallet.
You can run this code when the page loads and if it finds a connection, you can skip calling the requestPermissions method unless the user wants to connect a different account:
Disconnecting wallets
It's good programming practice to allow a user to disconnect their wallet, such as if they want to connect with a different wallet.
To disconnect the active wallet, call the clearActiveAccount method, as in this example:
Other tools
Some specific wallets provide toolkits to connect dApps to them.
For example, the Temple wallet provides the @temple-wallet/dapp NPM package.
For more information, see https://github.com/madfish-solutions/templewallet-dapp.
Best practices
Keep tools up to date
It's important to keep the SDKs that you use to connect to wallets up to date for the best user experience and performance.
Reuse connected accounts
For the best user experience, use the reconnection feature of Beacon described above to persist user accounts.
The UI can reflect that the user is connected and display the account address.
In this case, you can replace the "Connect" and "Sync" buttons with "Disconnect" and "Unsync" button.
Connect to multiple RPC nodes
If a high number of users are using your dApp at the same time, the load on the RPC can spike.
Ideally, the server infrastructure should be using a load balancer and caching to handle the load.
If no such infrastructure is available, it is a good idea to provide an array of nodes and randomly select one when the page loads.
In case one of the nodes goes down, a user can connect to a different one by refreshing.
An even better approach is to add a node selection to your dApp, including a way for users to provide their own RPC node.
See the documentation for your platform for information on changing the RPC node.
Allow users to connect their wallet early
If your dApp is focused around a specific time, such as an NFT drop or a countdown, you can provide a way for users to connect their wallet to the dApp prior to that time.
Connecting early reduces the load on the Beacon peer-to-peer communication layer so users don't experience delays by connecting at the same time when the time arrives.
Sending transactions
After connecting to a wallet, dApps can call smart contract entrypoints and make transactions with that wallet.
These calls can include:
Sending tez to an account or smart contract
When a dApp sends tez, it removes the tez from the source account and adds it to the target account.
When you send tez to a smart contract's address without calling an entrypoint, the smart contract behaves as though you called its default entrypoint.
Some tools have a specific syntax for sending tez to a contract that is different from the syntax to call an entrypoint, so check your tool's documentation for how to send tez to a contract.
Calling a smart contract entrypoint
When a dApp calls a smart contract, it passes an argument in Michelson format that includes the name of the entrypoint and the parameters to pass to it.
Most tools compile this argument for you, so you can call the entrypoint and pass parameters as though you were calling a function.
A call to a smart contract entrypoint always includes a transfer of tez, even if the amount is zero.
Originating a smart contract
Tools can originate a smart contract from source code.
For information about calling contracts from other contracts, see Operations.
Taquito
You can use the Taquito SDK to send transactions from JavaScript/TypeScript applications.
For more information about Taquito, see Taquito.
Sending tez
To send tez with Taquito, connect to the user's wallet and use the Tezos.wallet.transfer method, as in this example:
You can also use the Taquito Contract API to send tez in a similar way.
For more information, see Transfers in the Taquito documentation.
Calling contracts
Taquito offers several different ways to send transactions from JavaScript/TypeScript code.
One way is to create a Taquito object that represents the contract.
That contract object contains a method that corresponds to each entrypoint in the contract.
For example, this code calls an entrypoint named "doSomething."
It passes parameters in the order that the contract expects them:
To call an entrypoint that accepts parameters, you must encode those parameters in the format that the entrypoint requires.
To see the format for these parameters, create a Taquito object that represents the contract and extract its parameter schema, as in the following example:
The response shows the entrypoints in the contract and the parameters that they accept.
For example, the FA2 transfer entrypoint appears like this:
This transfer entrypoint accepts an array of token transfers.
Each transfer object includes the address to take the tokens from and an array of accounts to send the tokens to, as in this example:
To call the transfer entrypoint, pass this parameter to the Taquito entrypoint method, as in this example:
For more examples of calling smart contracts, see tutorials such as Build a simple web application or Create a contract and web app that mints NFTs.
For more information about using Taquito, see Smart contracts in the Taquito documentation.
For a video walkthrough, see Interacting with FA2 Contracts Using Taquito.
Beacon
You can use the Beacon SDK to send transactions from JavaScript/TypeScript code.
Sending tez with Beacon
To send tez with Beacon, use the requestOperation method, as in this example:
Calling contracts with Beacon
To call contracts with Beacon, use the requestOperation method and pass the address of the contract, the entrypoint to call, and the parameters to include, as in this example:
Octez
The Octez command-line client can send tez and call contracts from the command line.
See Interacting with contracts.
Taquito dApp SDK for TypeScript
Taquito is a TypeScript library that dApp developers can use to get information about Tezos and submit transactions.
Many wallets in the Tezos ecosystem use the Taquito library.
A full reference is available in the Taquito documentation.
Installation
The Taquito library is made of several NPM modules:
@taquito/taquito: High-level functionality that builds on the other packages in the Tezos Typescript Library Suite.
@taquito/ledger-signer: Provides ledger signing functionality.
@taquito/rpc: Provides low-level methods and types to interact with an RPC node.
@taquito/utils: Provides utility methods to verify Tezos-specific data and convert data types.
@taquito/michelson-encoder: Provides a JavaScript abstraction based on a Tezos smart contracts code, parameters and storage.
@taquito/michel-codec: Provides a Michelson parser/validator/formatter.
@taquito/local-forging: Provides local forging functionality.
@taquito/signer: Provides signing functionality.
@taquito/beacon-wallet: Provides a wrapper for the Beacon SDK.
@taquito/http-utils: Provides HTTP functionality for Taquito.
@taquito/tzip12: Provides TZIP-12 functionality for Taquito.
@taquito/tzip16: Provides TZIP-16 functionality for Taquito.
@taquito/remote-signer: Remote signer provider.
@taquito/contracts-library: Allows you to store static data related to contracts (such as scripts and entrypoints) to prevent Taquito from needing to fetch them from the network.
The main module is @taquito/taquito; it is used for most actions.
The other modules are used by the @taquito/taquito methods as complementary features, but they can also be used separately.
You can install Taquito from NPM:
Tutorials
For tutorials that include using Taquito, see:
Build a simple web application
Create a contract and web app that mints NFTs
Mint NFTs from a web app
Taquito configuration
General setup
Like all Tezos clients, Taquito must be connected to an RPC node.
To connect Taquito to a node, create an instance of the TezosToolkit class, which is the façade class that surfaces the library's features, and pass the URL of the node.
For example, this code uses the public Ghostnet node at https://rpc.ghostnet.teztnets.com:
Connecting to wallets
Taquito can connect to Tezos wallets through the Beacon protocol.
Follow these steps to connect to wallets in an application:
Install Taquito and the @taquito/beacon-wallet and @airgap/beacon-types packages from NPM:
Import the BeaconWallet class and create a new instance by passing an object with the different options required by the Beacon SDK.
After creating the instance of the wallet, you can request permission from the user to connect their wallet before passing the wallet instance to the wallet provider in the TezosToolkit provided by Taquito:
Getting data from the Tezos blockchain
Taquito provides methods to get different types of data from the Tezos blockchain, for example, the balance of a user account, the storage of a contract, or token metadata.
Note: querying data from the blockchain doesn't create a new transaction.
Getting the balance of an account
Taquito allows developers to get the current balance in mutez of a user account. The getBalance method is available on the instance of the TezosToolkit and requires a parameter of type string that represents the address of the account.
The returned value is of type BigNumber:
Getting the storage of a contract
Taquito provides an easy way to get the storage of any contract and exposes it as a JavaScript object:
Getting token metadata
Taquito also provides a library to get token metadata, which can be very useful when you build a dApp that handles NFTs.
Without Taquito, you would have to fetch the location of the metadata from the contract, understand where the metadata is stored, fetch it, and parse it. Taquito does all of that for you, as in this example:
Interacting with the Tezos blockchain
Taquito lets you interact with the Tezos blockchain in multiple ways, for example, by sending tez, originating new contracts, interacting with existing contracts or reading events emitted by a contract. Most of these interactions start with an instance of the TezosToolkit object.
Sending tez
After creating an instance of the TezosToolkit object, you can use the Contract API (for backend apps) or the Wallet API (for frontend apps) to access the transfer method and pass an object as a parameter with a to property for the recipient of the transfer and an amount property for the amount to be sent:
Originating a contract
The origination of a new contract is also possible through the Contract API or the Wallet API with the originate method. It takes an object as a parameter with a code property for the Michelson code of the contract and a storage property for the initial storage of the contract:
Sending a contract call
One of the main features of your dApp is probably smart contract interactions.
After creating the contract abstraction for the contract you want to interact with, you can call one of the entrypoints available as a method on the methods property. The entrypoint method takes a parameter of the type expected by the contract and returns a contract call that can be executed by calling the send method:
Reading smart contract events
Events are a way for contracts to deliver event-like information to third-party (off-chain) applications.
Taquito provides a simple way for users to subscribe to certain events on the blockchain via the PollingSubscribeProvider object.
Best practices
One single TezosToolkit instance
You should make sure that you only have one instance of the TezosToolkit object at all times in your app to avoid using the wrong one, which can have negative financial consequences for your users.
Even if your app requires a change in the network or Tezos node, it is better to create a new instance of the TezosToolkit and stop using the previous one to prevent unexpected behaviors.
Contract API vs Wallet API
The Contract API is better suited for backend applications that don't require the manual signing of transactions, while the Wallet API is better suited for frontend applications that will interact with the users' wallets.
The use of one or the other should be consistent within the same app to prevent unexpected behaviors.
methods vs methodsObject
The methodsObject property is better used in cases when the parameter for a contract call is a complex pair.
You can use methods to pass single parameters or simple pairs.
Catching transaction errors
It is important to wrap contract calls and other transactions sent from the app inside a try... catch block to handle transaction failures. You must handle failures to provide visual feedback to your users and prevent unwanted behaviors like users clicking a button again because the UI did not inform them that the previous attempt failed.
:::note More information
For more information, see the Taquito documentation.
:::
Best practices and avoiding flaws
When creating a frontend application that uses the Tezos blockchain, you will most probably use a JavaScript framework, may it be React, Vue, Svelte, or another one.
There are some best practices to follow when you use one of these frameworks to make sure that your code is safe, your app behaves in the intended way and your users enjoy a great experience. Here are the most important ones.
Dapp lifecycle
The JS framework of your choice probably introduces different functions or models to manage the lifecycles of your application: when it's mounted, when it's updated, and when it's unmounted.
There are actions specific to a Tezos dapp that are better implemented during these stages.
On mount: this is when you generally want to set up the TezosToolkit from Taquito as it requires HTTP requests to be made to the selected Tezos node. At the same time, you can set up Beacon and set the wallet provider on the instance of the TezosToolkit without asking your user to connect their wallet.
On update: this is when you ask the user if they want to connect their wallet after they interact with your dapp. Once the dapp is mounted, you can also fetch relevant information like XTZ balance, token balances, or connection status.
On unmount: you can disconnect the wallet if you wish to, and you should also clear any interval you set, for example, to regularly fetch data from the blockchain.
Wallet connection
Connecting and interacting with a wallet is an experience specific to web3 apps and although there is still a lot to learn about user experience with wallets, some rules already exist to provide the best user experience possible.
Do not force wallet connection: the request to connect a user's wallet must come from the user interacting with your dapp, not appear out of nowhere, for example, when the dapp loads. Let the user get some details about your dapp before they decide to connect their wallet.
Choose the right position for the wallet button: the users visiting your dapp will expect to find the button to connect or interact with their wallet in the upper part of the interface, on the left or right side. The button must be clearly visible and discoverable in one second.
Display wallet information: the minimal information to display is the address of the connected account to let the users know which account they are using. A lot of dapps on Tezos also display the XTZ balance, as well as the network the dapp is connected to (Mainnet/testnet) or the wallet used for the connection.
Offer the option to select the RPC node: network traffic can get busy on Tezos, but you can provide a better UX by adding a switch for a different Tezos node if the one selected by default becomes too slow. Some power users may also like having the choice to enter the address of their favourite node!
Add an option to disconnect the wallet: some users want to switch wallets while using your dapp, so there must be a way to disconnect their wallet and connect a new one effortlessly.
Interacting with Tezos
The interactions with a blockchain introduce new challenges and solutions for these challenges:
Display clear messages for wallet interactions: whether it is about sending a transaction to the blockchain or signing a message, the action and its result must be clear to the user, signing a bunch of bytes or approving a transaction without a prior click on a button is a no-no.
Entertain your users while they wait: visual feedback is crucial while the transaction is being confirmed because it takes a few seconds. During that time, an animation in the UI helps the users understand that something is happening in the background. No visual feedback after signing a transaction will most probably be interpreted as a problem and the user may create a new transaction.
Disable the UI during the transaction confirmation: you can physically prevent the users from creating new transactions or messing with the current state of your dapp by disabling the UI. Disable the button that triggered the previous transaction and any other input whose value shouldn't change before the transaction is confirmed.
Provide visual feedback for the outcome of the transaction: if the transaction is successful, display a message and update the UI. If the transaction failed, inform the user about the failure and if possible, why it didn't work and how to fix it.
Tezos Unity SDK
The Tezos Unity SDK provides tools that let you access user wallets and Tezos in games and other Unity projects.
You can use Tezos via the SDK to:
Use a player's Tezos account as their account for a game and their wallet as their way of logging in to the game
Accept payments from players in tez
Use Tezos to create game assets, store player inventories, and transfer assets between players
Verify that users own specific game assets and allow them to sell or share them to other players
Use Tezos smart contracts as backend logic for games
Installation and use
For a walkthrough of installing and using the SDK in an existing Unity project, see Quickstart.
Tutorial scenes
The SDK includes tutorial scenes that demonstrate how to use the SDK.
For information about setting up and using the scenes, see Tutorial scenes.
Sample game
For information about a complete sample game that you can load locally and explore, see Sample game.
SDK objects
The SDK provides objects that you can use to interact with user wallets and with Tezos.
See Unity SDK reference.
Dependencies
The Tezos SDK uses modified versions of the following libraries for communication:
Airgap Beacon SDK: Interacts with Tezos wallets through the Beacon standard for iOS, Android, and WebGL platforms.
Netezos: Interacts with Tezos wallets through the Beacon standard for Windows, Linux, and MacOS platforms. Also prepares parameters for smart contract calls and interprets complex data returned by the ReadView method.
The SDK also uses the Newtonsoft JSON Unity Package.
Supported Platforms
The SDK supports Windows, Linux, MacOS, iOS, Android, and WebGL platforms.
Quickstart
Follow these steps to install the Tezos Unity SDK in an existing Unity project and start using it.
These instructions cover:
Installing the SDK into an existing Unity project
Testing that the SDK works in your project
Connecting to a user's Tezos wallet
Creating and managing tokens
Prompting the user to sign messages
Installing the SDK
In your Unity project, in the Package Manager panel, click the + symbol and then click Add package from git URL.
Enter the URL https://github.com/trilitech/tezos-unity-sdk.git and click Add.
The Package Manager panel downloads and installs the SDK.
You can see its assets in the Project panel under Packages > Tezos Unity SDK.
Ensure that you have a Tezos-compatible wallet configured for the Ghostnet testnet on your mobile device.
For instructions, see Installing and funding a wallet.
If you want to publish the project to WebGL, follow the steps in Enabling WebGL support.
To import the tutorial scenes, see Scenes.
Enabling WebGL support
The Unity SDK provides a WebGL template that you can use to publish Unity projects to run in a web browser.
Follow these steps to set up the Tezos SDK to work with WebGL:
In the Unity Editor, go to the Project panel and expand the Packages > Tezos Unity SDK > WebGLFrontend folder.
From the WebGLFrontend/output folder, copy the StreamingAssets and WebGLTemplates folders into the Assets folder of your project.
Select the AirGap template to use in the WebGL build:
Click Edit > Project Settings.
Go to the Player tab.
On the Player tab, go to the WebGL settings tab.
Under Resolution and Presentation, select the AirGap WebGL template, as shown in this picture:
Funding a wallet
Follow these steps to get testnet tez for the wallet:
From your wallet, get the address of your account, which starts with tz1.
This is the address that applications use to work with your wallet.
Go to the Ghostnet faucet at https://faucet.ghostnet.teztnets.com.
On the faucet page, paste your wallet address into the input field labeled "Or fund any address" and click the button for the amount of tez to add to your wallet.
20 tez is enough to work with, and you can return to the faucet later if you need more tez.
It may take a few minutes for the faucet to send the tokens and for those tokens to appear in your wallet.
You can use the faucet as much as you need to get tokens on the testnet, but those tokens are worthless and cannot be used on Mainnet.
Fund your wallet using the Ghostnet Faucet
Testing locally
Tezos smart contracts are immutable after deployment, so you must rigorously test them before deploying them to ensure functionality, prevent errors, and avoid potential financial losses. Importantly, contract testing doesn't require any tokens or a wallet account to execute.
Tools for local testing
The Michelson interpreter is an OCaml function that can be used by tools to simulate a call to any entry point of any smart contract, given an initial value of the storage and parameters. Some programming languages like LIGO or SmartPy use this as part of their testing frameworks.
The mockup mode of octez-client can be used to test contract calls and other features such as some RPC calls, all without running an actual node, saving the time of going through the consensus mechanism and waiting to get blocks created and validated. Tools like Completium, built by the team behind the Archetype language, use this for their testing framework. Find out more in the documentation of the mockup mode.
For example, when you compile the contract in the tutorial Create a smart contract to Michelson, its first line defines the parameter type that the contract accepts:
You can call this contract in mockup mode by passing the compiled contract file, the storage value as a Michelson expression, and the parameter value to pass as a Michelson expression.
For example, this command sets the storage to 4 and passes 5 to the Increment entrypoint:
The response in the console shows the new value of the storage and any operations emitted.
Testing in high-level languages
High-level languages come with tools to help write tests locally, and some testing tools can be used independently of the language used to write the smart contract.
For example, SmartPy includes syntax dedicated to testing.
The following SmartPy test code snippet is for a Tezos smart contract that acts like a calculator. The code defines a series of tests to check the functionality of the calculator contract.
The test scenario runs these operations sequentially and would check if all operations execute as expected and if the final result matches the expected value.
Structure of a test scenario
A test scenario usually consists of the following steps:
Decide the smart contract's initial storage and balance
Valid calls to entrypoints, with different parameters and context information such as:
the address of the caller
the amount of tez sent
the timestamp of the block (value of now during the call)
the level of the block
Verify the contract's storage or balance changed the way you expected.
Invalid calls to entrypoints, and they are expected to fail.
Verification of the error caused by these invalid calls, making sure the error messages are the ones you thought would come up.
When executed, the test scenario is successful if all verifications are correct, and all invalid calls fail with the expected errors.
More advanced scenarios may involve a local sandbox deployment and calls to multiple contracts to test interactions.
Programming languages for testing
The test scenarios are usually written using a full classical programming language, such as JavaScript or Python, with a library that gives you access to special features to:
Deploy contracts
Make calls to entrypoints
Manipulate all the types/values supported by Tezos
Generate testing accounts, to simulate calls from multiple accounts
Perform cryptographic computations similar to the ones available in the contract
Rules for testing
Testing a contract thoroughly is not easy and requires experience.
Here are some tips to follow when getting started:
Write tests without looking at the implementation of the contract to avoid copying mistakes.
If possible, have another developer write the test to avoid testing semantic errors incorrectly.
Make sure to cover every possible execution path, whether it's valid or invalid.
Create many small tests, each checking something very specific, rather than a long test that tries to do many things at once.
Test around the limits
For example, if a value should be always above 10, include a call with the value 10 that should fail and a call with the value 11 that should succeed.
Test extremes
For more information about avoiding flaws in contracts, see Avoiding flaws on opentezos.com.
Implementation details
Michelson: Mockup mode
Archetype: Completium test scenario
SmartPy: Tests and scenarios
LIGO: Testing LIGO
Next steps
When you're done testing contracts locally, you can deploy them to a test network and test them there.
See Testing on testnets and Using a local sandbox.
Testing on testnets
:::note
The current testnets and details about them are at https://teztnets.com/.
:::
If you are a smart contract developer, testing contracts is a big part of your work. More time is spent testing contracts than writing them. You will often need to test new versions of your contracts and run many tests starting from their deployment to calling every entrypoint in all kinds of ways.
After you have tested contracts locally as described in Testing locally, you can deploy them to test networks to test them in a realistic environment.
Similarly, bakers often test their setups on test networks to ensure that they will work on new versions of the Tezos protocol.
Testing with public test networks
If you want to test your development in conditions that are close to those of Tezos Mainnet, you can use one of several public test networks.
These networks behave like Mainnet with a few differences:
You can use faucets to obtain tez for free on these networks, so you don't need to (and can't) spend actual tez.
They use different constants than Mainnet, such as reduced block times and shorter cycles for faster testing and reduced windows for inserting rejections in rollups.
Tools like public block explorers or indexers may or may not be available, depending on the network.
They either use a modified version of the amendment process or don't use it at all.
In some cases, you must use specific versions of tools such as the Octez suite to work with them.
Regardless of the type of network, if you intend to do intense testing, you can run your own nodes on these networks to avoid availability issues and limitations.
Types of test networks
Type | Longevity | Target users | Examples
--- | --- | --- | ---
Permanent test networks | Permanent | dApp developers and bakers | Ghostnet
Protocol test networks | During the protocol amendment process | Protocol developers | Nairobinet, Oxfordnet
Periodic test networks | Short-term | Protocol developers and bakers | Weeklynet
Permanent test networks
Permanent test networks are networks that are meant to run indefinitely. Just like Mainnet, they migrate to new versions of the protocol when proposals are adopted.
At the moment, the main such network is Ghostnet. It follows the currently active protocol on Mainnet and upgrades to the next protocol during the Adoption period on Mainnet, which is after the last round of voting but before the new version activates on Mainnet. The objective is to provide a rehearsal event for Mainnet migration.
For developers, using a permanent network like Ghostnet is convenient compared to other public networks because they can keep contracts running for a long time without having to set things up on a new network when the previous one gets shut down. Services such as indexers, explorers, or public nodes also tend to run more reliably on Ghostnet than on non-permanent networks.
Bakers often run tests on a permanent network because they are the closest environment to Mainnet. Ghostnet, in particular, can be used as a staging environment for testing new setups or new versions of software such as new Octez releases.
On the other hand, as transactions and blocks keep accumulating over time, synchronizing with this network can take some time, and the context size gets bigger. This means testing a restart and resynchronization can be time and resource-consuming.
Because the protocol on Ghostnet migrates to the newly adopted amendment a few days before Mainnet does, it can serve as a rehearsal for the actual migration on Mainnet. Both bakers and developers can check that they are ready for the migration and that nothing in their configuration breaks when it happens.
Protocol test networks
Protocol test networks are created for a specific version of the protocol.
They allow developers and bakers to anticipate the changes brought by upcoming protocol amendments.
When an amendment is proposed, a corresponding network is created. This network gets joined by more bakers as the proposal is selected and moves through the different periods of the self-amendment process. If the protocol passes the 3 votes of the amendment, joining a test protocol early gives you about 2.5 months to test all the changes that will be made to Mainnet. If the protocol is not adopted the network is discarded or sometimes remains active until a different protocol is adopted.
This means there is usually one or two such running networks: one for the current version of the protocol running on Mainnet, and possibly one for the proposed protocol that is going through the amendment process, if there is one.
Whether you are a developer or a baker, testing on the network for a new proposal before it gets activated enables you to check that all your software, smart contracts, dApps, and other tools work well with this new proposal.
It also enables you to test any new features of this proposal. Trying the features can help you form your own opinion about this proposal and discuss it with the community before voting on it.
When the protocol is activated, the corresponding protocol test network can be a good network for a baker to run tests with the current version of the protocol, because these networks are lightweight to bootstrap and have reduced context sizes.
On the other hand, these networks may be less convenient for smart contract or dApp developers to use because they have a limited life span and tend to be less supported by services like indexers and other tools.
Periodic test networks
Periodic test networks allow developers to test new features that are under development before those features become part of a proposal or reach Tezos Mainnet.
These networks are based on Alpha development versions of the Tezos economic protocol and the Octez suite.
The periodic network currently available is Weeklynet, which is named this way because it restarts every Wednesday, with the latest Docker build as a reference. It is the place to test upcoming new features. It is also a network to use if you are a big baker or a BaaS provider and you want to test tailored infrastructure.
Working with periodic test networks
To work with the periodic test networks, you must use exactly the same version of the Octez suite as the network.
For this reason, common wallet apps typically don't work with these networks.
For example, you can look up information about Weeklynet at https://teztnets.com/weeklynet-about.
This page shows the URL of a Weeklynet RPC endpoint to use and instructions for connecting to the network in different ways.
There are two main ways to use periodic test networks:
Run the Docker image with the correct version of the Octez suite
Build the Octez suite from the specific Git commit that is listed on the test network page
In either case, you must connect the Octez suite to the test network RPC endpoint.
For example, if the Weeklynet endpoint on https://teztnets.com/weeklynet-about is https://rpc.weeklynet-2024-01-17.teztnets.com, you can connect the Octez client by running this command:
Then you can create a local wallet by running octez-client gen keys my_account and fund it with the network faucet.
For convenience, teztnets.com provides information about the test networks at https://teztnets.com/teztnets.json.
You can use the data from this file to set up your environment, such as setting environment variables.
For example, to get information about Weeklynet, install the curl and jq programs and run this command:
You can use the response to set environment variables like the RPC endpoint, as in this code:
Here are some other tips for using the Docker images for periodic test networks:
The Docker images for each instance of the periodic test networks are listed on the information page for the network.
For example, Weeklynet information is here: https://teztnets.com/weeklynet-about.
The Docker images are based on Alpine Linux, which uses the apk package manager.
For example, to install the curl program, run sudo apk add curl.
The shell interpreter path is /bin/sh, not /usr/bin/bash as on many Linux distributions.
Public nodes and faucets
To connect to existing public nodes for these networks, or to get some testnet-only tez on these from a faucet, check https://teztnets.com.
Other sources of public nodes include:
Community RPC Nodes listed by ECAD Labs.
SmartPy nodes.
Testing with your own private network
In some special cases, you may want to run your own private network for your testing. This could be true if you are developing tools that you want to keep confidential until you put them into production, and if the sandboxed mode is not sufficient for your situation.
See the Private blockchain section on OpenTezos to learn how to set up your own network.
More information
Test networks by Nomadic Labs
Medium post: Introducing Ghostnet
Using a local sandbox
Local sandboxes allow you to test your work without sending any transactions to Tezos Mainnet or testnets.
They run a simulated version of the Tezos protocol locally so you can test contracts, dApps, or other projects while interacting with actual nodes, but without using a public test network or creating your own private network.
Sandboxes can be convenient if you want to run all your tests locally but still need a realistic Tezos environment, such as if you need to interact with nodes and the consensus mechanism.
Testing locally can also keep your work confidential until you decide to put it into production.
However, sandboxes lack some features that testnets have, such as indexers and block explorers.
If you want an indexer or block explorer for your sandbox, you must run it yourself.
Here are some options for running local Tezos sandboxes:
Octez sandboxed and mockup modes
The Octez client sandboxed and mockup modes run a local version of the Tezos network.
Sandboxed mode runs a local network with one or more nodes.
Mockup mode runs a light version of the network without nodes.
Tezbox
Tezbox is a simulated Tezos environment that runs in a container.
Tezbox provides different images that mirror versions of the Octez suite.
For example, to run Tezbox with Octez version 19.1 and the Paris protocol, run this command:
The container runs in the background and provides an RPC node at http://localhost:8732.
Then you can use the sandbox through that RPC node.
For example, you can configure the Octez client to use the sandbox by running this command:
Then you can use your local installation of the Octez client to interact with the sandbox, such as deploying contracts and sending transactions.
Tezbox provides sample accounts in the /tezbox/context/accounts.json file.
Flextesa
The Flextesa is also a simulated Tezos environment that runs in a container.
The Flextesa image has different scripts that start different versions of the Tezos protocol.
For example, to start a Flextesa sandbox with the Oxford protocol, run this command:
Then you can see the accounts that are available by running this command:
The Flextesa image comes with the Octez client pre-configured, so you can use it directly from the image.
These commands create an alias for the installation of the Octez client in the image and uses it from the host system:
Now you can use the Octez client to deploy contracts and send transactions to the sandbox.
Flextesa allows you to control baking manually, so blocks are only backed when you trigger them.
For more information, see the Flextesa documentation.
The Octez client
The Octez command-line client is part of the Octez suite of tools for interacting with Tezos and running nodes.
Developers use the Octez client for many tasks, including:
Working with accounts
Sending transactions and interacting with contracts
Originating smart contracts and Smart Rollups
Other parts of Octez allow you to host, manage, and monitor nodes, bake blocks, and host RPC nodes.
This documentation is an overview of the Octez client for Tezos smart contract and dApp developers.
For more detailed information, see the Octez documentation and opentezos.com.
Installing the Octez client
You can install the Octez client directly on your computer or use a Docker image that has the most recent version of the Octez tools installed.
Installing the Octez client locally
You can install the Octez client on your computer by using your package manager.
Then, initialize it to use the RPC node of your choice:
Install the client:
For MacOS, run these commands:
For Ubuntu, Windows WSL, and Linux distributions that use apt, run these commands:
For Fedora and Linux distributions that use Copr, run these commands:
For more local installation options, see How to get Tezos in the Octez documentation.
Verify that the Octez client is installed by running this command:
If you see a message with the version of Octez that you have installed, the Octez client is installed correctly.
For help on Octez, run octez-client --help or see the Octez documentation.
Initialize the client's configuration file by running this command:
This command creates a default configuration file in the location $HOME/.tezos-client/config.
Set the RPC node to use:
Get the URL of a public RPC node or a private node that you have access to.
For example, you can get the URL of a testnet node from https://teztnets.com/, such as https://rpc.ghostnet.teztnets.com for Ghostnet.
Set your Octez client to use this node by running this command on the command line, replacing the Ghostnet URL with the URL that you copied:
If you are using a testnet, Octez shows a warning that you are not using Mainnet.
You can hide this message by setting the TEZOS_CLIENT_UNSAFE_DISABLE_DISCLAIMER environment variable to "YES".
Verify that you are using the correct RPC URL by running this command:
The response from Octez includes the URL of the RPC node that you are using.
For a full list of Octez client commands, run octez-client man.
Using the Octez client in the Tezos Docker image
The Tezos Docker image contains the latest version of the Octez client and the other Octez tools.
To start a container from this image, run this command:
You can verify that the Octez client is available in the container by running this command:
Then set the RPC node for the client as described above.
For more information about using the Docker image, see Using Docker Images And Docker-Compose in the Octez documentation.
Creating accounts
You can create or import accounts into the Octez client just like you do so in wallet applications.
Octez keeps a local list of aliases for addresses, including user accounts, smart contracts, and Smart Rollups.
You can list the aliases that the Octez client is aware of by running the command octez-client list known addresses.
When you run transactions with Octez, you can use the alias in place of the account address.
Creating accounts
To create an account, run this command, replacing local_account with a local name for the new account:
You can see the address of the account by running this command:
The account address (technically the hash of the public key) starts with tz1, tz2, or tz3.
You can use this address to send tez to this account, such as from a faucet if you are using a testnet.
See Testing on testnets.
Importing pre-existing accounts
If you already have a Tezos account, you can import your private key to use the account in Octez:
Export the private key from your wallet application, being careful not to expose it to anyone.
Run this command, replacing $ALIAS with a local alias for the account and $PRIVATE_KEY with the private key:
Now you can use the alias in place of the address when you send transactions with Octez.
Interacting with contracts
Before sending transactions to contracts with the Octez client, make sure that your client is configured to use an RPC node for the network that you want to use.
To verify the RPC node that you are using, run octez-client config show and look at the value in the entrypoint field.
Sending tez
To send tez from a source account to a target account, use the octez-client transfer command, as in this example:
You can use addresses or local aliases for the source and target accounts, but Octez must have the private key for the source account to sign the transaction.
To check the balance of an account after a transaction, use the octez-client get balance for command and pass the alias or address of an account, as in this example:
Calling smart contracts
To call a smart contract, use the octez-client transfer command.
Contracts can have aliases in the Octez client like accounts.
This example calls a contract with the alias my-counter:
This command calls the increment entrypoint of the my-counter contract and includes 0 tez and up to 0.1 tez in fees with the transaction.
It passes the parameter "5" to the entrypoint.
You can use a local alias or the full address for the smart contract.
Because entrypoints accept parameters in Michelson code, you must encode the values that you send as Michelson values.
The high-level languages have tools to help you encode values in Michelson.
For example, if you are using LIGO to create an entrypoint that accepts an integer, address, and string as a parameter, you can pass the parameter values as a LIGO expression and get the Michelson version with this command:
The compiled parameter value looks like this:
Then you can use this value for the value of the --arg argument in the octez-client transfer command.
Originating (deploying) smart contracts
To deploy (originate) a smart contract to the current network, use the octez-client originate contract command, as in this example from the Deploy a smart contract tutorial:
This command accepts the compiled version of the contract as a Michelson .tz file.
See the documentation for the high-level language you are using for how to compile a contract.
Like the command to call a smart contract, this command accepts the initial value of the contract storage as a Michelson-encoded value.
After you originate the contract, you can use the local alias from this command to send transactions to its entrypoints.
You can see the aliases of contracts by running the command octez-client list known contracts.
Getting information about the blockchain
Developers and dApps can get information about the Tezos blockchain, such as account balances, from these sources:
The Octez client
The The Octez client provides information about accounts, addresses, and many other things.
For example, you can get the balance of an account with this command:
The RPC interface
The RPC interface allows nodes to cooperate with each other and with their clients.
In particular, many RPCs provide information about the blockchain.
This data is not always in the format that developers and dApps need.
For example, the RPC interface does not provide a way to get information about a specific operation by its hash.
You can get some information about accounts, contracts, and other things from RPC requests.
For example, this RPC request gets the current balance of an account:
Indexers
Indexers are off-chain applications that retrieve blockchain data, process it, and store it in a way that makes it easier to search and use.
For example, you can use the TZKT API to get the recent operations an account made with this request:
For more information, see Indexers.
Block explorers
Block explorers use data from indexers to show information in a human-friendly interface.
For example, this link shows information about a contract, including its current storage, entrypoints, and transaction history: https://better-call.dev/ghostnet/KT1R4i4qEaxF7v3zg1M8nTeyrqk8JFmdGLuu/operations
For more information about block explorers, see Block explorers.
Block Explorers
What is a blockchain explorer?
A blockchain explorer, also known as a block explorer, is an app that tracks activity on a blockchain. All transactions ever performed on a network can be viewed using such a tool.
Blockchain explorers are like search engines for blockchains.
You can think of it as a window into the blockchain world, allowing you to observe what's happening in it.
Cryptocurrency users and developers use such a tool to view the status of past or present transactions.
Some of the most basic information available on blockchain explorers includes (but are not limited to):
Block feed: This allows you to view all the confirmed and pending blocks on the blockchain.
Transaction feed: The transaction feed displays all the most recent and pending transactions.
Transaction viewer: Each transaction can be viewed individually to reveal the public addresses of the sending and receiving parties.
Wallet history: All past and present transactions of an individual wallet address.
Block Explorer use cases
Block explorers are not only made for casual users to check if their coins are still safe or for delegators to verify that their baker is not cheating with their earnings.
Block explorers are also used by:
blockchain engineers who develop and debug new features in sandboxes (e.g. new blockchain consensus).
app developers who need debugging tools and more visibility into the current and past state of their contracts running on internal testnets and Mainnet.
bakers and staking services who need reliable data about delegation and earnings history to calculate correct payouts, plan their bond pools and execute operations.
less technical user groups like auditors and regulators with strict requirements for data quality, as they need to access a trusted copy of the full on-chain history in a format that's easy to digest for their spreadsheets and compliance tools.
Here are some commonly used Tezos block explorers:
TzStats
TzKT
Arronax
Baking Bad
Better Call Dev
Explorus
Etherlink Explorer
TzFlow
TzKT Tezos blockchain explorer
import Figure from '@site/src/components/Figure';
TzKT explorer from the Baking Bad team is designed to improve experience for both newcomers and advanced Tezos Blockchain users. In this article we will reveal the main features of this explorer.
Main Page: Contains general information on the blockchain: current cycle and block, Governance status, accounts and transactions stats, current price chart. The dropdown tab in the header allows you to switch the explorer to the testnets.
Also, there is a Liquidity Baking tab, where you can interact with the Sirius DEX contract directly from TzKT. Sirius is an AMM tzBTC/XTZ DEX directly integrated into Tezos with a protocol subsidy.
API: Leads to the powerful API sub-site, where all API documentation is located, free for use by Tezos developers.
Tezos DAPPs: List of DAPPs present in Tezos ecosystem. Chart can be sorted by category or any parameters like TVL, Volume, Users, Interactions with a different timeframes (1D, 7D, 30D)
Stats: The entire ecosystem of Tezos, expressed in graphs. Useful to view the dynamics of the L1 protocol according to a wide list of indicators like transactions, volume, contract interactions, active users, total accounts and other.
Bakers: Provides a list of all Tezos Bakers. By default, this tab displays only active public bakers - this measure is to secure the newcomer delegators. Use filters or switch to “all bakers” tab for advanced search.
Blockchain: a wide range of tools for users to get specific data. Cycles and blocks list, accounts information, particular operations, governance events, software overview etc.
Search and bookmarks. On the header right side there is a search bar. The search is configured to find the right user or contract by name, address and Tezos Domain, as well as to prompt you with similar results. Bookmark any address to ease its use for you. Export and import it to easily set on other devices or share with your mates.
The tzStats blockchain explorer
import Figure from '@site/src/components/Figure';
In this chapter, we will use the TzStats explorer to illustrate the different features of an explorer, but similar features are usually available on others. Concerning the observation of smart contracts, the different aspects are discussed in the following chapter.
TzStats is developed by Blockwatch Data Inc. It is a block explorer for public and private Tezos networks and it is based on the TzIndex indexer.
Each Tezos network has its own TzStats version:
Mainnet: tzstats.com
Ghostnet: florence.tzstats.com
TzStats' main features
TzStats has a complete guide available here.
Main Dashboard: This page provides a quick view of all the main activity on the Tezos network, e.g. staking activity, gas price, tez supply, transaction volume, etc.
Cycle: This page provides general information about a specific cycle number. A cycle is a way of measuring time. Every cycle is equal to 4096 blocks.
Block: This page provides general information about a specific block number along with its technical details such as gas used, block health (Endorsed Slots, Missed Priorities and Missed Endorsements), etc.
Network Activity: This page provides a world map with the location of where new blocks are being baked. There is also the list of whale operations (i.e. a list of high-value transfers >= $100,000).
Bakers: This page provides the total number of Tezos bakers. Several lists are also available to gain an overview of the Tezos baker landscape. You can choose between several tabs, namely, Public, Private, Closing, and Leaderboard.
Protocols: This page shows the past and current protocol used by Tezos and the overall age of the Tezos blockchain. See History of amendments to understand each protocol.
Voting: This page shows the past and current elections and indicates when it ends. See Governance to understand the voting process.
Markets: This page provides an overview of the current market activity, e.g. list of exchanges, 1 day's volume, overall market capitalization, etc.
Here the main features have been presented and, in the next chapter, we will see how to check out your smart contract.
References
[1] https://tzstats.com
[2] https://tzstats.com/docs/guide
Indexers
Indexers are off-chain applications that retrieve blockchain data, process it, and store it in a way that makes it easier to search and use.
Indexers are an important component of Block explorers.
You can use indexers to provide the data that you need for your dApps.
Why indexers are needed
Tezos nodes store copies of blocks, but they provide only certain information about those blocks through the RPC interface.
For example, assume that you want information about an operation and all you have is its hash.
The RPC interface can't provide this information directly, so you would have to search each block until you found the block with this operation, which is very inefficient.
Instead, you can use an indexer that records information about each operation.
This kind of indexer can provide information about a specific operation by its hash or a list of operations sent by a certain account.
How indexers work
You can imagine indexers as the card catalog in a library.
Libraries typically sort books by genre and author name, so readers can find a book if they know its genre or author.
However, suppose a reader wants to find a poem about acacia trees, a story about a gas station architect, or every book written in 1962.
Without any other information, they must check all the books in the library until they find what they are looking for.
To simplify the process of searching for books, libraries add each new book they receive to their card catalogs.
Card catalogs list all of the books on a certain topic and provide other metadata such as the authors' names and publication dates.
Readers can look up a topic in the catalog and get a list of all books on that topic.
Libraries can index books in as many ways as are necessary to help people search for books more efficiently.
Similarly, relational databases can have indexes to speed up queries.
In the same way, blockchain indexers create a database with the blockchain data organized in certain ways.
Types of indexers
There are two main types of blockchain indexers: full and selective.
Full indexers
Full indexers process and write all data from blocks, from simple transactions to validator's node software versions.
Blockchain explorers commonly use them to provide users with advanced blockchain analytics and allow them to search for any type of on-chain data.
Also, those who host full indexers can offer public APIs that other projects can use without hosting the indexer themselves.
You can get data from these full indexers, which allow you to find almost any information in the Tezos blockchain:
TzKT
TzPro
TzIndex
Selective indexers
Selective indexers store only selected data, which means that they need less space and resources to maintain.
Creating a selective indexer requires you to write the logic for the indexes, including what data to fetch, how to process it, and how to store it.
Usually, they are used in projects that require only specific on-chain data, such as active user balances, balances of their smart contracts, and NFT metadata.
You can optimize a custom selective indexer for fast execution of specific project queries.
You can also use them to work with data in the way that you want to, such as storing token amounts with decimal places.
You can use these frameworks to create your own selective indexer to provide the data that you need in the format that you need:
Que Pasa
DipDup
Dappetizer
For example, Teia.art and other NFT marketplaces use their indexers based on DipDup, optimized for working with NFTs.
Setting up indexers
For information on setting up indexers, see the documentation for the indexer or Indexers on OpenTezos.
Using indexers
The exact list of tables, index schemas, and command syntax depend on the indexer and database it uses.
For information about how to use a specific indexer, see its documentation.
Some indexers provide information about networks other than Mainnet, so check the indexer's documentation for information about selecting a network.
For example, this TzKT query gets an account's balance of the USDT token:
For information about the TZKT indexer's API, see https://api.tzkt.io.
Indexers can organize data in custom ways.
For example, TzKT indexes FA1.2 and FA2 tokens and gives each an internal ID.
This ID can be faster and easier to work with and compare than using the contract ID and token ID.
This TzKT query gets information about an FA1.2 token based on its internal ID instead of its contract address and token ID:
The response provides information about the token:
Data available on indexers
The exact list of queries and filters depends on the selected indexer.
Here are some examples of information you can get from full indexers:
Account: Balance in tez, transaction history, address type, and status like "baker" or "delegator"
Block: Header, content, and metadata like address and socials of the baker who made the block
Contract: Description, entrypoints, balance, code in Michelson, storage, and the content of a specific big map
Bakers and delegators: Who earned how much, who endorsed a particular block, and how much users delegate
Protocol: What cycle is now, what is on the vote, how many tez are in circulation
For example, here are some examples for getting information from TzKT.
Follow the links and paste your address instead of tz1…9v4 into the address bar to get data about your account:
fxhash NFTs you own.
The fxhash contract address filters the query, so try to change the address to see your NFTs from other marketplaces.
Your balance history in tez.
Nodes and indexers display balances without decimals, and ""balance": 500000" means only five tez.
List of FA1.2 and FA2 token transfers where you were the sender. Change "from" to "to" in the query to see the list of transfers where you were a recipient.
TzKT provides information about Ghostnet.
For example, you can run any of the previous queries on Ghostnet by changing the host name in the URL to https://api.ghostnet.tzkt.io/.
Where indexers are used
Many applications that work with on-chain data use an indexer.
The simplest example of working with an indexer is a blockchain wallet.
For example, to display a user's token balances, Temple Wallet queries data from the TzKT indexer and gets tokens' tickers and logos from the contract metadata.
You can do the same thing by calling the GET tokens/balances endpoint of the TzKT API and including your address as the value of the account parameter, as in this example:
In the same way, Temple Wallet receives transaction details and displays NFTs, delegation rewards, the value of your tokens, and other data.
It uses other sources for other data.
For example, it requests the XTZ price from Coingecko.
Other blockchain applications use indexers in similar ways:
Decentralized exchanges use indexers to get historical data on the balances of each pool, transactions with them, and the value of tez.
Based on this data, they calculate the volume of transactions in tez and other currencies, as well as the historical prices of tokens in fiat currencies.
NFT marketplace websites index transactions with their contracts to display new NFTs, transaction history, and statistics of the most popular tokens.
Block explorers display data from all blocks with the help of indexers and allow users to find anything, like operation details by hash.
Thanks to this, users can find the information they need in a user-friendly graphical interface.
An introduction to smart contracts
import Figure from '@site/src/components/Figure';
A smart contract is a piece of code stored on the blockchain. It contains a set of instructions and rules to trigger them. Once deployed, it becomes immutable, but a user can trigger the execution of the code without modifying it.
Smart contract metaphor
Smart contracts can achieve different kinds of operations with coins and other smart contracts. They're comparable to snack vending machines:
Each machine has a contract saying "Give me cryptocurrency, then I give you a food item or drink."
Each machine can have a different smart contract for various food or drink items.
Other smart contracts can work with the machines behind the scenes, such as a contract that represents an employee gathering the money from the machines.
Each machine doesn't operate until enough currency is delivered (Gas). Note that the quantities of foods or drinks change while their types can't (ever).
Of course, smart contracts go beyond this metaphor. Thanks to transparency and immutability, they allow an agreement to be secured between two or more parties.
For example, it is common to create financial instruments like various tokens (usually worth a fraction of the blockchain's coin) with different usability and characteristics inside a multiple smart contracts system. Other more or less complex projects can propose lending, stablecoins, or crowdfunding.
In most cases, smart contracts remove intermediates and drastically reduce costs compared to classic paper contracts and their validations.
Notice that a smart contract can only run and interact with the blockchain it's stored on. It can't interact with the outside world. That's where decentralized applications or "dApps" come in, because they provide interfaces for the outside world.
Components of a smart contract
A smart contract is composed of three elements:
Its balance: a contract is a kind of account, and can receive and send tez
Its storage: data that is dedicated to and can be read and written by the contract
Its code: one or more entrypoints, which are a kind of function that can be called either from outside the chain or from other contracts
The smart contract code is in the Michelson language, but several high-level languages exist to make it easier to write the code.
See Languages.
:::note VisualTez
VisualTez allows you to visualize the fundamental logic of a smart contract without relying on any specific syntax.
:::
Limitations of smart contracts
All a contract can do can be summarized as:
Performing computations
Reading or updating the value of its own storage
Generating a list of operations, such as calls to other contracts (see Operations)
Smart contracts can't do these things:
Access programs outside the blockchain, including calling external APIs
Access other contracts' storage
Change their code
Catch and respond to errors (see Handling errors)
Features of Tezos smart contracts
Tezos smart contracts support these features:
Storage of data that the contract can read and write to
Entrypoints that users can call
Data types from simple to complex and logic that can be used on them, including Comparing values and Loops
Operations, which are calls to other smart contracts
Views, which expose data to other contracts
Handling errors, although error handling in Tezos is very different from other platforms
Constants that are available to all contracts
Sapling, a way to run private transactions
Lifecycle of a Tezos smart contract
Tezos contracts have a two-step lifecycle:
Deployment
Interactions through calls
Deployment of a Tezos smart contract
The deployment of a Tezos smart contract is called origination.
When a smart contract is originated, an address and a corresponding persistent storage are allocated to it. The smart contract address is like its identity and where it lives on the ledger.
After it is deployed, anyone or anything can call the smart contract, including contracts on the chain and applications off the chain, by submitting an operation to its address with arguments. This call triggers the execution of the pre-defined instructions in the contract's code.
The origination of a Tezos smart contract must define:
A complex parameter type in the low-level Michelson language, which is a list or tuple of each parameter type (see more below with high-level languages)
The storage type
The initial value of the storage
A set of instructions in Michelson
After the contract is deployed, it cannot be changed or removed from the blockchain.
For more information about deploying smart contracts, see Deploying smart contracts.
Call of a Tezos smart contract
A smart contract can be called by a classic account or by a smart contract account. The operation or transaction specifies one or more arguments. In the below example, we increase or decrease a value in the storage:
Users can call smart contracts from different platforms, including:
The Octez command-line program, which is provided by Tezos to send transactions to Tezos and interact with the chain in other ways, including hosting a node. For more information about the Octez client, see https://tezos.gitlab.io/.
Remote Procedure Calls (RPCs) via HTTP.
SDKs such as Taquito.
Sample smart contracts
Here are some places to find sample smart contacts:
Completed applications from the tutorials are in the repository https://github.com/trilitech/tutorial-applications
For conceptual examples of contracts, see https://opentezos.com/smart-contracts/simplified-contracts/
For examples of contracts in LIGO, see https://packages.ligolang.org/contracts
For examples of contracts in Archetype, see https://archetype-lang.org/docs/templates/overview
For examples of contracts in SmartPy, see https://smartpy.io/guides/examples/
For examples of FA2 smart contracts, see:
The SmartPy FA2 library
oxheadalpha/smart-contracts
Languages
You can write Tezos smart contracts in any of these high-level languages:
LIGO, which has versions with syntaxes similar to JavaScript/TypeScript and OCaml
SmartPy, which has a syntax similar to Python
Archetype, which is a high-level language developed specifically for Tezos
Each of these languages is eventually compiled to Michelson, the base language for Tezos smart contracts.
That means that the high-level languages have limitations caused by how Michelson works.
For information about Michelson, see Michelson.
LIGO
LIGO is a functional programming language that is intended to be both user-friendly and to avoid patterns that make formal verification difficult.
LIGO offers two syntaxes:
JsLIGO, a syntax that is inspired by TypeScript/JavaScript
CameLIGO, a syntax that is inspired by OCaml
You can use either syntax and compile to Michelson to run on Tezos.
To learn LIGO, see these tutorials:
Deploy a smart contract with CameLIGO
Deploy a smart contract with JsLIGO
Here are examples of straightforward LIGO contracts.
Each contract stores an integer and provides entrypoints that increase or decrease the integer or reset it to zero.
CameLIGO
JsLIGO
Further reading
LIGO documentation
LIGO tutorials
OpenTezos
SmartPy
SmartPy is a comprehensive solution for developing, testing, and deploying smart contracts on Tezos. With its easy-to-use Python syntax, developers can create contracts in a familiar and intuitive way, while SmartPy's type inference provides added safety.
To get started with SmartPy, see the tutorial Deploy a smart contract with SmartPy, the tutorial on smartpy.io, or Smart contract development with SmartPy on opentezos.com.
Test scenarios
SmartPy allows you test contracts in simulated scenarios, including complex cases with multiple interacting contracts. Then SmartPy compiles the contracts to Michelson for deployment. SmartPy can also automatically upload metadata and other files to IPFS directly from the test scenario.
FA2 library
SmartPy provides a library of classes that you can extend to create FA2 token contracts. The library provides basic functionality for NFTs, fungible tokens, and single-asset token contracts and mixins that change how the tokens work. For more information, see FA2lib in the SmartPy documentation.
Online IDE
The SmartPy online IDE offers a user-friendly interface for trying out the language directly in a web browser. It comes with an origination feature for deployment of contracts to the blockchain at the click of a button. For those who prefer to write smart contracts and tests in their favourite editor, you can also install SmartPy locally.
Explorer
The SmartPy explorer allows you to explore and interact with with already deployed contracts. It presents contract data as SmartPy values, such as records and variants, to make interacting with contracts easier.
Example
Here is a simple SmartPy contract and test scenario:
Further reading
SmartPy documentation
Online IDE
OpenTezos
Archetype
Archetype is an elegant generic-purpose language to develop smart contracts on the Tezos blockchain. It's a DSL (domain-specific language) for Tezos that facilitates formal verification and transcodes contracts to SmartPy and LIGO.
It supports all Michelson features but also provides exclusive high-level features for a precise and concise source code, that make contracts easier to develop, read and maintain.
Looking at a simple Archetype contract
Create a file hello.arl
The contract starts with the archetype keyword followed by a contract identifier.
For example:
Parameters
A contract may have parameters. A parameter value is not in the source code and is provided at deployment (origination) time. For example, the address of the contract owner is typically a contract parameter.
By default, a contract parameter is an element of the contract storage. It is defined by an identifier and a type. The list of parameters follows the contract's identifier between parenthesis and the parameters are separated by commas.
For example:
The seller and buyer addresses then need to be set at deployment time.
Deploy a contract with Completium:
The Completium CLI is the command line utility to install Archetype compiler and manage contracts (deploy, call).
To install and initialize Completium do:
Then you can deploy the contract with
Call contract's entrypoint input with argument "Archetype":
Further reading
Archetype documentation
OpenTezos
Medium article
How To Verify a smart contract with Archetype
Michelson
import Figure from '@site/src/components/Figure';
Michelson is the domain-specific language used to write smart contracts on the Tezos blockchain.
Users can write Michelson directly, but most of them use a high-level language for a more approachable syntax and for more user-friendly programming features; see Languages.
Features
Michelson is a Turing-complete stack-based language that includes common features of a programming language as well as some specific blockchain-related features:
It doesn't have variables but instead manipulates data directly on a stack, through a set of stack manipulation instructions. For example, the ADD instruction consumes two elements from the top of the stack and puts their sum on top of the stack.
It is strongly typed, with basic types such as integers, amounts of tez, strings, and account addresses, as well as complex types such as pairs, lists, key-value stores (big-maps), or pieces of code (lambdas).
It has limited access to data, and can only read data from its own storage, data passed as parameters during calls to its entrypoints, and a few special values such as the balance of the contract, the amount of tez sent to it during a call, and the creation time of the current block. It can also access a table of constants.
Michelson was designed to facilitate formal verification, allowing users to prove the properties of their contracts.
Michelson uses a stack rewriting paradigm, whereby each function rewrites an input stack into an output stack. (The meaning of this will be fully explained below.) This runs in a purely functional way and does not modify the inputs at all. Thus, all data structures are immutable.
What is a stack?
A stack is an abstract data type that serves as a collection of elements, with two principal operations: push (adds an element to the collection) and pop (removes the most recently added element that has not yet been removed). The order in which elements come off a stack gives rise to its alternative name, LIFO (last in, first out). Additionally, a peek operation may give access to the top without modifying the stack.
A diagram of the stack data structure, showing a stack of elements and the push and pop actions
Source: Hyperthermia on Wikimedia Commons.
Rewriting Stacks
To see what mean it means to rewrite stacks, we will run through a transaction in Michelson. First, before a transaction runs, the blockchain state at a certain hash is deserialized and put onto the stack as the variable storage. We have a from function that receives the transaction data amount, the amount of attached tez, and the parameter, the function's parameters.
After running the function, without any updates to the stack, the program will call a to function that has the parameters result, which is the result of the function, and the output storage that is serialized and stored on the blockchain.
In the example, Michelson only manipulates the stack functionally and a new stack is passed from function to function.
Entrypoints
Depending on the high-level language used, a smart contract deployment also defines its entrypoints using the complex Parameter Type. These are special functions used to dispatch invocations of the smart contract. Each entrypoint is in charge of triggering an instruction. Below is the same example as before, abstracting the complex Parameter Type:
Each type and position of a parameter in the list (or pair) allows you to define an entrypoint (a function). For instance, in our example, there are two parameters, hence two types. Both types are integers (to increase or decrease a value). Because the type is the same, its position (left, right, or index number) determines which entrypoint is correct.
It could be:
Left type: "Increment" entrypoint
Right type: "Decrement" entrypoint
Below is another illustration of this process:
For more information, see Entrypoints.
Further reading
Michelson documentation
Michelson Reference
Michelson tutorial series
Data types
See these pages for information about the data types that Tezos supports:
Primitive data types
Complex data types
Cryptographic data types
Higher-level languages may treat data types differently, but they all behave the same way when they are compiled to Michelson and run on Tezos.
Primitive data types
Tezos contracts support these primitive data types.
The high-level languages may implement these data types slightly differently, but they all behave the same way in the compiled Michelson code:
Numeric data types: int and nat
Token amounts: mutez and tez
Strings
Bytes
Booleans
Timestamps
Addresses
This list is intended for general information for developers and is not intended to be comprehensive.
For a complete list of data types that are available, see the reference information for the language that you are using:
Michelson: Types
LIGO: Introduction
Archetype: Types
SmartPy: Overview
Numeric data types: int and nat {#numeric}
Integers (int) are whole numbers that can be positive or negative.
Naturals (nat) are whole numbers that can only be positive or zero.
Tezos differentiates these two types to prevent problems such as performing operations that may not always return a positive number.
On Tezos, there is no hard limit to how large nat and int values can be.
The only limits are those associated with the storage and gas costs.
This means you never need to worry about overflow issues.
You can perform these ordinary arithmetic operations on int and nat or a mix of the two:
Getting the opposite of a number (NEG)
Adding (ADD), subtracting(SUB) or multiplying (MUL) two values
Performing an integer division between two values (EDIV), which returns a pair with the result and the remainder
The type of the output may not be the same type as the inputs.
In general, the output type depends on whether the result can be negative.
For example, subtraction always returns an int, but addition returns a nat if both inputs are nat and an int if either input was an int.
You can perform bitwise logical operations: the usual OR, AND, XOR, NOT.
You can also perform bitwise left and right shifts (LSL and LSR), with a parameter that indicates by how many bits you shift the value.
For information about comparing values, see Comparing values.
Finally, you can convert an int to a nat or vice versa:
To convert an int to a nat, use the absolute value function (ABS).
To convert a nat into an int, use the INT function.
You can also convert an int to an option on a nat (ISNAT).
Why are decimal numbers not supported?
Tezos does not support floating point or decimal numbers.
These kinds of numbers and their associated rounding errors cause many problems.
For example, Tezos protocol upgrades could cause inconsistencies with floating point numbers.
If this happens, different nodes may get different results for the same transactions, which would lead to inconsistencies on the blockchain.
Also, code that uses floating point numbers is much harder to run formal verification on.
Token amounts: mutez and tez {#token-amounts}
The mutez type (or micro tez) stores amounts of tokens from the native cryptocurrency of Tezos, the tez.
One mutez is equal to one millionth of a tez.
Some languages also support the tez type, but the internal type is always the mutez, so you can see a value of type tez as a shortcut for the corresponding value in mutez.
mutez values, like nat values, are whole non-negative numbers.
However, contrary to nat, they can't hold arbitrarily large values.
More precisely, mutez are stored as signed 64 bit values.
This means their value can only be between $$0$$ and $$2^{63} - 1$$, which is approximately $$9.223 \cdot 10^{18}$$ mutez, and corresponds to 9 trillion tez.
Although it is rare to work with mutez amounts this large, there is still a risk of overflow.
For example, if code performs intermediate computations such as squaring a number, it might reach the storage limit.
You can do these arithmetic operations on mutez:
Adding two mutez values (ADD)
Subtracting two mutez values (SUB_MUTEZ), which returns an option because the result could be negative
Multiplying a mutez value with a nat (MUL), which returns a result in mutez
Performing an integer division (EDIV)
For information about comparing values, see Comparing values.
Strings {#strings}
On Tezos, a string is a sequence of standard non-extended ASCII characters.
This means there are only 128 possible values for each character, which excludes any accented letters.
This limited list of characters prevents compatibility issues with unicode characters.
If you need to store unicode text, store it as bytes.
Like int and nat, there is no limit on the size of a string other than the indirect limits caused by the associated costs of storage.
You can do these operations on strings:
Concatenate two string types (CONCAT)
Get the size of a string (SIZE), which returns a nat
Extract a substring of a string (SLICE)
Compare two string types based on their lexicographical order; see Comparing values
Bytes {#bytes}
You can store any piece of information as a sequence of bytes.
This type has no limits on its size other than the indirect limits caused by the associated costs.
bytes have the same operations as strings:
Concatenate two bytes types (CONCAT)
Get the size of a bytes (SIZE), which returns a nat
Extract a substring of a bytes (SLICE)
Compare two bytes types based on their lexicographical order; see Comparing values
To save space, you can store most other data types in a bytes type.
To convert
Furthermore, bytes can be used to store values of most other valid types in an optimized binary representation.
To convert values to and from bytes, use these functions:
To convert any value of a supported type to bytes, use PACK
To convert bytes to the encoded type, use UNPACK
Serialization is also useful in applying cryptographic functions to data, as in these examples:
Computing a cryptographic hash of some data using one of several hash functions, such as Blake2b-256
Checking that a sequence of bytes has been signed with a given key
Applying elliptic-curve cryptographic primitives (BLS12-381)
For more information about serialization, see Serialization.
bytes are also used in Sapling.
Booleans {#booleans}
Boolean types on Tezos (bool) work the same way as in most programming languages.
A Boolean value can be True or False
Comparison operators produce Boolean values
Boolean values can be used in conditional statements or while loops
The usual logic operators are supported: AND, OR, XOR, NOT
Timestamps {#timestamps}
Dates are very important in smart contracts, such as verifying that a call is made before or after a given deadline.
The timestamp type represents the number of seconds since January 1st, 1970, also known as UNIX time.
Internally, timestamps are stored as an int, so like int types, timestamps can have arbitrarily large positive or negative numbers, representing times long before or after January 1st, 1970.
The special instruction NOW represents the timestamp of the current block.
The following operations are supported on timestamps:
Adding a number of seconds to a timestamp (ADD)
Subtracting a number of seconds from a timestamp (SUB)
Computing the difference in seconds between two timestamp values (SUB)
Comparing two timestamps (COMPARE); see Comparing values
Addresses {#addresses}
On Tezos, each account is uniquely identified by its address.
Internally, addresses take the form of a string type.
For user accounts, the string starts with "tz1", "tz2", "tz3" or "tz4".
For smart contract accounts, the string starts with "KT1".
| Type of Account | Example |
| --- | --- |
| User account | tz1YWK1gDPQx9N1Jh4JnmVre7xN6xhGGM4uC |
| Smart contract | KT1S5hgipNSTFehZo7v81gq6fcLChbRwptqy |
The next part of the string is a Base58 encoded hash, followed by a 4-byte checksum.
Data type implementations
See these links for technical information about how different languages handle different data types:
Michelson: int and nat, booleans, strings, timestamps, mutez.
Archetype: Types basics, Types, Arithmetic operators
SmartPy: Integers and mutez, Booleans, Strings and Bytes, Timestamps
LIGO: numbers and tez, strings & bytes, booleans
Complex data types
Tezos contracts support these complex data types.
The high-level languages may implement these data types slightly differently, but they all behave the same way in the compiled Michelson code:
Pairs
Records
Options
Big-maps and maps
Lists
Sets
Variants and Unions
Lambdas
Tickets
Unit
This list is intended for general information for developers and is not intended to be comprehensive.
For a complete list of data types that are available, see the reference information for the language that you are using:
Michelson: Types
LIGO: Introduction
Archetype: Types
SmartPy: Overview
Pairs {#pairs}
A pair is a complex type made of two other types.
For example, a pair of an int and a string can hold a value such as (42, "Hello").
Languages have instructions to create pairs and to extract the left or right value from a pair.
Pairs can be nested, which makes it possible to create more complex structures with many values of different types.
The two main ways to nest pars is by using right combs or binary trees:
Right combs
The most common way to nest pairs on Tezos is to create a right comb.
A right comb is a pair whose second element is a pair, whose second element is a pair, and so on.
For example, this right comb stores an int, a string, and a bool using nested pairs: {-42; {"Hello"; True}}.
To add another unit, the right value of the most nested pair becomes a pair, as in this example: {-42; {"Hello"; {True; 21}}}.
This is a way to create a Tuple (a sequence of elements of different types) using only pairs.
Because right combs are used often in Michelson, there are shorter ways to express them.
For example, the notation {42; "Hello"; True; 21} is equivalent to {-42; {"Hello"; {True; 21}}}.
Binary trees
Another way to use pairs to combine multiple values is to use a binary tree layout.
In this layout, both sides of the main pair contain a pair, then both sides of these pairs contain pairs, and so on.
Here is an example of a binary tree: {{-42; "Hello"}; {True; 21}}
The binary tree layout is more efficient than a right comb when accessing arbitrary elements.
For example, to access the last element, you can get the second element of the main pair ({True; 21}) and the second element of that pair (21).
If the tree is balanced, the number of operations to get to any element is
$$O(\log_2 (size))$$, whereas for a right comb, it's $$O(size)$$.
Implementation details
Michelson: Operations on pairs and right combs
LIGO: Tuples
SmartPy: Tuples and Records
Archetype: Composite types, Tuple
Records {#records}
To make it easier to create type that combine multiple elements, high-level languages provide the record data type.
The record data type assigns a name to each element, which makes it much easier to get the element that you need because you don't have to remember the location of the element in the data.
Records are similar to Python dictionaries and JavaScript objects.
Different high-level languages represent records in different ways, but here is a simple abstract representation of a record definition:
Here is an abstract example of a value of that record type:
When you compile the high-level code, Michelson represents records with nested pairs and annotations.
In most cases, you can nest records.
For example, if you have a record type named "address," you can add it as an element to the previous record like this:
Implementation details
Archetype: Record
LIGO: Records
SmartPy: Tuples and Records
Options {#options}
Options represent a value that may or may not be defined.
Primitive types do not provide the possibility of a null or empty value; for example, an int type must always contain a number.
If you want to include the possibility that a value is unknown, undefined, or nonexistent, you can make a type into an option.
For example, an option based on an int type can hold a number or no value at all.
You can create an option type based on almost any other type.
For example, an option type based on an int is denoted as option and can contain these values:
An int value, represented as Some(42)
No value, represented as None
Each time that you manipulate the value within an option you must check if it contains a value or not.
The features available for options are:
Creating an option that contains a given value (SOME)
Creating an option that contains nothing (NONE)
Testing if an option contains something or none (IF_NONE)
Getting the value contained in an option (IF_NONE)
Using options instead of failures
Options are used for operations that can't always provide a result, which allows the code to handle the situation without failing and leads to good programming practice.
Here are a few examples where an option is used:
Converting an int to a nat returns an option, which is None if the int is negative
Dividing (EDIV), returns None when trying to divide by zero
Extracting a portion of a string or a bytes value returns None if the extract is beyond the bounds of the value
Fetching a value for a given key in a big-map or map returns None if the entry doesn't exist
Fetching the contract that corresponds to an address returns None if the address is not a contract
Unpacking bytes returns None if the data is not valid
When not to use options
Using an option is convenient when you need it, but it makes the corresponding code harder to write and read and slightly slower and more costly.
When a value may be undefined only at the initial contract deployment, it may be more convenient and efficient to initialize the value instead of making it an option, as in these examples:
For a timestamp, consider initializing it with epoch: January 1st, 1970.
For an address, consider initializing it with the address of the owner of the contract.
Alternatively (but harder to understand without comments), you can use the special null address, "tz1burnburnburnburnburnburnburjAYjjX", which does not correspond to an actual account
Implementation details
Michelson: Operations on optional values
LIGO: Optional values
SmartPy: Options
Archetype: Options
Big-maps and maps {#big-maps}
Smart contracts often need to store a database of records where each record is identified by a key and can be fetched quickly.
For example, an NFT contract may store a database of NFTs, each identified by a unique numeric ID.
For each NFT it stores metadata, such as the current owner.
A big-map is a key-value store that associates values to different keys.
This example big-map uses int and string types to associate numbers with their names:
The main operations available for big-maps are:
Creating an empty big-map (EMPTY_BIG_MAP)
Checking if there is an entry for a given key (MEM)
Accessing the entry associated with a given key (GET)
Assigning an entry to a given key (UPDATE)
Deleting the entry for a given key (UPDATE)
Big-maps vs maps
Big-maps are a special type of map type that is optimized so that it can contain very large amounts of data without necessarily causing issues with gas limits.
This is because the content of a big-map is lazily deserialized; only the entries that are manipulated by a contract are deserialized/reserialized, as opposed to maps and all the other data types, where all of the content is deserialized/reserialized for each call of the contract.
This makes big-maps more useful in practice than maps, because using maps can quickly cause gas consumption issues if the number of entries gets large.
Maps support all the features of big-maps plus these:
Iterating through each element of the map, and applying some code to it (ITER)
Getting the size (number of elements) of the map (SIZE)
Furthermore, unlike big-maps, maps can be passed as parameters and included in records or big-maps.
You cannot pass big-maps as parameters or include them in records because doing so would require manipulating the serialized content of the big-map and defeat the purpose of big-maps.
In general, developers use big-maps unless there is a good reason to use maps because big-maps.
If you choose to use a map, take precautions and optimize your code.
Example contract using big-maps
Here is a table representing an example of a contract that uses two big-maps:
{
Implementation details
Michelson: Operations on big-maps
Archetype: Assets, Map
LIGO: Maps, Big-maps
SmartPy: Maps and big-maps
Lists {#lists}
Lists can store and iterate through values of the same type.
For example, they can do these operations:
Inserting an element at the beginning of a list (CONS)
Getting the first element and the rest of a list (IF_CONS)
Iterating through a list (ITER)
Getting the number of items in a list (SIZE)
:::note High-level language list methods
Some high level languages may offer additional features such as getting an extract of a list.
Refer to the language documentation to see what is supported.
:::
:::warning List security considerations
To prevent attacks, make sure that the number of elements in a list can't be increased arbitrarily.
An attacker could make the list increase and cause problems.
In general, use big-maps to store large amounts of data.
:::
Implementation details
Michelson: Operations on lists
SmartPy: Lists
Archetype: List
LIGO: List
Sets {#sets}
Like lists, sets contain elements of the same data type, but in sets, each element can be present only once.
Sets are ordered, and the order is the natural order of the values in the set; see Comparing values.
The main operations available on sets are:
Creating an empty set (EMPTY_SET)
Adding an element to the set (UPDATE)
Removing an element from the set (UPDATE)
Checking if an element is present in the set (MEM)
Iterating through the set in the order of the value of the elements (ITER)
Getting the number of items in the set (SIZE)
Implementation details
Michelson: Operations on sets
Archetype: Set
SmartPy: Sets
LIGO: Set
Variants and Unions {#variants}
A variant (or union) can hold values of multiple types.
For example, a variant can hold either an int or a string.
When you use a variant, you can check which of the types it holds and run corresponding code.
Variants are used internally as a way to implement entrypoints
Some high-level languages use variants to implement enumerations, which is a type that has a list of valid named values.
Implementation details
Michelson: Operations on unions
LIGO: Variant types
SmartPy: Variants
Archetype: Enum
Lambdas {#lambdas}
A lambda is a piece of code that is also a value.
It can be stored or passed as a parameter to an entrypoint.
The code of a lambda takes parameters and returns a value but it has no side effects.
Unlike other code, it doesn't have access to the contract storage and cannot modify the storage.
Here are some common uses for lambdas:
Lambdas allow you to reuse code in multiple places when the language does not support reuse.
In high-level languages, you can reuse code with functions or similar structures, but in Michelson, you may need to use a lambda for the same purpose.
Lambdas can make parts of a contract upgradeable.
For example, the contact can store some of its logic in a lambda and an admin can call an entrypoint to change the lambda to change how the contract works.
Note that the ability to upgrade the contract can cause users to worry about the trustworthiness of the contract.
You can use lambdas to implement a generic multi-sig or DAO contract where a proposal takes the form of a lambda that performs some action and people vote on whether to execute the action or not.
Implementation details
Michelson: Control structures
Archetype: apply_lambda
SmartPy: Lambdas
LIGO: Anonymous functions
Simplified DAO contract
Tickets {#tickets}
A ticket is a data type that includes security mechanisms that make it suitable for issuing new tokens or granting portable permissions.
Tickets cannot be duplicated, so a single contract is always in control of a ticket.
In this way, a ticket can represent control over something or permission to do something.
A ticket contains three pieces of information:
The address of the contract that created it, called the ticketer
Some data with a type and value assigned by the contract, called the wrapped value or the payload of the ticket
An amount in the form of a natural number
Tickets have a type, which is based on the type of the data.
For example, a ticket with a payload of a string value is referred to as a "string ticket."
The ticket's information is public and can be read by any contract that holds the ticket.
Passing tickets
Contracts can pass tickets to entrypoints to change which contract is in control of the ticket.
If contract A passes a ticket to contract B, contract A loses all access to the ticket.
Contracts can pass tickets to other contracts via entrypoints accepting a ticket of the correct type; contracts can also pass tickets to user accounts.
Ticket features
There are three main features at the core of tickets, each associated with one of its three pieces of information:
Guaranteed origin
The ticketer address always refers to the contract that created the ticket.
Contracts can't change the ticketer address or create tickets that reference other contracts as the creator.
Immutability of the wrapped value
The data stored in a ticket (the wrapped value) can't be changed after the creation of the ticket, even by the contract that created it.
Splitting and joining tickets
The contract that creates the ticket sets the initial amount to any natural number.
From then on, contracts that control tickets can change them in the following ways:
SPLIT_TICKET: A contract splits a ticket into two tickets.
Both new tickets have the same ticketer address and payload, but the amount of the initial ticket is split between the two.
The initial ticket is destroyed.
JOIN_TICKETS: A contract merges two tickets into a single ticket.
The tickets must have the same ticketer address and payload.
The new ticket has the same ticketer address and payload as the originals, and its amount is the sum of the amounts of the joined tickets.
The two initial tickets are destroyed.
For example, a contract can create a single ticket with a large amount and send it to another contract.
The other contract can split the ticket and send the resulting tickets to other contracts, which can split and join the ticket.
Eventually, many contracts may have a ticket that was split from the original or one of its descendants.
The ticketer address and payload stays the same for all of these tickets and the sum of the amounts is always the same as the amount of the original ticket.
:::note Differentiating tickets
Because the only identifying information of a ticket is the address of the contract that created it and its payload, it is possible to create multiple indistinguishable tickets.
For example, a contract can create multiple tickets with the same payload.
After other contracts split and join these tickets, there is no on-chain way to tell which descendant ticket can from which original ticket.
For this reason, your code should verify the address of the contract that mints tickets before trusting them.
:::
Benefits of tickets used as tokens
The key benefit of tickets is that they continue existing independently of the contract that issued them.
This is very different from how tokens are usually managed, such as tokens that use the FA 1.2 or FA 2 standards.
Such tokens are fully under the control of the issuing contract; for example, transferring such a token may only be done by calling the smart contract that issued it.
Wrapping can be used as a way to work around this, but this is not technically transferring the token itself.
This helps bring extra trust in the value of the tokens represented by tickets, because there is no risk of the tokens suddenly becoming unusable if the issuing contract fails.
Tickets increase the decentralization of tokens and make them behave more like the native tez token, but with many more features and additional trust.
Operations on tickets
Contracts can run these operations on tickets:
Creating a new ticket with a given content and amount, and the current contract as the ticketer (TICKET)
Reading a ticket, which returns the three values contained in the ticket plus the ticket itself (READ_TICKET)
Splitting a ticket into two tickets with the same content and ticketer, but splitting the amount (SPLIT_TICKET)
Joining two tickets that have the same content and ticketer into a new ticket with the sum of the amounts (JOIN_TICKETS)
Implementation details
Michelson: Operations on tickets
LIGO: Tickets
Archetype: create_ticket and related
SmartPy: Tickets
Unit {#unit}
In Tezos, the unit type contains a single value that holds no information.
Smart contracts use unit values as placeholders where a variable is required but no other information is needed.
It is the input type of functions taking no input, the output type of functions producing no output, and the storage type of contracts storing no information.
For example, if a LIGO entrypoint receives no parameter, the data type of the entrypoint's parameter is unit:
Similarly, if you call this entrypoint with the Octez client and omit the --arg argument to pass no parameter, the client passes unit in the background.
Unit is a concept that Tezos inherits from OCaml; see Side-Effects and the unit Type in the OCaml documentation.
Implementation details
LIGO: Unit
Archetype: Unit
SmartPy: Unit
Cryptographic data types
Tezos provides hash functions for cryptographic purposes.
By default, use BLAKE2B, which computes a cryptographic hash of the value contents using the Blake2b-256 cryptographic hash function.
These other hash functions are available:
KECCAK: Compute a cryptographic hash of the value contents using the Keccak-256 cryptographic hash function.
SHA256: Compute a cryptographic hash of the value contents using the Sha256 cryptographic hash function.
SHA512: Compute a cryptographic hash of the value contents using the Sha512 cryptographic hash function.
SHA3: Compute a cryptographic hash of the value contents using the SHA3-256 cryptographic hash function.
Checking signatures
Tezos lets you check that a given piece of data, a sequence of bytes in a bytes data type, has been signed by the holder of the private key corresponding to a given public key.
The primitive CHECK_SIGNATURE takes as parameters the sequence of bytes, the signature and the public key, and returns a Boolean that indicates if the signature is indeed a signature of that sequence of bytes, by the holder of ths key.
BLS12-381 primitives
BLS12-381 is the name of an elliptic curve, a cryptographic primitive that can be used for digital signatures and zero-knowledge proofs.
It has the particularity of being pairing-friendly, which makes it possible to create short digital signatures that can be efficiently aggregated.
It can also be used for identity-based cryptography, single-round multi-party key exchanges, or and efficient polynomial commitment schemes such as KZG commitments.
Implementation details
Michelson: Cryptographic primitives, BLS12-381 primitives
LIGO: Crypto
Archetype: Blake2b and related, Elliptic curves
SmartPy: Cryptography
Taquito: Signing data
Time-locks
A timelock is a cryptographic primitive that can be used as part of a commit-and-reveal scheme, to provide a guarantee that the information associated to the commit is eventually revealed.
For information about using time-locks, see Timelocks.
Implementation details
Michelson: Time-lock
Archetype: Timelock
LIGO: Timelock
Comparing values
The ways that you can compare values depends on the types of those values.
Many types allow the usual comparison operators: =, !=, <, >, ≤ and ≥.
The syntax depends on the language.
Comparing values in this way produces a Boolean type that you can use in conditional instructions or to continue or terminate loops.
How values are compared depends on the type of the values:
nat, int, mutez and timestamp values are compared numerically.
Strings, bytes, key_hash, key, signature and chain_id values are compared lexicographically.
Boolean values are compared so that false is strictly less than true.
Address are compared as follows:
Addresses of user accounts are strictly less than addresses of smart contracts.
Addresses of the same type are compared lexicographically.
Pair values (and therefore records) are compared component by component, starting with the first component.
Options are compared as follows:
None is strictly less than any Some.
Some x and Some y are compared as x and y.
Values of union types built with or are compared as follows:
any Left x is smaller than any Right y,
Left x and Left y are compared as x and y,
Right x and Right y are compared as x and y.
Values of type Unit are all equal.
In Michelson, comparisons are done in two steps:
A COMPARE instruction consumes the values and produces a value that is 0 if the two elements are equal, negative if the first element in the stack is less than the second, and positive otherwise.
The instructions EQ (equal), NEQ (not equal), LT (lower than), GT (greater than), LE (lower or equal) and GE (greater or equal) consume this value and return the corresponding Boolean value.
Implementation details
Michelson: Generic comparison
Archetype: Comparison operators
SmartPy: Comparing sp.int and sp.nat
LIGO: Comparing values
Loops and iterations
A smart contract can contain loops, which take two general forms:
Conditional loops, which keep iterating as long as a given condition is true, such as while loops
Loops that iterate through every element of a data structure such as a list, map, or set
:::warning
When using loops, be careful of attacks that could increase the number of iterations in the loop.
:::
In many cases, it is possible to avoid performing loops in the contract itself by doing most of the computations off-chain.
Implementation details
Michelson: Control structures
Archetype: Asset - iteration, for, while, iter
LIGO: Iteration
Operations
The execution of the code of an entrypoint can have only two effects:
Changing the value of the storage of the contract
Generating new operations that run after the entrypoint execution is over
These operations can include:
Transferring tez to an account or to a smart contract entrypoint (TRANSFER_TOKENS)
Originating a new smart contract (CREATE_CONTRACT)
Setting the delegate of the current smart contract (SET_DELEGATE)
Only the first type is technically a transaction, but the terms "operation" and "transaction" are often used interchangeably in courses, documentation, and tools.
Don't worry too much about the difference.
Order of execution
The code of a contract never directly executes an operation or a transfer of tez.
Instead, it adds operations to a list and the list is added to a stack of operations to run after code of the entrypoint is complete.
The operations generated by a contract are executed in the order that they are added to the list.
All the operations generated by a contract and the operations these end up generating are executed before any other operations previously added to the stack.
For example, if a contract generates operations A and B, and operation A generates operation C, operation C runs before operation B.
Operation examples
For example, assume three contracts named A, B, and C that each have an entrypoint named "Start."
Contract A's storage has a value named "text," which is a string.
Contract A also has an entrypoint named "Add," which adds text to the storage string based on a string that the sender passes.
This table shows the logic of the entrypoints:
{
Operation Walkthrough
If a user calls A.start(), the following happens:
A.start() runs:
Replaces its storage text with "Start A,"
Adds operation B.start() to the list of operations
Adds operation C.start() to the list of operations
Adds "End A," to its storage, which becomes "Start A, End A"
Pushes the operations from the list [B.start(), C.start()] to the stack; B.start() is on the top
B.start() runs:
Adds operation A.add("Start B,") to the list of operations
Adds operation A.add("End B,") to the list of operations
Pushes the operations from the list [A.add("Start B,"), A.add("End B,")] to the top of the stack; the operation stack is now [A.add("Start B,"), A.add("End B,"), C.start()]
A.add("Start B") runs:
Replaces its storage with "Start A,End A,Start B,"
A.add("End B") runs:
Replaces its storage with "Start A,End A,Start B,End B,"
C.start() runs:
Adds operation A.add("Start C,") to the list of operations
Adds operation A.add("End C,") to the list of operations
Pushes the operations from the list [A.add("Start C,"), A.add("End C,")] to the top of the stack
A.add("Start C") runs:
Replaces its storage with "Start A,End A,Start B,End B,Start C,"
A.add("End C") runs:
Replaces its storage with "Start A,End A,Start B,End B,Start C, End C,"
At the end of all operations, A's storage is "Start A,End A,Start B,End B,Start C, End C,".
To summarize:
All of the code in an entrypoint runs before the operations it generates run
If a contract A generates a call to a contract B then a call to a contract C, all of the operations generated by B run before contract C runs.
If any of these operations cause a failure, everything is cancelled, including operations that have already completed.
Implementation details
Michelson: Operations on contracts
Archetype: Operation
LIGO: Inter-contract invocations
SmartPy: Operations
Handling errors
Unlike in many programming languages, there is no exception management on Tezos.
More precisely, there is no way to catch or intercept problems and trigger some alternate behavior when problems happen.
Instead, Tezos uses failures, which immediately cancel operations.
When code introduces a failure, all of the operations are canceled and any completed operations are reverted, as if the initial call to the contract never happened.
To reduce the risk of bugs, there is no way to catch or prevent a failure after code introduces it.
What happens after a failure?
On Tezos, a failure causes several things to happen:
The execution of the contract is immediately stopped and all of its potential effects are cancelled.
All prior effects of the contract are reverted, as if they never happened, like a database rollback.
Any changes to the storage are reverted.
The contract's balance is restored to what it was before execution started.
Furthermore, if the contract was called by another contract, or if it generated a call to another contract, all of these operations are cancelled as well.
The entire execution of everything, from the initial contract call by a user to the failure, is undone.
This is a double-edged sword that you must keep in mind when designing a contract:
positive impact: If something doesn't happen as intended and a single failure happens somewhere during a contract call or subsequent calls it produces, nothing at all happens, and you don't end up in an inconsistent state corresponding to a partial execution.
negative impact: It takes only one small issue in one of the contracts called as a consequence of your initial call for everything that you wanted to happen to be undone.
In some cases, this can mean that your contract becomes unusable.
Automatic failures
Some instructions automatically cause a failure.
Here are a few examples:
Causing an overflow on a mutez type, such as when adding or multiplying
Trying to do a bitwise left shift or right shift of a nat type by more than 256
Generating a transaction where the amount of tez transferred is greater than the balance of the contract that creates the transaction
Generating a transaction for an address that doesn't exist
There aren't too many of these cases, as most instructions that could cause an error use options as their return values, which allows (and also forces) you to explicitly handle the error case.
For example, integer division (EDIV) returns an option; if the division is successful, it returns Some and if the code tried to divide by zero, it returns None.
Raising failures
If your code encounters a problem, you can raise a failure.
The failure includes an error value that can help users or tools of a contract understand what went wrong.
See the documentation for your language for how to raise a failure.
Error values
The error value is meant to be used off-chain as information to identify the cause of the error.
Nothing can be done with it on-chain, because nothing at all happens on-chain when an error is produced.
The typical error value is a string with an error message, such as Error: deadline has expired.
Internally, all kinds of error values can be produced, such as integers or records.
The types supported depend on the language.
In particular, the error value is often used when testing contracts, where the test verifies that a specific invalid call produces a specific error.
Implementation details
Michelson:
Failures
Control structures
FAIL
Assertion macros,
Archetype: require, fail if
SmartPy: Exceptions
LIGO: Exceptions
Creating smart contracts
This documentation provides step-by-step instructions for creating smart contracts on Tezos. After creating the contract, you can find the resources on testing and deploying.
Choosing your smart contract language
Tezos supports a variety of smart contract languages: Michelson, SmartPy, LIGO, Archetype.
You can select a language based on your familiarity with programming paradigms, the complexity of the contract you want to deploy, and the specific features you require. Here's a more detailed table for each language:
| | Michelson | SmartPy | LIGO | Archetype |
|:----------------:|:----------------------------------------------------------:|:-----------------------------------------------------:|:-------------------------------------------------------------------------------------:|:---------------------------------------------------------------------------------:|
| Complexity | High (stack-based, low-level) | Low (Python-like, high-level) | Moderate (various high-level syntaxes) | Moderate (includes formal specification features) |
| Capabilities | Full control over contract, optimal for gas efficiency | Easy to write, automatically manages stack operations | Statically-typed, strong error checking | Specialized for formal verification and correctness |
| Use Cases | Optimized contracts, developers with blockchain experience | Python developers, rapid prototyping | Developers familiar with static typing, variety of mainstream programming backgrounds | High-security contracts, developers looking for formal proof of contract behavior |
For beginners, we recommend SmartPy or LIGO for their higher-level more abstracted approach.
Making a strategic choice
Before writing your code, take some time to consider whether your project is suitable for starting with a pre-existing template or if it would be better to start from scratch. Essentially, this depends on the type of contract you are building. For example:
FA2 contract: it’s better to use a template to start.
Others: build it from scratch.
Coding your contract
Before coding, you should clearly outline the purpose of your smart contract, define the problem it addresses, detail the functions it will perform, and specify any external interactions or transactions it will manage.
Starting with online IDE
The online editor is the quickest and easiest way to get started.
For example:
For smartpy user, we recommend to use the SmartPy online IDE
For LIGO user, we recommend to use the LIGO online IDE
Defining contract storage
Contract storage holds the persistent state of your smart contract. It’s important to carefully design your storage since storage is expensive on-chain. You should avoid storing any data that the contract will not use.
SmartPy: Use Pythonic classes and types to represent storage. SmartPy provides a straightforward way to map these into Michelson storage requirements.
LIGO: Choose the most suitable syntax flavor and use the type definitions to lay out the storage structure.
In Tezos, big maps are a storage optimization feature for large sets of data, especially when handling large datasets that don't need to be fully loaded into memory at once. Big maps are ideal for ledger applications with numerous accounts, as they load data lazily, fetching only necessary parts on demand. In contrast to regular maps, suitable for smaller collections, and lists, which order data, big maps save costs when the dataset is large.
In SmartPy, you can define a big map using sp.big_map, and in LIGO, you use big_map keyword for the type declaration.
Defining entrypoints
Entrypoints serve as methods to receive external communication in Tezos.
SmartPy: Entrypoints are defined as methods within a Python class that extends sp.Contract. They use decorators like @sp.entry_point to denote entrypoints
LIGO: Entrypoints in LIGO are defined as functions that manipulate storage. The function keyword is used, and each entrypoint function must be explicitly marked for export in the contract interface
You should clearly define the parameters and storage interaction for both languages.
Each entrypoint's parameters must be well-specified, with types that match the expected inputs. For example, if an entrypoint is supposed to accept an integer and a string, the parameter list should reflect this.
The contract storage is usually passed as an argument to the entrypoints. In SmartPy, the storage is accessed through the self.data attribute inside the entrypoint methods. In LIGO, storage is a parameter of the function, and it's often the last parameter by convention.
Deploying smart contracts
In Tezos, deploying a smart contract is often referred to as “origination”. This process essentially creates a new account that holds the smart contract's script. Contracts originated in this manner have addresses that start with KT1, which distinguishes them from the user accounts with addresses beginning with tz1, tz2, or tz3.
Prerequisites
Compile your contract and its initial storage
Set up an wallet account on Tezos with some tez to pay the fees
Deploying a smart contract
Generally, there are two methods for deploying your smart contracts: either using the command line in your terminal or deploying through an online IDE.
Deploying via terminal
The first one is to deploy through your terminal. Here is the syntax for the Tezos command line to deploy a smart contract:
where:
CONTRACT_NAME is the name given to the contract.
MICHELSON_FILE is the path for the Michelson smart contract code (.tz file).
AMOUNT_TEZ is the quantity of tez being transferred to the newly deployed contract. If a contract balance reaches 0 then it is deactivated.
FROM_USER account from which the tez are taken (and transferred to the new contract).
INITIAL_STORAGE is a Michelson expression. The --init parameter is used to specify the initial state of the storage.
GAZ_FEE is a specified maximal fee the user is willing to pay for this operation (using the --burn-cap parameter).
Deploying via online IDE
As for deploying through your online IDE, if you are using LIGO or SmartPy programming languages, you can deploy your smart contracts through their respective online IDEs.
SmartPy online IDE
LIGO online IDE
Compiling the initial storage value
When you deploy a contract, you initialize its storage.
The initial value of the storage must be a Micheline value, which is the format for variables in Michelson smart contracts.
The high-level languages provide tools to compile the initial values of smart contracts into Micheline values.
Compiling LIGO storage values
For LIGO smart contracts, you can use the ligo compile storage command.
For example, assume that a JsLIGO contract has a storage value that includes a list of integers, a string, and an integer:
When this contract is compiled to Michelson, the storage line of the contract looks like this:
To compile an initial value to this format, you can pass a JsLIGO value to the ligo compile storage command, as in this example:
The result is the Micheline value, as in this example:
Then you can use this Micheline value as the initial storage value for the contract:
Compiling SmartPy storage values
SmartPy lets you set the initial value of the contract storage in the smart contract code in the __init__ function.
For example, this contract defines three storage variables and sets their initial values:
Now you can compile and deploy the contract via the online IDE with these starting values.
If you want to deploy the contract with the Octez client, add a test to the contract and run the test with the command python MyContract.py.
One of the files this command creates ends in storage.tz and contains the Micheline value of the initial storage, as in this example:
Then you can use this Micheline value as the initial storage value for the contract:
Interacting with the contract
When you have successfully originated the smart contract and it is included in a baked block, there are two ways to interact with it: through command lines or through a block explorer.
Interacting through command lines
The first method involves interacting with the contract's entry points using command lines.
For example, suppose you have a smart contract with an entrypoint called update_data, which takes an integer as an argument to update some data in its storage. Here's how you might invoke this entrypoint:
Where:
CONTRACT_NAME: Identifier or the address of the contract that you want to interact with.
YOUR_ACCOUNT_ADDRESS Your own account address that will initiate the transaction.
--arg: Argument that you're passing to the entrypoint, in this case, an integer value. You need to format this according to the expected input in the contract's Michelson code.
--entrypoint: Method in the smart contract that you're calling.
--burn-cap: The maximum fee you are willing to spend for this transaction to be included in the blockchain.
Here's an example with hypothetical values filled in:
Where:
KT1Vsw5kh4P1Vn...: Contract address.
tz1VSUr8wwNhLAzempoch5d6hLRiTh8Cjcjb: User's account address.
'42': New integer value you wish to pass to the update_data entrypoint.
0.05: Maximum amount of tez you're willing to pay in fees.
:::note
Always ensure that you check the documentation specific to the smart contract you are interacting with, as the expected arguments (--arg) and the name of the entrypoint (--entrypoint) can vary widely depending on the contract's design and purpose.
:::
Interacting via blockchain explorers
A blockchain explorer is an efficient and user-friendly tool that enables you to interact with deployed contracts. In the Tezos ecosystem, there are two main blockchain explorers:
Better Call Dev
TzKT
To interact with a contract, copy its address into one of these blockchain explorers. Below is the user interface for interacting with a contract through Better Call Dev:
UI for Better Call Dev
Entrypoints
The entrypoints of a contract represent the different ways that it can be called, similar to a method or function in many programming languages or an endpoint of an API.
The entrypoints in a Tezos smart contract must meet these specifications:
Contracts must have at least one entrypoint.
Each entrypoint must have a name.
Entrypoints may accept parameters, which can be of almost any data type that Tezos supports.
Unlike functions and API endpoints, entrypoints do not return a value directly to the caller.
To return data from a smart contract, you can use one of these methods:
Use Views to return data to smart contracts or off-chain applications
Use Events to return data to off-chain applications
Include a callback parameter that sends information to another smart contract, as in the getAllowance, getBalance, and getTotalSupply entrypoints of FA1.2 contracts
For an example of a simple contract, see the tutorial Create a smart contract.
For examples of more complex contracts, see Examples of contracts on opentezos.com.
Entrypoint logic
An entrypoint may run logic based on:
The contract storage
The parameters that senders pass
Transaction context values such as the address of the caller
The table of constants
Entrypoints cannot access information outside of Tezos, such as calling external APIs.
If an entrypoint needs information from outside Tezos it must use oracles; see Oracles and Using and trusting Oracles on opentezos.com.
The only effects that an entrypoint can have are changes to its storage and new operations that are run after the entrypoint completes.
An entrypoint can call other entrypoints in its contract or entrypoints in other contracts.
Example entrypoints
The contract in the tutorial Create a smart contract has three entrypoints:
| Entrypoint | Description |
| --- | --- |
| increment | increment takes an int as a parameter and adds it to the previous value of the storage |
| decrement | decrement takes an int as a parameter and subtracts it from the previous value of the storage |
| reset | reset takes "Unit" (no value) as a parameter and sets the storage to 0 |
Implementation details: the default entrypoint
Even though your higher-level code may have separate codeblocks for each entrypoint, the compiled Michelson code uses a single codeblock with a single entrypoint, known as the default entrypoint.
This default entrypoint uses the parameter that clients pass to decide which code to run.
In most cases, developers can ignore the default entrypoint and imagine that the compiled Michelson code has multiple entrypoints like the higher-level code.
However, in some cases, you may need to consider how the contract actually decides which code to run and how clients trigger this code.
For example, when you compile the contract in the tutorial Create a smart contract to Michelson, its first line defines the parameter type that the contract accepts:
To call the reset entrypoint, clients technically call the default entrypoint and pass the Michelson-encoded parameter Left Unit.
This parameter value means that the left value of the parameter type, which is annotated %reset, is set to the value Unit, which means no value.
In its logic, the compiled Michelson code uses the IF_LEFT command to check if the left value of the parameter is defined and if so, it runs the reset entrypoint code.
In this way, the following Octez client commands are equivalent; one passes Unit to the reset entrypoint and the other passes Left Unit to the default entrypoint:
Developers need to know about the default entrypoint only when they encode parameters for smart contracts manually.
Most Tezos clients, including Octez and Taquito, encode parameters automatically.
Working from the previous example, they convert a call to the increment entrypoint with the parameter 5 as a call to the default entrypoint with the parameter Right (Right 5).
Different languages have different ways of indicating entrypoints.
For information about coding entrypoints in specific languages, see these links:
Michelson: Entrypoint
Archetype: Entrypoint
SmartPy: Contracts
LIGO: Main function and Entrypoints
Storage
Each contract has associated storage, which is persistent internal data that it can read and write to.
Contracts can access only their own storage; they can't access the storage of other contracts.
To provide information to other contracts, use Views.
However, the content of the storage of a contract is public, like everything else in the state of the blockchain.
Therefore, you can see the current value of the storage of any contract using an explorer such as Better Call Dev.
The type of the storage is fixed by the code of the contract and cannot change.
It can be any type, from a basic primitive type such as a nat, to a complex type that includes lists, sets, big-maps, and variants.
See Examples of contracts on opentezos.com for ideas about how storage can be used.
Implementation details
Michelson: Semantic of contracts and transactions
Archetype: Storage
SmartPy: Contracts
LIGO: Main function
Special values
The code of a contract can access some special values.
See the reference for your language for information about accessing these values:
caller: The address of the direct caller of the current entrypoint.
This value is often used for these reasons:
To check that the caller is allowed to call the entrypoint.
For example, only a member of a DAO may call its vote entrypoint.
Only the owner of an NFT may call an addToMarket entrypoint of a marketplace to put the NFT on sale.
To assign or transfer resources to the caller or to store information about them.
For example, a user may call a buy entrypoint of an NFT marketplace and the contract assigns ownership of the NFT to them.
The contract assigns ownership by storing the caller address in the record that is associated with the NFT.
source: The address of the initiator of the sequence of calls that led to this entrypoint.
For example, assume that user A called contract B that in turn called contract C:
A -> B -> C
When C runs, source is the address of A, while caller is the address of B.
:::warning Access permissions
It is best practice to implement permissioning based on caller instead of source because any user account can call any entrypoint on Tezos.
:::
self: The address of the contract itself.
For example, you can ensure that an entrypoint is called only by the contract itself by verifying that caller = self.
balance: The amount of tez (in mutez) in the contract, including any tez that have been transferred to the contract by the current transaction.
amount: The number of tez that have been transferred to the contract during the current transaction.
These tez are added to the balance, except if the execution ends in a failure.
Some languages refer to this amount with the name transferred.
:::note Rejecting tez
By default, an entrypoint automatically accepts any tez that is sent to it.
If the contract should not accept tez, it can reject tez by verifying that the amount is zero.
:::
now: The timestamp of the current block.
This value is the same during the execution of all of the contract calls from the same block.
Technically, this value is equal to the timestamp of the previous block plus the minimum block delay (the expected duration between two blocks).
This prevents the baker of the current block from manipulating this value, while keeping it predictable to everyone.
This value is often used to check deadlines, for example, if someone has to vote before a certain date.
level: The level of a block corresponds to the number of blocks in the chain since the beginning of the chain (genesis block) until that block.
It increments by one for each new block.
Implementation details
Michelson: Special operations, Operations on contracts
Archetype: Constants
SmartPy: Timestamps
LIGO: Tezos, Tezos specific built-ins, Tezos.now
Global table of constants
Tezos provides a feature that lets user store data in a global table of constants.
This makes it possible to reuse code or data between contracts, and by doing so, reducing the size of these contracts.
It is a write-only key-value store, where anyone can add data as long as they pay for the storage costs.
When you register a piece of data in this table, you obtain its address, which is a Base58-encoded Blake2b hash of the binary serialization of the data.
The data can then be referenced anywhere in your code.
It can be used to store code, types, or data.
Implementation details
Michelson: Global constants
LIGO: Global constants
Archetype: Global constants
Serialization
Between contract calls, the code of a contract, as well as its storage, are stored as a serialized sequence of bytes, for efficiency purposes.
Every time the contract is called, the serialized code and storage are deserialized, unless the deserialized version is still cached.
Similarly, after the execution of the contract, the storage needs to be serialized to be stored again as a sequence of bytes.
This takes CPU time, which means that when you call an entrypoint, on top of paying for the gas for the execution of the code of the entrypoint itself, you also need to pay for this serialization/deserialization.
The cost to call a very simple entrypoint may get large if there is a lot of data in its storage.
Remember that unlike the rest of the storage, big-maps are not entirely serialized/deserialized for each call.
Instead, only the values that are read are deserialized, and only the values that are added or updated are serialized.
This makes using big-maps more efficient in these cases.
PACK and UNPACK
Tezos provides the ability to serialize and deserialize data or code yourself:
The PACK instruction takes a value of (almost) any type, and serializes it into a bytes value.
The UNPACK instruction takes a bytes value, and deserializes it into its original value.
As the deserialization may be impossible if the sequence of bytes doesn't represent valid serialized data, it returns an option type.
Serializing your own data in this way may be useful if you want to apply operations that are only available on bytes values.
For example, you may want to compute the hash of some data.
You can do so by packing it first and then applying a hash function such as BLAKE2B on the resulting bytes value.
Formatting
The Tezos PACK instruction prepends this metadata to the serialized value:
One byte to indicate the data format, usually 05 to indicate a Micheline value.
One byte to indicate the data type, such as string, int, nat, or address.
Four bytes to indicate the length of the data in bytes.
The rest of the serialized value is the original value converted to hexadecimal.
This metadata allows Tezos to compress data such as addresses into fewer bytes than ordinary byte-encoded strings.
For example, if you pack the address tz1QCVQinE8iVj1H2fckqx6oiM85CNJSK9Sx, the resulting bytes are 0x050a00000016000032041dca76bac940b478aae673e362bd15847ed8, but if you pack the string value tz1QCVQinE8iVj1H2fckqx6oiM85CNJSK9Sx, the resulting bytes are longer: 0x050100000024747a3151435651696e453869566a31483266636b7178366f694d3835434e4a534b395378.
Because of this metadata, you can't use other byte serialization functions to pack and unpack data on Tezos.
Many Tezos tools include functions to pack and unpack data, including LIGO, SmartPy, and the Octez client.
For example, to pack the address tz1QCVQinE8iVj1H2fckqx6oiM85CNJSK9Sx with the Octez-client, run this command:
To unpack the resulting bytes, use the unpack michelson data command to remove the metadata and then the normalize data command to get the original value, as in this example:
For more information about the format that Tezos uses to pack and unpack data, install the octez-codec program and run this command:
Implementation details
LIGO: Pack and Unpack
SmartPy: Packing and Unpacking
Archetype: pack, unpack
Private transactions (Sapling)
Sapling is a protocol that enables transactions of fungible tokens while increasing privacy.
It hides transactions from the public, but allows specific entities to view them to comply with regulations.
The key steps are as follows:
A shielded pool is created within a contract which a number of users can call to perform transactions whilst keeping details private.
The users send tokens to this shielded pool, which is called shielding tokens.
Information about these transactions is public.
Users perform shielded transactions, in such a way that the amount, sender of receiver of each transactions are not revealed publicly.
Only the origin and destination of each transaction have access to the transaction information.
Later, users may get some or all of their tokens out of the pool by unshielding their tokens.
Information about these transactions is public.
If a regulator needs access to the transactions of a user, this user may share a viewing key, which gives access to all the transactions made by this user.
Note that using the Sapling protocol in a shielded pool and expecting a high degree of privacy requires taking a number of precautions, including:
Making sure there are enough members in the pool to ensure anonymity.
For example, if there are only two members, it becomes very easy to identify the source and destination of transactions.
Adding dummy transactions, or dummy inputs and outputs of transactions, to hide the actual number of parties involved in each transaction.
Making sure to use shielded tokens in multiple transactions.
For example, if a user shields exactly 16.32 tokens and another user later unshields exactly 16.32 tokens, the transaction may be traceable.
Being careful about information that can be deduced from the timing of transactions.
The internals of Sapling are quite technical.
The system is based on an UTXO (bitcoin-like) transaction system, where each transaction consumes some unspent output and produces new unspent outputs.
It uses a system of cryptographic commitments in place of public amounts and addresses, that can then be "consumed" using a system of nullifiers.
The process uses a mix of cryptographic tools including SNARKs, incremental Merkle trees, and Diffie-Hellman key exchanges.
Implementation information
Michelson: Sapling integration
Archetype: Sapling
LIGO: Sapling
Views
Views are a way for contracts to expose information to other contracts and to off-chain consumers.
Views help you get around a limitation in smart contracts: a smart contract can't access another contract's storage.
Smart contracts can provide information via callbacks, but using a callback means calling entrypoints, which is an asynchronous action.
By contrast, views are synchronous; a contract can call a view and use the information that it returns immediately.
Like entrypoints, views can accept parameters, access the contract's storage, and call other views.
Unlike entrypoints, views return a value directly to the caller.
However, views can't cause side effects, so they can't create operations, including calling smart contracts and transferring tez.
Views also can't change the contract storage.
Off-chain users can run a view without creating a transaction, which is a convenient way to get information from a smart contract.
For example, you can use the Octez client run view command to run a view from the command line.
Types of views
Contracts can store the source code of their views either on-chain or off-chain:
The code of on-chain views is stored in the smart contract code itself, like entrypoints.
The code of off-chain views is stored externally, usually in decentralized data storage such as IPFS.
The contract metadata has information about its off-chain views that consumers such as indexers and other dApps use to know what off-chain views are available and to run them.
On-chain and off-chain views have the same capabilities and limitations.
Examples
Views can provide information about tokens.
You can use views to provide an account's balance of a token type or the total amount of a token in circulation.
DEXs can provide the exchange rate between two tokens or the amount of liquidity in the pool.
Instead of repeating certain logic in multiple places, you can put the logic in a view and use it from different smart contracts.
Creating views in JsLIGO
Views in LIGO look like entrypoints because they receive the input values and storage as parameters, but they have the @view annotation instead of the @entry annotation.
They return a value instead of a list of operations and the new value of the storage.
This JsLIGO view returns the larger of two numbers:
This view returns a value from a big-map in storage:
Calling views in JsLIGO
This JsLIGO code calls the get_larger view from the previous example by passing the target contract address, parameters, and view name to the Tezos.call_view() function:
If the view takes no parameters, pass a Unit type for the parameter:
Creating views in SmartPy
Views in SmartPy look like entrypoints because they receive the self object and input values as parameters, but they have the @sp.onchain_view annotation instead of the @sp.entrypoint annotation.
This SmartPy contract has a view that returns a value from a big-map in storage:
Calling views in SmartPy
In SmartPy tests, you can call views in the contract just like you call entrypoints.
However, due to a limitation in SmartPy, if the view accepts multiple parameters, you must pass those parameters in a record.
For example, to call the get_larger view in the previous example, use this code:
To call a view in an entrypoint, pass the view name, target contract address, parameters, and return type to the sp.view() function, as in this example:
If the view takes no parameters, pass () for the parameter:
Calling views with Taquito
Calling a view with Taquito is similar to calling entrypoints.
When you create an object to represent the contract, its contractViews property has a method for each view, which you can call as in this example:
Calling views with the Octez client
To call a view with the Octez client, use the run view command, as in this example:
If the view takes no parameters, you can pass Unit or omit the with input.
Implementation details
Octez: On-chain views
Archetype: View
SmartPy: Views in testing
LIGO: On-chain views
Taquito: On-chain views
Events
Events are a type of internal operation on Tezos.
Smart contracts emit events and off-chain applications can listen for events to know when things happen on the chain.
Event data
An event includes data about the call to the smart contract that triggered the event, including the hash of that operation and the level of the block that included the operation.
The event can also include these optional fields:
A tag that can identify the type of event or help clients filter the stream of events.
A payload of data in Michelson format
The Michelson data type of the payload
Emitting events
Each high-level language has its own way of creating events.
The compiled Michelson code uses the EMIT command to emit the event.
For example, this contract stores a number and emits events when that amount changes:
JsLIGO
SmartPy
When a client calls the reset entrypoint, it emits an event that is tagged with "reset" and includes the address that called the entrypoint and the amount that the storage was before it was reset to 0.
Responding to events
Smart contracts cannot respond to events.
Off-chain applications can listen for and respond to events by monitoring the event operations in blocks.
For example, Taquito includes tools to listen for and respond to events.
For example, this code listens for events from the contract with the address contractAddress and the tag tagName:
Both the tag and address parameters are optional in the subscribeEvent function, but most clients are interested in events from a specific contract address or tag.
The event data is in Michelson format, so an event from the reset entrypoint of the previous example contract might look like this:
Note that the address field is returned as a byte value.
To convert the bytes to an address, use the encodePubKey function in @taquito/utils.
You can see the complete content of the event operation by looking up the operation hash in a block explorer.
For example, to see the operation in the previous example, look up the operation onw8EwWVnZbx2yBHhL72ECRdCPBbw7z1d5hVCJxp7vzihVELM2m.
Implementation details
Michelson: Contract events
LIGO: Events
SmartPy: sp.emit
Archetype: Events
Taquito: Contract Events
Delegation
Placing your tez in a smart contract means you can't stake them towards baking or delegate them to get rewards.
However, the smart contract itself can delegate the tez it holds and distribute the rewards to the original owners of the tez or keep them in its balance.
To manage delegation, you can implement these features:
Set, update, or remove the address of the baker that you want the contract to delegate its tez to (SET_DELEGATE).
Obtain the voting power of a contract (a delegate), which is based on its total staking balance as computed at the beginning of the voting period (VOTING_POWER).
Obtain the total voting power of all contracts (TOTAL_VOTING_POWER).
In practice, both the voting power of a contract and the total voting power of all contracts are expressed as a number of mutez, but this may change with time as the protocol evolves.
Implementation details
Michelson: Operations on contracts
Archetype: Total voting power, Voting power, set_delegate
SmartPy: Operations
Multi-signature contracts
Multi-signature (or multisig) contracts require multiple accounts to authorize operations before running them.
They have many applications, including:
Governance: DAOs and other groups can use them to vote on the actions that the organization takes.
Funds distribution: Accounts can vote on where funds are sent.
Security: Requiring multiple signatures can prevent a single compromised wallet from doing malicious things.
As with any contract, a single account must originate multisig contracts, but that account does not necessarily have any special privileges on the contract.
The contract originator does not even need to be one of the accounts that can authorize operations.
Using proposals
One common way to create a multisig contract is to allow authorized users to submit a proposal that other authorized users can vote on.
For example this multisig contract stores tez and allows users to propose and vote on the account that should receive the tez.
It stores a big-map of proposals, each with an amount to pay, the account to pay, and information about who has voted for the proposal:
The submit_proposal entrypoint allows authorized users to submit a payment amount and an account address, which adds a proposal to the storage:
Authorized accounts call the vote_on_proposal entrypoint to vote for the currently active proposal:
Accounts that don't want to vote for the proposal don't need to do anything.
When the necessary number of votes have been reached, the vote_on_proposal entrypoint automatically sends the tez to the account in the proposal:
Using multi-signature operations
You can also require operations to be signed by multiple accounts.
For example, the Octez client has a built-in multisig contract that you can use.
The contract requires signatures from multiple accounts before running transactions such as :
Distributing tez
Changing the threshold
Changing the accounts
Setting the delegate of the contract
Running arbitrary Michelson code
To originate the contract, you specify the accounts to include as authorized signers of the contract and the threshold, which is the number of accounts that are needed to authorize a transaction.
This example creates a contract with three members and a threshold of 2:
To initiate a transaction, use the octez-client prepare multisig transaction command.
For example, this command initiates a transfer of 10 tez from the contract to Bob's account:
The response includes a string of bytes that the other accounts must sign, as in this example:
To sign the bytes, the other accounts run the octez-client sign bytes command.
For example, this code assigns the bytes to the TO_SIGN variable and signs them with two accounts:
Then you can use the two accounts' signatures to run the transaction:
The contract uses a counter to ensure that the signatures work only once.
For more information, run the command octez-client man multisig and see Built-in multisig contracts in the Octez documentation.
Setting up multi-signature wallets
Some tools create wallets that can store tez and other tokens and manage the process of signing transactions.
For example, TzSafe provides a front-end application that lets you:
Create a multisig wallet and store tez, FA1.2 tokens, and FA2 tokens in it
Create proposals to transfer tokens
Sign or reject proposals
Run approved proposals
For more information about TzSafe, see https://docs.tzsafe.marigold.dev.
Securing multisig contracts
Like all contracts, you must ensure ensure that multisig contracts won't become compromised or permanently blocked.
Control the list of voters, how accounts can be added or removed, and how many votes are needed to approve a proposal
Prevent users from blocking the contract by setting a time limit for proposals
Prevent users from clogging the contract with too many proposals or submitting a new proposal before other users have time to vote on the current proposal
More information
For more information on multisig contracts, see examples in the repository https://github.com/onedebos/multisig and an explanation in this video: https://www.youtube.com/watch?v=r9QrrSfJuVg.
Timelocks
Timelocks are a way to prevent exploits known as front-running, or more properly, extractable value (EV) attacks.
In general, these attacks happen when a client uses information about an upcoming transaction to make a profit at its expense.
:::note
Within decentralized finance, the term "front-running" can be misleading because it implies a relationship between clients and block producers where none may exist.
In traditional finance, front-running often relies on malicious brokers profiting from advance, nonpublic information about their clients' trades.
For example, a malicious stockbroker may buy a security for themselves before they execute a client's large buy order, knowing that the client's buy order will drive the price of the security up.
In decentralized finance, anyone can see incoming transactions, so front-running does not always mean that block producers are acting maliciously or sharing private information with clients.
EV attacks can come from bots that watch for incoming transactions and insert their own transactions before the incoming transaction runs.
However, block producers may still be able to profit from advance information about transactions.
For example, they may craft blocks that include a client's transaction and one of their own in an order that guarantees a gain to the block producer.
This type of attack is called a block producer extractable value (BPEV) attack.
:::
For more information about this kind of attack, see An analysis of Ethereum front-running and its defense solutions.
Preventing EV attacks with timelocks
Tezos developers can prevent EV attacks with timelock encryption, which encrypts a message so it can be decrypted in two ways:
The author of the encrypted message provides the unencrypted message and proof that it matches the encrypted message.
Anyone else can decrypt the message with a certain number of operations.
With timelocks, an author can encrypt a message in such a way that anyone else can reveal the message, but only after a certain amount of time.
This duration is based on the time it takes for a single computer to decrypt the commitments because the decryption algorithm can’t be parallelized.
That means that computers can’t easily work together to decrypt it and that adversaries cannot break it even with significant computing power.
dApps that use timelocks to prevent EV attacks work in this general way:
A user sends a timelock-encrypted transaction or operation to the dApp.
The dApp adds the transaction to its queue before anyone can see what the transaction is.
To everyone else, including bakers, bots, and the dApp itself, the transaction is encrypted and unreadable.
No one else can decrypt the transaction quickly, so they can’t take advantage of it in an EV attack.
In the background, the dApp begins decrypting the transaction.
One of two things happen:
The user submits the decrypted transaction and the proof that the decryption is accurate to the dApp before the dApp decrypts the transaction.
The dApp decrypts the transaction before the user submits the decrypted transaction, such as if prices changed and the user doesn't want to execute the transaction anymore.
In this case, the dApp takes a penalty charge from the transaction for making it waste processing power on decrypting it.
The dApp fulfills the decrypted transactions in its queue in the order that they were submitted.
In practice, DeFi users nearly always submit their decrypted transactions before anyone else decrypts them.
They don’t want to pay the penalty and they know how long it will take the dApp to break the transaction’s encryption.
Flow of timelocks in a typical commit-and-reveal scheme
Timelocks are often used to ensure that a group of users each submit information while keeping their submissions secret for a certain amount of time.
Sometimes this process is called a commit and reveal scheme because all users commit to their choice without seeing the others' choices.
This is the typical usage pattern of a timelock:
In the first time period, a contract collects timelock encrypted values from users along with some valuable deposit, such as tez.
In the second time period, after the values are collected, users submit a decryption of the value they submitted with a proof that the decryption is correct.
This prevents users from changing their values.
In the third time period, if any value isn't decrypted, anyone can claim some of the deposit by submitting a decryption of the value.
This prevents users from profiting by not revealing their decrypted values or blocking the process.
This period needs to be long enough so that people have enough time to perform the timelock decryption.
Finally, the contract runs some logic based on the decrypted data.
For example, it might distribute funds to a winner or run an operation that the majority of the users secretly voted for.
Contracts can assess different penalties for not revealing, depending on whether the user merely failed to submit a decryption for their value or if they also intentionally encrypted invalid data.
They can also distribute different rewards for submitting a correct decryption.
Because it's possible to reveal the data eventually, all participants have an incentive to reveal because they will eventually lose their deposit when someone else cracks and reveals the data.
In this way, timelocks work as a deterrent; in practice, participants nearly always reveal rather than forcing someone else to crack the encryption.
However, the second period needs to be long enough so that bakers cannot easily censor submission of the decryption in a bid to later claim the reward.
Also, contracts should burn part of a deposit when another user submits a decryption of someone else's value.
Burning a part of the deposit limits attacks where a user gets back their whole deposit by providing the decryption, but in a way that delays everyone else.
Example
Timelocks make it possible to prove that a certain decision was taken before some information was revealed.
This information may be the decision of other participants or some external independent information.
As an example, imagine that two players want to play the game rock, paper, scissors via a smart contract.
If one player can see another player's choice before they choose, they will win every time.
Because it is impossible to force and verify that the two players reveal their choice simultaneously, they can use a commit-and-reveal scheme.
During the first step, they pick their choice and put it in a pair with some random data.
Then they compute a hash of the result to create a timelock and send this value to the contract as a commitment.
After both players have sent their commitment, they can reveal by sending the actual data to the contract including the random data.
The contract can verify that the hash of this data matches the previous commitment.
When the two players have revealed their data, the smart contract determines the outcome of the game and distributes rewards accordingly.
References
Timelock puzzles and timed release Crypto
Not protecting against bots (BPEV attacks)
How Tezos timelocks help protect DeFi transactions
Oracles
Oracles provide data to smart contracts that they wouldn't be able to access otherwise.
Because smart contracts can't access data from outside the blockchain, including calling external APIs, you can use oracles to provide the data.
At a basic level, oracles have two parts:
The off-chain part provides external data to the on-chain part via ordinary smart contract transactions
The on-chain part stores the data on the chain and provides it to consumer smart contracts
How the oracle works is up to the designer.
Generally speaking, oracles allow smart contracts to call them for information and charge a fee or subscription in exchange.
An example of an oracle is Harbinger, which provides information about currency exchange rates.
Trusting oracles
The difficult part of setting up oracles is ensuring that the data they provide is accurate and authoritative so it can be trusted.
For example, oracles can average multiple sources of data like currency prices to prevent manipulation of the data and ensure that it does not rely on a single source.
They can use encryption to sign data and prove that it it authoritative.
For ways to set up oracles to be trustable, see Using and trusting oracles on opentezos.com.
Decentralized applications (dApps)
One of the main features of blockchains is decentralization: each transaction is verified by multiple nodes and its validation process does not rely on a single trusted third party.
Decentralized applications (dApps or Dapps) take advantage of these features to create applications that are independent, transparent, and trustless.
In general, dApps have these parts:
Frontend: An off-chain component that can act as a user interface to simplify interaction with the on-chain component, run off-chain processing, and get information from sources that are not available to the on-chain component
Middleware: Optionally, an indexer to interpret the backend information and provide it in a more convenient format for the front-end component
Backend: An on-chain component that consists of one or more smart contracts
The off-chain component can be nearly any kind of program, including a web application, mobile or desktop app, or command-line interface.
It relies on wallets and tools to interact with the smart contracts on behalf of a user's Tezos account.
Fundamental diagram of dApps, showing the frontend, indexer, and backend
Some of these tools that allow an off-chain component to interact with smart contracts include:
Taquito, an SDK for JavaScript/TypeScript applications
The Tezos Unity SDK, a toolkit for the Unity game development platform
Taqueria, a development platform for dApps
The next pages in this section illustrate dApps with examples, detail the main steps when developing dApps such as Connecting to wallets and Sending transactions, and introduce some best practices
Tutorials
These tutorials cover dApps of different complexities:
For a simple dApp, see Build a simple web application
For a dApp that mints NFTs, see Mint NFTs from a web app
For a large dApp that allows users to buy and sell NFTs, see Build an NFT marketplace
Sample dApps
Here are some sample web applications that access Tezos:
Completed applications from the tutorials on this website are in the repository https://github.com/trilitech/tutorial-applications
Example applications that use Taquito: https://tezostaquito.io/docs/contracts_collection/
A sample application that uses Taqueria: https://taqueria.io/docs/scaffolds/taco-shop/
Connecting to wallets
dApps must connect to user wallets to view the tokens in the account and to submit transactions on behalf of the wallet's owner.
The primary tools that dApps use to connect to wallets are:
Beacon: A JavaScript/TypeScript SDK for connecting to wallets, signing transactions, and sending information about this connection between connected apps
Beacon supports many Tezos wallets seamlessly, including TZIP-10 and WalletConnect2.0 wallets, so you don't have to write different code for each wallet that you want to support.
Beacon also implements the TZIP-10 proposal, which describes an interaction standard between wallets and dApps.
By using this standard, a dApp that uses Beacon can send messages over a peer-to-peer communication layer to a wallet, such as allowing a user to connect with an app on one platform, such as by scanning a QR code on a mobile app, and then use the dApp with the connected wallet on another platform, such as a desktop browser.
Beacon can remember the connections that have been established and the accounts that have connected to the app.
It also includes default UI elements for connecting wallets and showing the status of a transaction.
For more information about Beacon, see https://www.walletbeacon.io.
Taquito: A JavaScript/TypeScript SDK for sending transactions
Taquito provides a wrapper for Beacon so dApps can interact with wallets and with Tezos with the same code.
For more information about Taquito, see Taquito.
Beacon and Taquito
Most of the time, dApps use Beacon and Taquito together for a straightforward way to connect to wallets and submit transactions.
For an example, see the tutorial Build a simple web application.
Connecting to wallets
That tutorial connects to the wallet using the Taquito BeaconWallet object, which is a wrapper around Beacon's wallet functionality, with code like this example:
When this code runs, Beacon opens a popup window that guides the user through connecting their wallet.
Then the application can send transactions to Tezos.
See Part 3: Sending transactions in the tutorial Build a simple web application.
Reconnecting to wallets
As with using Beacon on its own, you can detect whether a user has previously connected their wallet and reconnect automatically.
For example, this code checks to see if the user has connected and if so, it automatically reconnects to the wallet:
Disconnecting wallets
It's good programming practice to allow a user to disconnect their wallet, such as if they want to connect with a different wallet.
To disconnect the active wallet, call the clearActiveAccount method, as in this example:
Beacon by itself
You can also use Beacon without Taquito.
Connecting to wallets
To connect to a wallet with Beacon, import the Beacon package and use the getDAppClientInstance function to get an instance of the Beacon DAppClient object.
Using this function ensures that you have only one instance of the Beacon client because it returns an instance if one already exists or creates one if it does not.
Creating multiple instances or copies of the Beacon DAppClient object can lead to unexpected behavior.
Then, use this object to send a permission request to prompt the user to connect a wallet:
When this code runs, Beacon opens a popup window that guides the user through connecting their wallet.
Reconnecting to wallets
Beacon can detect users that return to the dApp after connecting previously.
The getActiveAccount method returns an address if the user has previously connected a wallet.
You can run this code when the page loads and if it finds a connection, you can skip calling the requestPermissions method unless the user wants to connect a different account:
Disconnecting wallets
It's good programming practice to allow a user to disconnect their wallet, such as if they want to connect with a different wallet.
To disconnect the active wallet, call the clearActiveAccount method, as in this example:
Other tools
Some specific wallets provide toolkits to connect dApps to them.
For example, the Temple wallet provides the @temple-wallet/dapp NPM package.
For more information, see https://github.com/madfish-solutions/templewallet-dapp.
Best practices
Keep tools up to date
It's important to keep the SDKs that you use to connect to wallets up to date for the best user experience and performance.
Reuse connected accounts
For the best user experience, use the reconnection feature of Beacon described above to persist user accounts.
The UI can reflect that the user is connected and display the account address.
In this case, you can replace the "Connect" and "Sync" buttons with "Disconnect" and "Unsync" button.
Connect to multiple RPC nodes
If a high number of users are using your dApp at the same time, the load on the RPC can spike.
Ideally, the server infrastructure should be using a load balancer and caching to handle the load.
If no such infrastructure is available, it is a good idea to provide an array of nodes and randomly select one when the page loads.
In case one of the nodes goes down, a user can connect to a different one by refreshing.
An even better approach is to add a node selection to your dApp, including a way for users to provide their own RPC node.
See the documentation for your platform for information on changing the RPC node.
Allow users to connect their wallet early
If your dApp is focused around a specific time, such as an NFT drop or a countdown, you can provide a way for users to connect their wallet to the dApp prior to that time.
Connecting early reduces the load on the Beacon peer-to-peer communication layer so users don't experience delays by connecting at the same time when the time arrives.
Sending transactions
After connecting to a wallet, dApps can call smart contract entrypoints and make transactions with that wallet.
These calls can include:
Sending tez to an account or smart contract
When a dApp sends tez, it removes the tez from the source account and adds it to the target account.
When you send tez to a smart contract's address without calling an entrypoint, the smart contract behaves as though you called its default entrypoint.
Some tools have a specific syntax for sending tez to a contract that is different from the syntax to call an entrypoint, so check your tool's documentation for how to send tez to a contract.
Calling a smart contract entrypoint
When a dApp calls a smart contract, it passes an argument in Michelson format that includes the name of the entrypoint and the parameters to pass to it.
Most tools compile this argument for you, so you can call the entrypoint and pass parameters as though you were calling a function.
A call to a smart contract entrypoint always includes a transfer of tez, even if the amount is zero.
Originating a smart contract
Tools can originate a smart contract from source code.
For information about calling contracts from other contracts, see Operations.
Taquito
You can use the Taquito SDK to send transactions from JavaScript/TypeScript applications.
For more information about Taquito, see Taquito.
Sending tez
To send tez with Taquito, connect to the user's wallet and use the Tezos.wallet.transfer method, as in this example:
You can also use the Taquito Contract API to send tez in a similar way.
For more information, see Transfers in the Taquito documentation.
Calling contracts
Taquito offers several different ways to send transactions from JavaScript/TypeScript code.
One way is to create a Taquito object that represents the contract.
That contract object contains a method that corresponds to each entrypoint in the contract.
For example, this code calls an entrypoint named "doSomething."
It passes parameters in the order that the contract expects them:
To call an entrypoint that accepts parameters, you must encode those parameters in the format that the entrypoint requires.
To see the format for these parameters, create a Taquito object that represents the contract and extract its parameter schema, as in the following example:
The response shows the entrypoints in the contract and the parameters that they accept.
For example, the FA2 transfer entrypoint appears like this:
This transfer entrypoint accepts an array of token transfers.
Each transfer object includes the address to take the tokens from and an array of accounts to send the tokens to, as in this example:
To call the transfer entrypoint, pass this parameter to the Taquito entrypoint method, as in this example:
For more examples of calling smart contracts, see tutorials such as Build a simple web application or Create a contract and web app that mints NFTs.
For more information about using Taquito, see Smart contracts in the Taquito documentation.
For a video walkthrough, see Interacting with FA2 Contracts Using Taquito.
Beacon
You can use the Beacon SDK to send transactions from JavaScript/TypeScript code.
Sending tez with Beacon
To send tez with Beacon, use the requestOperation method, as in this example:
Calling contracts with Beacon
To call contracts with Beacon, use the requestOperation method and pass the address of the contract, the entrypoint to call, and the parameters to include, as in this example:
Octez
The Octez command-line client can send tez and call contracts from the command line.
See Interacting with contracts.
Taquito dApp SDK for TypeScript
Taquito is a TypeScript library that dApp developers can use to get information about Tezos and submit transactions.
Many wallets in the Tezos ecosystem use the Taquito library.
A full reference is available in the Taquito documentation.
Installation
The Taquito library is made of several NPM modules:
@taquito/taquito: High-level functionality that builds on the other packages in the Tezos Typescript Library Suite.
@taquito/ledger-signer: Provides ledger signing functionality.
@taquito/rpc: Provides low-level methods and types to interact with an RPC node.
@taquito/utils: Provides utility methods to verify Tezos-specific data and convert data types.
@taquito/michelson-encoder: Provides a JavaScript abstraction based on a Tezos smart contracts code, parameters and storage.
@taquito/michel-codec: Provides a Michelson parser/validator/formatter.
@taquito/local-forging: Provides local forging functionality.
@taquito/signer: Provides signing functionality.
@taquito/beacon-wallet: Provides a wrapper for the Beacon SDK.
@taquito/http-utils: Provides HTTP functionality for Taquito.
@taquito/tzip12: Provides TZIP-12 functionality for Taquito.
@taquito/tzip16: Provides TZIP-16 functionality for Taquito.
@taquito/remote-signer: Remote signer provider.
@taquito/contracts-library: Allows you to store static data related to contracts (such as scripts and entrypoints) to prevent Taquito from needing to fetch them from the network.
The main module is @taquito/taquito; it is used for most actions.
The other modules are used by the @taquito/taquito methods as complementary features, but they can also be used separately.
You can install Taquito from NPM:
Tutorials
For tutorials that include using Taquito, see:
Build a simple web application
Create a contract and web app that mints NFTs
Mint NFTs from a web app
Taquito configuration
General setup
Like all Tezos clients, Taquito must be connected to an RPC node.
To connect Taquito to a node, create an instance of the TezosToolkit class, which is the façade class that surfaces the library's features, and pass the URL of the node.
For example, this code uses the public Ghostnet node at https://rpc.ghostnet.teztnets.com:
Connecting to wallets
Taquito can connect to Tezos wallets through the Beacon protocol.
Follow these steps to connect to wallets in an application:
Install Taquito and the @taquito/beacon-wallet and @airgap/beacon-types packages from NPM:
Import the BeaconWallet class and create a new instance by passing an object with the different options required by the Beacon SDK.
After creating the instance of the wallet, you can request permission from the user to connect their wallet before passing the wallet instance to the wallet provider in the TezosToolkit provided by Taquito:
Getting data from the Tezos blockchain
Taquito provides methods to get different types of data from the Tezos blockchain, for example, the balance of a user account, the storage of a contract, or token metadata.
Note: querying data from the blockchain doesn't create a new transaction.
Getting the balance of an account
Taquito allows developers to get the current balance in mutez of a user account. The getBalance method is available on the instance of the TezosToolkit and requires a parameter of type string that represents the address of the account.
The returned value is of type BigNumber:
Getting the storage of a contract
Taquito provides an easy way to get the storage of any contract and exposes it as a JavaScript object:
Getting token metadata
Taquito also provides a library to get token metadata, which can be very useful when you build a dApp that handles NFTs.
Without Taquito, you would have to fetch the location of the metadata from the contract, understand where the metadata is stored, fetch it, and parse it. Taquito does all of that for you, as in this example:
Interacting with the Tezos blockchain
Taquito lets you interact with the Tezos blockchain in multiple ways, for example, by sending tez, originating new contracts, interacting with existing contracts or reading events emitted by a contract. Most of these interactions start with an instance of the TezosToolkit object.
Sending tez
After creating an instance of the TezosToolkit object, you can use the Contract API (for backend apps) or the Wallet API (for frontend apps) to access the transfer method and pass an object as a parameter with a to property for the recipient of the transfer and an amount property for the amount to be sent:
Originating a contract
The origination of a new contract is also possible through the Contract API or the Wallet API with the originate method. It takes an object as a parameter with a code property for the Michelson code of the contract and a storage property for the initial storage of the contract:
Sending a contract call
One of the main features of your dApp is probably smart contract interactions.
After creating the contract abstraction for the contract you want to interact with, you can call one of the entrypoints available as a method on the methods property. The entrypoint method takes a parameter of the type expected by the contract and returns a contract call that can be executed by calling the send method:
Reading smart contract events
Events are a way for contracts to deliver event-like information to third-party (off-chain) applications.
Taquito provides a simple way for users to subscribe to certain events on the blockchain via the PollingSubscribeProvider object.
Best practices
One single TezosToolkit instance
You should make sure that you only have one instance of the TezosToolkit object at all times in your app to avoid using the wrong one, which can have negative financial consequences for your users.
Even if your app requires a change in the network or Tezos node, it is better to create a new instance of the TezosToolkit and stop using the previous one to prevent unexpected behaviors.
Contract API vs Wallet API
The Contract API is better suited for backend applications that don't require the manual signing of transactions, while the Wallet API is better suited for frontend applications that will interact with the users' wallets.
The use of one or the other should be consistent within the same app to prevent unexpected behaviors.
methods vs methodsObject
The methodsObject property is better used in cases when the parameter for a contract call is a complex pair.
You can use methods to pass single parameters or simple pairs.
Catching transaction errors
It is important to wrap contract calls and other transactions sent from the app inside a try... catch block to handle transaction failures. You must handle failures to provide visual feedback to your users and prevent unwanted behaviors like users clicking a button again because the UI did not inform them that the previous attempt failed.
:::note More information
For more information, see the Taquito documentation.
:::
Best practices and avoiding flaws
When creating a frontend application that uses the Tezos blockchain, you will most probably use a JavaScript framework, may it be React, Vue, Svelte, or another one.
There are some best practices to follow when you use one of these frameworks to make sure that your code is safe, your app behaves in the intended way and your users enjoy a great experience. Here are the most important ones.
Dapp lifecycle
The JS framework of your choice probably introduces different functions or models to manage the lifecycles of your application: when it's mounted, when it's updated, and when it's unmounted.
There are actions specific to a Tezos dapp that are better implemented during these stages.
On mount: this is when you generally want to set up the TezosToolkit from Taquito as it requires HTTP requests to be made to the selected Tezos node. At the same time, you can set up Beacon and set the wallet provider on the instance of the TezosToolkit without asking your user to connect their wallet.
On update: this is when you ask the user if they want to connect their wallet after they interact with your dapp. Once the dapp is mounted, you can also fetch relevant information like XTZ balance, token balances, or connection status.
On unmount: you can disconnect the wallet if you wish to, and you should also clear any interval you set, for example, to regularly fetch data from the blockchain.
Wallet connection
Connecting and interacting with a wallet is an experience specific to web3 apps and although there is still a lot to learn about user experience with wallets, some rules already exist to provide the best user experience possible.
Do not force wallet connection: the request to connect a user's wallet must come from the user interacting with your dapp, not appear out of nowhere, for example, when the dapp loads. Let the user get some details about your dapp before they decide to connect their wallet.
Choose the right position for the wallet button: the users visiting your dapp will expect to find the button to connect or interact with their wallet in the upper part of the interface, on the left or right side. The button must be clearly visible and discoverable in one second.
Display wallet information: the minimal information to display is the address of the connected account to let the users know which account they are using. A lot of dapps on Tezos also display the XTZ balance, as well as the network the dapp is connected to (Mainnet/testnet) or the wallet used for the connection.
Offer the option to select the RPC node: network traffic can get busy on Tezos, but you can provide a better UX by adding a switch for a different Tezos node if the one selected by default becomes too slow. Some power users may also like having the choice to enter the address of their favourite node!
Add an option to disconnect the wallet: some users want to switch wallets while using your dapp, so there must be a way to disconnect their wallet and connect a new one effortlessly.
Interacting with Tezos
The interactions with a blockchain introduce new challenges and solutions for these challenges:
Display clear messages for wallet interactions: whether it is about sending a transaction to the blockchain or signing a message, the action and its result must be clear to the user, signing a bunch of bytes or approving a transaction without a prior click on a button is a no-no.
Entertain your users while they wait: visual feedback is crucial while the transaction is being confirmed because it takes a few seconds. During that time, an animation in the UI helps the users understand that something is happening in the background. No visual feedback after signing a transaction will most probably be interpreted as a problem and the user may create a new transaction.
Disable the UI during the transaction confirmation: you can physically prevent the users from creating new transactions or messing with the current state of your dapp by disabling the UI. Disable the button that triggered the previous transaction and any other input whose value shouldn't change before the transaction is confirmed.
Provide visual feedback for the outcome of the transaction: if the transaction is successful, display a message and update the UI. If the transaction failed, inform the user about the failure and if possible, why it didn't work and how to fix it.
Tezos Unity SDK
The Tezos Unity SDK provides tools that let you access user wallets and Tezos in games and other Unity projects.
You can use Tezos via the SDK to:
Use a player's Tezos account as their account for a game and their wallet as their way of logging in to the game
Accept payments from players in tez
Use Tezos to create game assets, store player inventories, and transfer assets between players
Verify that users own specific game assets and allow them to sell or share them to other players
Use Tezos smart contracts as backend logic for games
Installation and use
For a walkthrough of installing and using the SDK in an existing Unity project, see Quickstart.
Tutorial scenes
The SDK includes tutorial scenes that demonstrate how to use the SDK.
For information about setting up and using the scenes, see Tutorial scenes.
Sample game
For information about a complete sample game that you can load locally and explore, see Sample game.
SDK objects
The SDK provides objects that you can use to interact with user wallets and with Tezos.
See Unity SDK reference.
Dependencies
The Tezos SDK uses modified versions of the following libraries for communication:
Airgap Beacon SDK: Interacts with Tezos wallets through the Beacon standard for iOS, Android, and WebGL platforms.
Netezos: Interacts with Tezos wallets through the Beacon standard for Windows, Linux, and MacOS platforms. Also prepares parameters for smart contract calls and interprets complex data returned by the ReadView method.
The SDK also uses the Newtonsoft JSON Unity Package.
Supported Platforms
The SDK supports Windows, Linux, MacOS, iOS, Android, and WebGL platforms.
Quickstart
Follow these steps to install the Tezos Unity SDK in an existing Unity project and start using it.
These instructions cover:
Installing the SDK into an existing Unity project
Testing that the SDK works in your project
Connecting to a user's Tezos wallet
Creating and managing tokens
Prompting the user to sign messages
Installing the SDK
In your Unity project, in the Package Manager panel, click the + symbol and then click Add package from git URL.
Enter the URL https://github.com/trilitech/tezos-unity-sdk.git and click Add.
The Package Manager panel downloads and installs the SDK.
You can see its assets in the Project panel under Packages > Tezos Unity SDK.
Ensure that you have a Tezos-compatible wallet configured for the Ghostnet testnet on your mobile device.
For instructions, see Installing and funding a wallet.
If you want to publish the project to WebGL, follow the steps in Enabling WebGL support.
To import the tutorial scenes, see Scenes.
Enabling WebGL support
The Unity SDK provides a WebGL template that you can use to publish Unity projects to run in a web browser.
Follow these steps to set up the Tezos SDK to work with WebGL:
In the Unity Editor, go to the Project panel and expand the Packages > Tezos Unity SDK > WebGLFrontend folder.
From the WebGLFrontend/output folder, copy the StreamingAssets and WebGLTemplates folders into the Assets folder of your project.
Select the AirGap template to use in the WebGL build:
Click Edit > Project Settings.
Go to the Player tab.
On the Player tab, go to the WebGL settings tab.
Under Resolution and Presentation, select the AirGap WebGL template, as shown in this picture:
 To enable copy and paste in the WebGL build, double-click _WebGLCopyAndPaste.unitypackage, which is in the WebGLFrontend/output folder of the SDK, to install it.
This package automatically enables copy and paste on selectable text fields, such as the account address field in the WalletConnection tutorial scene.
Connecting to wallets
Connecting to a user's wallet is a prerequisite to working with Tezos in any application.
Accessing the wallet allows your project to see the tokens in it and to prompt the user to submit transactions, but it does not give your project direct control over the wallet.
Users must still confirm all transactions in their wallet application.
Using a wallet application in this way saves you from having to implement payment processing and security in your application.
Game developers can also use the wallet and its account as a unique account identifier and as the user's inventory.
Copy the TezosAuthenticator and TezosManager prefabs to your scene.
These prefabs provide prerequisites to use Tezos in a scene and help connect to accounts.
For more information about them, see Prefabs.
The TezosAuthenticator prefab automatically adds features that connect to users' wallets.
If you copy these prefabs into your scene and run it, it shows a QR code or connection buttons that Tezos wallet applications can scan to connect with the application.
Whether it shows the QR code or buttons depends on whether the project is running in standalone, mobile, or WebGL mode.
Add features to your project to use the connected account.
For example, the Tutorials/Common/Scripts/WalletInfoUI.cs file responds to the WalletConnected event, which runs when the user approves the connection in their wallet application.
You can use this event to get the address of the connected account, as in this code:
You can use this address as a user's account ID because Tezos account addresses are unique.
To respond to other events, add listeners for the events that the SDK provides.
You can see these events and their return values in the EventManager object.
For an example, see the WalletConnection tutorial scene.
Deploying contracts
Contracts are backend programs that run on the Tezos blockchains.
Smart contracts can do many tasks, but for gaming they have two main purposes:
They handle tokens, which are digital assets stored on the blockchain
They provide backend logic that users can trust because it cannot change
The ContractAndMinting tutorial scene shows how to deploy a contract from a Unity project.
The SDK provides a built-in contract that you can use instead of writing your own.
This contract manages different kinds of tokens.
To deploy the built-in contract, call the TokenContract.Deploy() method and pass a callback function:
The project sends the deployment transaction to the connected wallet, which must approve the transaction and pay the related fees.
The SDK stores the address of the contract as TokenContract.address.
For an example, see the ContractAndMinting tutorial scene.
Creating tokens
To create a token type, call the contract's mint entrypoint and pass these parameters:
A callback function to run when the token is created
The metadata for the token, which includes a name and description, URIs to preview media or thumbnails, and how many decimal places the token can be broken into
The destination account that owns the new tokens, which can be a user account, this smart contract, or any other smart contract
The number of tokens to create
For example, this code creates a token type with a quantity of 100:
For an example, see the ContractAndMinting tutorial scene.
Transferring tokens
To transfer tokens, call the contract's Transfer entrypoint and pass these parameters:
A callback function to run when the transfer is complete
The account to transfer the tokens to
The ID of the token
The amount of tokens to transfer
This example transfers 12 tokens with the ID 5 to the account in the variable destinationAccountAddress.
For a complete example, see the Transfer tutorial scene.
Getting token balances
To get the tokens that the connected account owns, call the API.GetTokensForOwner() method in a coroutine.
This example prints information about the tokens that the account owns to the log:
Uploading files to IPFS
The InterPlanetary File System (IPFS) is a protocol and peer-to-peer network for storing and sharing data in a distributed file system.
Blockchain developers use it to store data such as token images and metadata.
The SDK provides tools to upload to IPFS by using the Pinata API, but you can set up IPFS upload in other ways.
To use the SDK, create instances of the Tezos Configuration and Data Provider Configuration objects and put your Pinata JWT (not the API key or secret) in the TezosConfigSO object's Pinata Api Key field.
To use the SDK, see the code in the UploadImageButton.cs file, which handles uploading files in the IPFSUpload scene.
It has a UI upload button that triggers this method, which uses the built-in Pinata uploader to upload the file and get the URL for it:
For a complete example, see the IPFSUpload tutorial scene.
Signing messages
You can also use the connection to the user's wallet to prompt them to sign messages.
Signing a message proves that it came from a specific user's wallet because the wallet encrypts the message with the user's account's key.
For example, this code prompts the user to sign the message "This message came from my account."
Then, the callback verifies that the signature is valid and that it came from the user's account:
Changing the RPC node
As described in The RPC interface, Tezos clients including the Unity SDK send transactions to RPC nodes.
By default, the SDK sends requests to a public RPC node that uses the Ghostnet test network, where you can test transactions without spending real tez.
For more information about test networks, see Testing on testnets.
If you need to change the RPC node that the SDK uses, such as if the default node is overloaded or if you are ready to send transactions to Mainnet, you can set the RPC node by creating an instance of the TezosConfigSO scriptable object and setting the node in the Rpc Url Format field, as in this picture:
To enable copy and paste in the WebGL build, double-click _WebGLCopyAndPaste.unitypackage, which is in the WebGLFrontend/output folder of the SDK, to install it.
This package automatically enables copy and paste on selectable text fields, such as the account address field in the WalletConnection tutorial scene.
Connecting to wallets
Connecting to a user's wallet is a prerequisite to working with Tezos in any application.
Accessing the wallet allows your project to see the tokens in it and to prompt the user to submit transactions, but it does not give your project direct control over the wallet.
Users must still confirm all transactions in their wallet application.
Using a wallet application in this way saves you from having to implement payment processing and security in your application.
Game developers can also use the wallet and its account as a unique account identifier and as the user's inventory.
Copy the TezosAuthenticator and TezosManager prefabs to your scene.
These prefabs provide prerequisites to use Tezos in a scene and help connect to accounts.
For more information about them, see Prefabs.
The TezosAuthenticator prefab automatically adds features that connect to users' wallets.
If you copy these prefabs into your scene and run it, it shows a QR code or connection buttons that Tezos wallet applications can scan to connect with the application.
Whether it shows the QR code or buttons depends on whether the project is running in standalone, mobile, or WebGL mode.
Add features to your project to use the connected account.
For example, the Tutorials/Common/Scripts/WalletInfoUI.cs file responds to the WalletConnected event, which runs when the user approves the connection in their wallet application.
You can use this event to get the address of the connected account, as in this code:
You can use this address as a user's account ID because Tezos account addresses are unique.
To respond to other events, add listeners for the events that the SDK provides.
You can see these events and their return values in the EventManager object.
For an example, see the WalletConnection tutorial scene.
Deploying contracts
Contracts are backend programs that run on the Tezos blockchains.
Smart contracts can do many tasks, but for gaming they have two main purposes:
They handle tokens, which are digital assets stored on the blockchain
They provide backend logic that users can trust because it cannot change
The ContractAndMinting tutorial scene shows how to deploy a contract from a Unity project.
The SDK provides a built-in contract that you can use instead of writing your own.
This contract manages different kinds of tokens.
To deploy the built-in contract, call the TokenContract.Deploy() method and pass a callback function:
The project sends the deployment transaction to the connected wallet, which must approve the transaction and pay the related fees.
The SDK stores the address of the contract as TokenContract.address.
For an example, see the ContractAndMinting tutorial scene.
Creating tokens
To create a token type, call the contract's mint entrypoint and pass these parameters:
A callback function to run when the token is created
The metadata for the token, which includes a name and description, URIs to preview media or thumbnails, and how many decimal places the token can be broken into
The destination account that owns the new tokens, which can be a user account, this smart contract, or any other smart contract
The number of tokens to create
For example, this code creates a token type with a quantity of 100:
For an example, see the ContractAndMinting tutorial scene.
Transferring tokens
To transfer tokens, call the contract's Transfer entrypoint and pass these parameters:
A callback function to run when the transfer is complete
The account to transfer the tokens to
The ID of the token
The amount of tokens to transfer
This example transfers 12 tokens with the ID 5 to the account in the variable destinationAccountAddress.
For a complete example, see the Transfer tutorial scene.
Getting token balances
To get the tokens that the connected account owns, call the API.GetTokensForOwner() method in a coroutine.
This example prints information about the tokens that the account owns to the log:
Uploading files to IPFS
The InterPlanetary File System (IPFS) is a protocol and peer-to-peer network for storing and sharing data in a distributed file system.
Blockchain developers use it to store data such as token images and metadata.
The SDK provides tools to upload to IPFS by using the Pinata API, but you can set up IPFS upload in other ways.
To use the SDK, create instances of the Tezos Configuration and Data Provider Configuration objects and put your Pinata JWT (not the API key or secret) in the TezosConfigSO object's Pinata Api Key field.
To use the SDK, see the code in the UploadImageButton.cs file, which handles uploading files in the IPFSUpload scene.
It has a UI upload button that triggers this method, which uses the built-in Pinata uploader to upload the file and get the URL for it:
For a complete example, see the IPFSUpload tutorial scene.
Signing messages
You can also use the connection to the user's wallet to prompt them to sign messages.
Signing a message proves that it came from a specific user's wallet because the wallet encrypts the message with the user's account's key.
For example, this code prompts the user to sign the message "This message came from my account."
Then, the callback verifies that the signature is valid and that it came from the user's account:
Changing the RPC node
As described in The RPC interface, Tezos clients including the Unity SDK send transactions to RPC nodes.
By default, the SDK sends requests to a public RPC node that uses the Ghostnet test network, where you can test transactions without spending real tez.
For more information about test networks, see Testing on testnets.
If you need to change the RPC node that the SDK uses, such as if the default node is overloaded or if you are ready to send transactions to Mainnet, you can set the RPC node by creating an instance of the TezosConfigSO scriptable object and setting the node in the Rpc Url Format field, as in this picture:
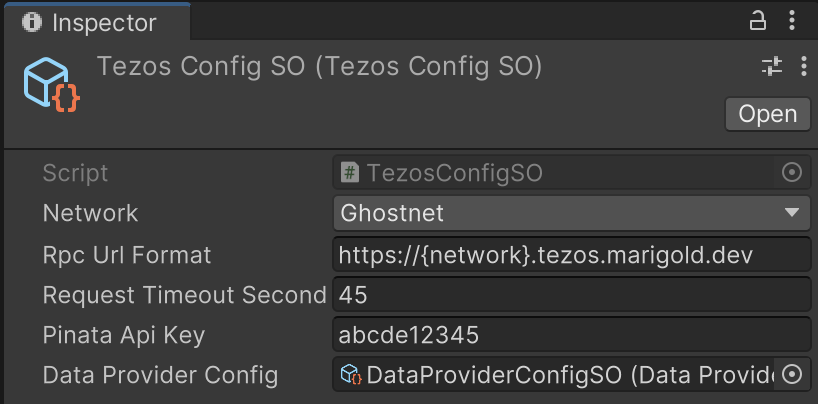 Then, drag this instance of the TezosConfigSO scriptable object to the Config field of the TezosManager prefab.
For more examples of how to work with the SDK, see Tutorial scenes.
Unity SDK tutorial scenes
The SDK includes tutorial scenes that demonstrate how to use the SDK.
Before using any of the scenes, install a Tezos-compatible wallet on a mobile device and get some test tez tokens that you can use to pay transaction fees.
For instructions, see Installing and funding a wallet.
Setup instructions
After you have installed the SDK according to the instructions in the Quickstart, you can import the tutorial scenes from the Package Manager panel:
In the Package Manager panel, click the Tezos Unity SDK package.
In the package information, go to the Samples tab.
Under Tutorials, click Import.
In the Project panel, expand Assets > Samples > Tezos Unity SDK > [SDK version number] > Tutorials.
Add the tutorial scenes to the build settings:
Click File > Build Settings.
Drag these scenes from the Project panel to the Scenes in Build list:
Tutorials/ContractAndMinting/_ContractAndMinting
Tutorials/IPFSUpload/_IPFSUpload
Tutorials/TransferToken/_TransferToken
Tutorials/WalletConnection/_WalletConnection
The Build Settings window looks like this:
The Build Settings window, showing the tutorial scenes that are included in the build
Close the Build Settings window.
Optional: To use the IPFSUpload scene, set up your Pinata key as described in IPFSUpload scene.
In the Tutorials folder, double-click the _Tutorials scene.
Click the Play button to start the scene.
The Tutorials scene shows links to the other tutorial scenes.
Click a link to run a scene.
For more information about these scenes, see the sections below.
Tutorials scene
This scene includes buttons that link to the other scenes.
Wallet Connection scene
This scene shows how to use the TezosAuthenticator prefab to connect to a user's wallet and get information about their account.
The scene uses the platform type to determine how to connect to a user's wallet.
In the TezosAuthenticator SetPlatformFlags function, it checks what platform it is running on:
Then based on the platform, it shows different buttons for different connection types:
These buttons correspond to the ways that the SDK can connect to wallets:
For mobile and WebGL platforms, the scene shows a button that links directly to a wallet app, such as a browser plugin or mobile app
For WebGL platforms, the scene shows a button that links to social wallets, such as Kukai
For standalone platforms, the scene shows a QR code that you can scan in any Tezos-compatible wallet app
This picture of the Wallet Connection scene in standalone mode shows the QR code automatically generated by the TezosAuthenticator prefab:
Then, drag this instance of the TezosConfigSO scriptable object to the Config field of the TezosManager prefab.
For more examples of how to work with the SDK, see Tutorial scenes.
Unity SDK tutorial scenes
The SDK includes tutorial scenes that demonstrate how to use the SDK.
Before using any of the scenes, install a Tezos-compatible wallet on a mobile device and get some test tez tokens that you can use to pay transaction fees.
For instructions, see Installing and funding a wallet.
Setup instructions
After you have installed the SDK according to the instructions in the Quickstart, you can import the tutorial scenes from the Package Manager panel:
In the Package Manager panel, click the Tezos Unity SDK package.
In the package information, go to the Samples tab.
Under Tutorials, click Import.
In the Project panel, expand Assets > Samples > Tezos Unity SDK > [SDK version number] > Tutorials.
Add the tutorial scenes to the build settings:
Click File > Build Settings.
Drag these scenes from the Project panel to the Scenes in Build list:
Tutorials/ContractAndMinting/_ContractAndMinting
Tutorials/IPFSUpload/_IPFSUpload
Tutorials/TransferToken/_TransferToken
Tutorials/WalletConnection/_WalletConnection
The Build Settings window looks like this:
The Build Settings window, showing the tutorial scenes that are included in the build
Close the Build Settings window.
Optional: To use the IPFSUpload scene, set up your Pinata key as described in IPFSUpload scene.
In the Tutorials folder, double-click the _Tutorials scene.
Click the Play button to start the scene.
The Tutorials scene shows links to the other tutorial scenes.
Click a link to run a scene.
For more information about these scenes, see the sections below.
Tutorials scene
This scene includes buttons that link to the other scenes.
Wallet Connection scene
This scene shows how to use the TezosAuthenticator prefab to connect to a user's wallet and get information about their account.
The scene uses the platform type to determine how to connect to a user's wallet.
In the TezosAuthenticator SetPlatformFlags function, it checks what platform it is running on:
Then based on the platform, it shows different buttons for different connection types:
These buttons correspond to the ways that the SDK can connect to wallets:
For mobile and WebGL platforms, the scene shows a button that links directly to a wallet app, such as a browser plugin or mobile app
For WebGL platforms, the scene shows a button that links to social wallets, such as Kukai
For standalone platforms, the scene shows a QR code that you can scan in any Tezos-compatible wallet app
This picture of the Wallet Connection scene in standalone mode shows the QR code automatically generated by the TezosAuthenticator prefab:
 This picture of the Wallet Connection scene in WebGL mode shows the deep link and social connection buttons:
 These UI elements call the Wallet.Connect() method with the walletProvider parameter set to WalletProviderType.beacon for the direct links or QR code connections and the walletProvider parameter set to WalletProviderType.kukai for the social wallet connections.
After the user approves the connection in the wallet, the scene shows the address of the connected account and its balance, as in the following picture.
At the bottom of the scene there is a logout button that closes the connection.
These UI elements call the Wallet.Connect() method with the walletProvider parameter set to WalletProviderType.beacon for the direct links or QR code connections and the walletProvider parameter set to WalletProviderType.kukai for the social wallet connections.
After the user approves the connection in the wallet, the scene shows the address of the connected account and its balance, as in the following picture.
At the bottom of the scene there is a logout button that closes the connection.
 ContractAndMinting scene
This scene shows how to deploy a smart contract to Tezos and create tokens with it.
A smart contract is a program stored on the blockchain.
Smart contracts can do many things, but the main thing that game developers use them for is to manage tokens, which are assets that are stored on Tezos.
In this case, the smart contract keeps track of tokens, their metadata, and who owns them.
The SDK comes with a sample smart contract that allows a Unity project to create tokens.
You can customize these tokens, give them to users, and treat them like the players' in-game inventories.
The Michelson source code of the built-in contract is in the Resources/Contracts folder of the SDK, but it isn't very human-readable.
For a list of the entrypoints in the contract, see TokenContract object.
For an example of a deployed contract, see https://ghostnet.tzkt.io/KT1Nhr9Bmhy7kcUmezRxbbDybh5buNnrVLTY/entrypoints.
Like the Wallet Connection scene, you must first connect to a wallet.
Then the scene shows the address of the connected account and enables the "Deploy Contract" and "Mint Token" buttons.
When you click "Deploy Contract," your connected wallet prompts you to confirm the transaction and pay the transaction fees.
Because you are connected to the test network, these are worthless testnet tokens and not real currency.
This process can take some time.
The scene calls the TokenContract.Deploy() method to deploy the contract to Tezos.
When you confirm the transaction in the wallet app, you must wait for the contract to be deployed on Tezos.
The log in the Console panel shows a message that looks like Received operation with hash oopFjLYGTbZTEFsTh4p1YPnHR1Up1SNnvE5xk2SRaGH6PZ4ry56, which is the address of the Tezos transaction that deployed the contract.
This process can take a few minutes.
For example, this is what the transaction looks like in the Temple wallet:
ContractAndMinting scene
This scene shows how to deploy a smart contract to Tezos and create tokens with it.
A smart contract is a program stored on the blockchain.
Smart contracts can do many things, but the main thing that game developers use them for is to manage tokens, which are assets that are stored on Tezos.
In this case, the smart contract keeps track of tokens, their metadata, and who owns them.
The SDK comes with a sample smart contract that allows a Unity project to create tokens.
You can customize these tokens, give them to users, and treat them like the players' in-game inventories.
The Michelson source code of the built-in contract is in the Resources/Contracts folder of the SDK, but it isn't very human-readable.
For a list of the entrypoints in the contract, see TokenContract object.
For an example of a deployed contract, see https://ghostnet.tzkt.io/KT1Nhr9Bmhy7kcUmezRxbbDybh5buNnrVLTY/entrypoints.
Like the Wallet Connection scene, you must first connect to a wallet.
Then the scene shows the address of the connected account and enables the "Deploy Contract" and "Mint Token" buttons.
When you click "Deploy Contract," your connected wallet prompts you to confirm the transaction and pay the transaction fees.
Because you are connected to the test network, these are worthless testnet tokens and not real currency.
This process can take some time.
The scene calls the TokenContract.Deploy() method to deploy the contract to Tezos.
When you confirm the transaction in the wallet app, you must wait for the contract to be deployed on Tezos.
The log in the Console panel shows a message that looks like Received operation with hash oopFjLYGTbZTEFsTh4p1YPnHR1Up1SNnvE5xk2SRaGH6PZ4ry56, which is the address of the Tezos transaction that deployed the contract.
This process can take a few minutes.
For example, this is what the transaction looks like in the Temple wallet:
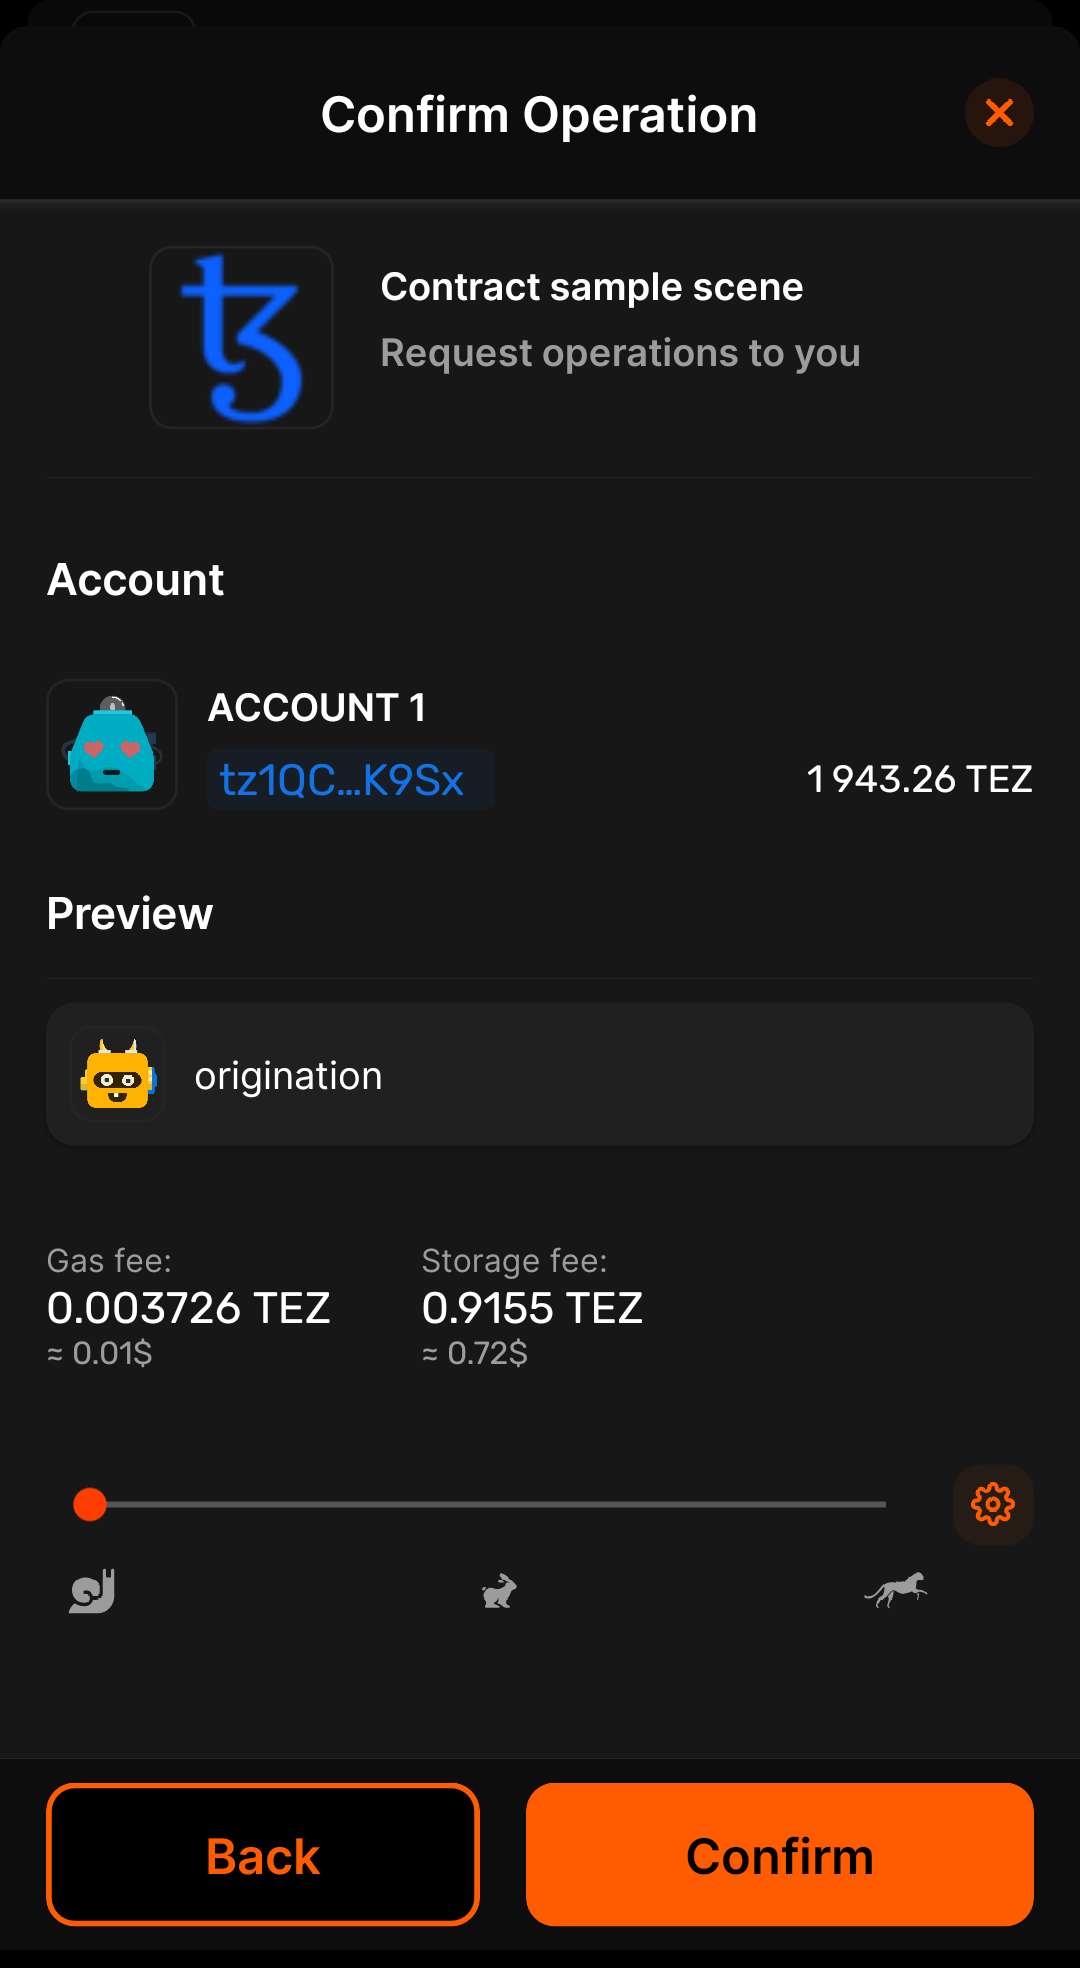 When the contract is deployed, the project updates to show the address of the contract, which starts with KT1.
The project remembers the contract if you reload the scene later.
To see information about the deployed contract, copy this address and put it into a block explorer such as Better Call Dev or tzkt.io.
The block explorer shows information about the contract, including recent transactions, its source code, and the tokens it controls and their owners.
Currently, the block explorer shows only the origination transaction, which deployed the contract:
When the contract is deployed, the project updates to show the address of the contract, which starts with KT1.
The project remembers the contract if you reload the scene later.
To see information about the deployed contract, copy this address and put it into a block explorer such as Better Call Dev or tzkt.io.
The block explorer shows information about the contract, including recent transactions, its source code, and the tokens it controls and their owners.
Currently, the block explorer shows only the origination transaction, which deployed the contract:
 Now you can go back to the Simulation panel in the Unity Editor and click "Mint Token."
The project gets approval in your wallet and then sends a transaction to the smart contract to create (mint) a token.
Like the deployment transaction, it can take time for the transaction to complete and be confirmed on Tezos.
When the mint transaction is complete, the "Tokens Count" text in the scene updates to show the number of token types that have been minted with this contract.
The mint process creates a random number of tokens with this type.
Your tokens can have a quantity of 1 to make them unique or a larger quantity to represent an amount of something.
You can also see the mint transaction on the block explorer.
Because the contract follows the FA2 standard for tokens, the block explorer also shows the tokens and information about them, as in this picture:
Now you can go back to the Simulation panel in the Unity Editor and click "Mint Token."
The project gets approval in your wallet and then sends a transaction to the smart contract to create (mint) a token.
Like the deployment transaction, it can take time for the transaction to complete and be confirmed on Tezos.
When the mint transaction is complete, the "Tokens Count" text in the scene updates to show the number of token types that have been minted with this contract.
The mint process creates a random number of tokens with this type.
Your tokens can have a quantity of 1 to make them unique or a larger quantity to represent an amount of something.
You can also see the mint transaction on the block explorer.
Because the contract follows the FA2 standard for tokens, the block explorer also shows the tokens and information about them, as in this picture:
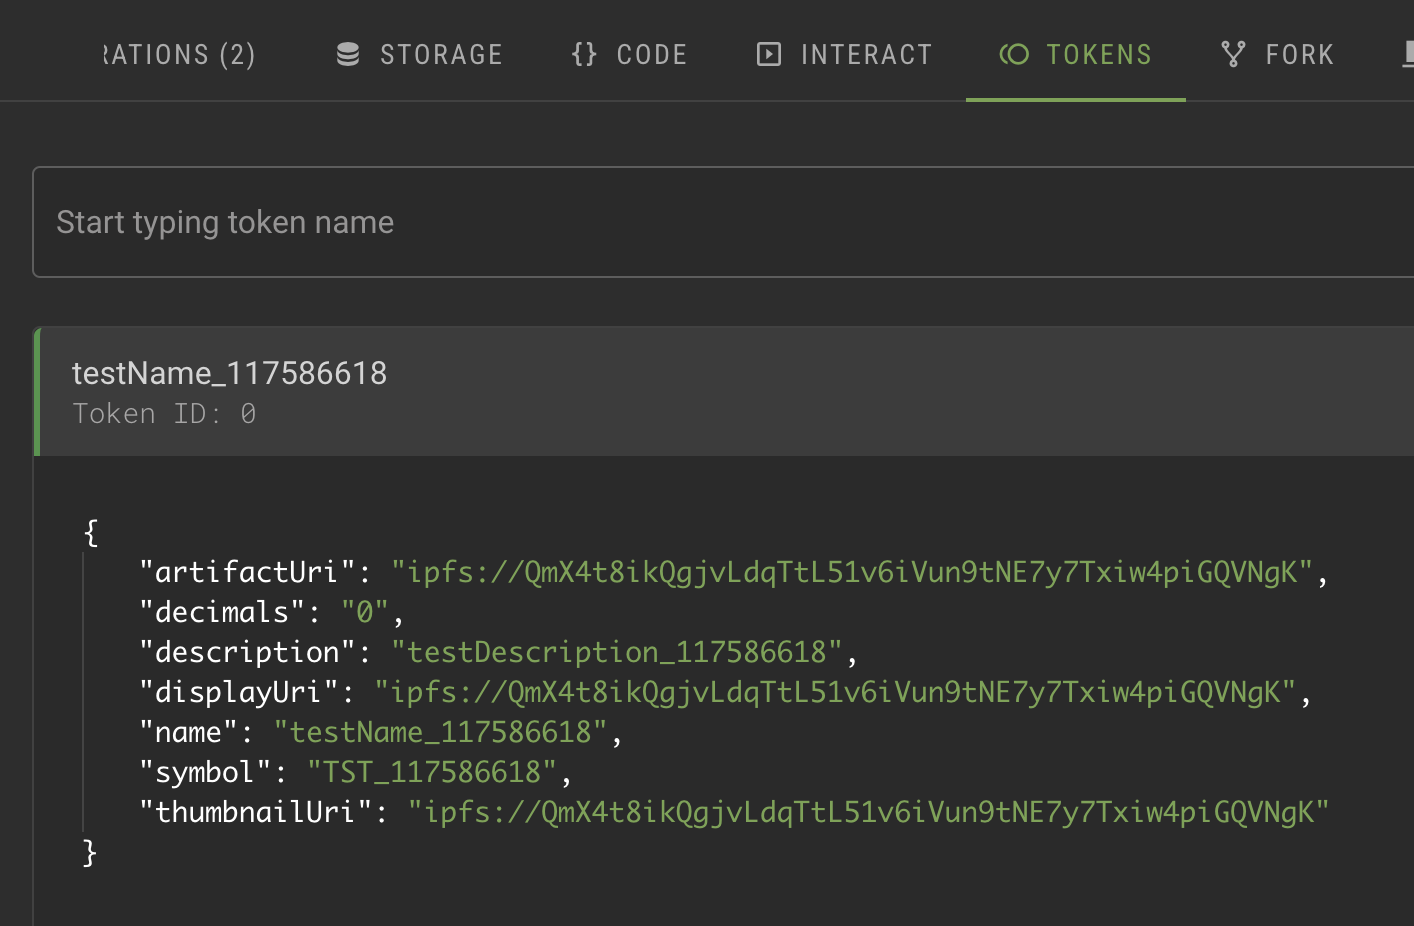 The tokens that this scene creates have randomly generated metadata.
To change the metadata, open the TezosSDK/Examples/Contract/Scripts/MintToken.cs file.
The file's HandleMint function creates the token by generating random numbers, creating a metadata object for the token, and using the TokenContract.Mint() method to send the mint transaction to the contract:
In your projects, you can set the metadata to store information about what the token represents.
For more information about working with Tokens, see Managing tokens and the tutorials Create an NFT and Build an NFT marketplace.
Transfer scene
This scene shows how to transfer tokens between accounts.
Like the Wallet Connection scene, you must first connect to a wallet.
By default, the scene uses the contract that you deployed with the Contract scene.
It also shows the IDs of the tokens that you created with that contract, starting with 0.
To transfer a token, make sure that the scene shows the address of the contract.
Then, fill in the fields and click the Transfer button.
The scene looks like this:
The tokens that this scene creates have randomly generated metadata.
To change the metadata, open the TezosSDK/Examples/Contract/Scripts/MintToken.cs file.
The file's HandleMint function creates the token by generating random numbers, creating a metadata object for the token, and using the TokenContract.Mint() method to send the mint transaction to the contract:
In your projects, you can set the metadata to store information about what the token represents.
For more information about working with Tokens, see Managing tokens and the tutorials Create an NFT and Build an NFT marketplace.
Transfer scene
This scene shows how to transfer tokens between accounts.
Like the Wallet Connection scene, you must first connect to a wallet.
By default, the scene uses the contract that you deployed with the Contract scene.
It also shows the IDs of the tokens that you created with that contract, starting with 0.
To transfer a token, make sure that the scene shows the address of the contract.
Then, fill in the fields and click the Transfer button.
The scene looks like this:
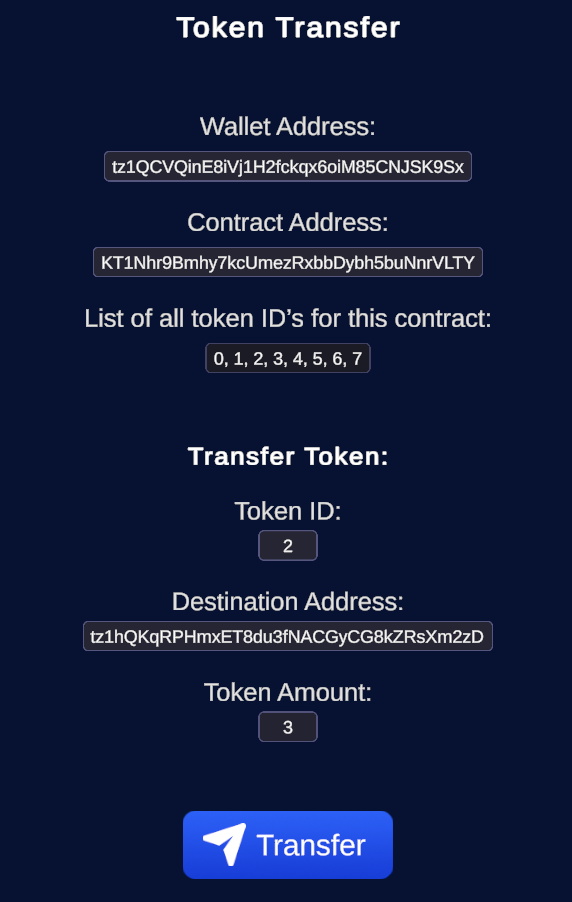 After you approve the transaction in your wallet app, the contract transfers the token to the new owner.
You can see the token owners by looking at the contract storage in a block explorer.
For example, in Better Call Dev, go to the Storage tab, expand the ledger object, and look at the entries.
For example, this entry shows that the account that ends in 2zD owns 9 of the token with the ID 1:
After you approve the transaction in your wallet app, the contract transfers the token to the new owner.
You can see the token owners by looking at the contract storage in a block explorer.
For example, in Better Call Dev, go to the Storage tab, expand the ledger object, and look at the entries.
For example, this entry shows that the account that ends in 2zD owns 9 of the token with the ID 1:
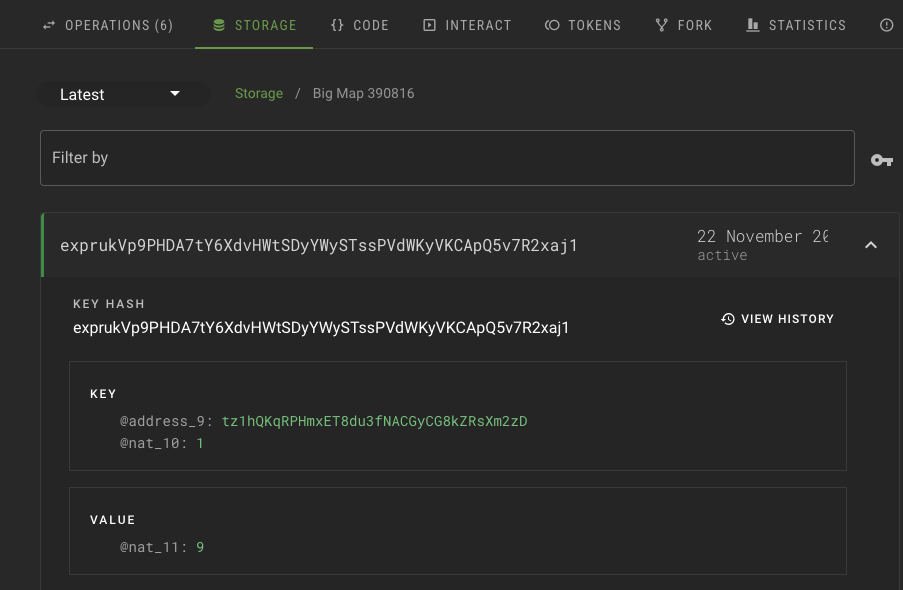 The transfer tutorial scene uses the TokenContract.Transfer() method to transfer the token:
This ledger of token ownership is stored in a big-map data type, which is serialized on Tezos to save space.
IPFSUpload scene
This scene shows how to upload files to IPFS with the Pinata API.
The InterPlanetary File System (IPFS) is a protocol and peer-to-peer network for storing and sharing data in a distributed file system.
Blockchain developers use it to store data such as token images and metadata.
To use the scene, create instances of the TezosConfigSO and DataProviderConfigSO objects and connect them to the scene:
Get a Pinata API key from Pinata and copy the JWT for the key.
In the Project view, right-click Assets and then click Create > Tezos > Data Provider Configuration.
In the Project view, right-click Assets and then click Create > Tezos > Configuration.
With the new TezosConfigSO object selected, go to the Inspector panel and put your Pinata JWT (not your key or secret key) in the Pinata Api Key field.
With the TezosConfigSO object still selected, drag the DataProviderConfigSO object to the Data Provider Config field.
The Inspector panel for the TezosConfigSO object looks like this, with your Pinata API key:
Open the IPFSUpload scene.
In the Hierarchy panel, select the TezosManager object.
The TezosManager object opens in the Inspector panel.
From the Assets folder in the Project panel, drag the TezosConfigSO object with your Pinata key to the config field of the TezosManager object.
Now you can run the scene and use your Pinata key to upload files to IPFS.
When you run the scene, it shows a button that opens a file selection window, uploads that file to IPFS, and returns the IPFS URI that you can use to access the file later.
The relevant code is in the UploadImageButton.cs script that is bound to the upload button:
Sample game
The sample game for the Unity SDK is a single-player third-person shooter with survival elements.
Players receive tokens that represent in-game items and the game tracks and transfers them via the Tezos blockchain.
You can import this game into the Unity Editor and work with it yourself.
The game shows how developers might structure a large-scale dApp by separating different features into different components, as described below in Architecture.
In particular, it handles some Tezos interaction from the Unity game itself, including connecting to the user's wallet and prompting them to sign a payload to authenticate.
The rest of the Tezos interaction happens in the backend application, including distributing tokens that represent in-game objects.
The Unity game also allows users to transfer those tokens to other accounts.
The source code for the Unity frontend application is here: https://github.com/baking-bad/tezos-unity-game.
To open it locally, see Opening the sample game.
To play the game, go to https://game.baking-bad.org.
The source code for the backend application is here: https://github.com/k-karuna/tezos_game_back.
A screenshot from within the game interface
Architecture
The sample game uses these main components:
User wallets as a source of user identity and authentication.
The user doesn't make any direct transactions from the wallet and pays no tez to the application or in fees.
For more information about Tezos wallets, see Installing and funding a wallet.
The Unity WebGL application is the front end of the application.
It connects to the user wallet, sends the sign request, runs the game interface, and sends requests to the backend.
The backend application hosts a REST API for the Unity application to call.
The Unity application calls it from the Assets/Scripts/Api/GameApi.cs file for tasks such as these:
Getting the signed payload from the wallet
Verifying the signed payload
Tracking events such as the beginning and end of a game session
Sending tokens to players' accounts
The backend application is responsible for most of the interaction with the smart contract, including transferring tokens to players.
It securely manages the private key for the administrator account, which is responsible for minting and transferring tokens.
This way, the game client itself has no access to the private key.
For information about the REST API endpoints, see this page: https://game.baking-bad.org/back/swagger/.
The backend database stores persistent information about players, such as the number of games they have played.
The smart contract is a program that runs on the Tezos blockchain to manage tokens that represent in-game items.
It maintains a ledger of tokens and owners and allows the backend's administrator account to transfer them to players.
The sample game uses a custom contract, but you can use the SDK's built-in FA2-compliant contract; see Managing contracts.
You can view and interact with the contract on a block explorer, such as tzkt.io: https://tzkt.io/KT1TSZfPJ5uZW1GjcnXmvt1npAQ2nh5S1FAj/operations.
The Interplanetary File System (IPFS) stores metadata for the tokens, including pictures and descriptions.
Links in the smart contract point to this metadata.
This diagram shows the basic interaction between these components:
The architecture of the sample game, showing interaction between the user wallet, the Unity WebGL application, the backend, and the smart contract
Authentication
The game uses the user's Tezos account as a source of authentication.
It prompts the user to connect their Tezos wallet so it can retrieve the user's account address.
For more information about connecting to user wallets, see Connecting accounts.
When the wallet is connected, the game prompts the user to sign a payload to prove that they have the key for the account.
The process follows these general steps:
The user loads the game client and clicks the button to connect.
The game client requests an authentication payload from the backend.
The backend generates a random string and sends it to the Unity application.
The Unity application sends the string as a signing request payload to the wallet.
The user signs the payload in their wallet application.
The Unity application receives the signed payload and sends it to the backend.
The backend verifies that the payload is correctly signed.
The game allows the user to play if validation is successful.
Here is a diagram of the process:
Authentication flow diagram
For more information about signing messages, see Signing messages in the Unity SDK quickstart.
Tokens
The game uses Tezos tokens to represent in-game items, such as weapons, armor, and power-ups.
Because these tokens are compliant with the FA2 standard, players can see their tokens in their wallets and in applications such as block explorers.
They could also set up a third-party platform to show and trade their tokens.
The smart contract that manages the tokens has one token type for each in-game item.
For example, tokens with the ID 1 represent armor:
Example of a token type
The contract pre-mints a supply of 1000 of each token type so tokens are available when players claim them.
When a player claims a token with the Claim Reward button and solves a captcha, the game client calls the backend, which verifies the captcha and calls the contract's transfer entrypoint to send one of that token type to the player's account.
This diagram shows the interaction between the game and the player's wallet:
A diagram of the interaction between the player's wallet and the components of the application, showing how tokens are read from the wallet information and distributed from the smart contract to the wallet
An account can have only one of each token type, which makes the tokens similar to NFTs, but they are not NFTs because any number of accounts can have one of each token.
Therefore, they are technically fungible tokens because tokens of the same type are interchangeable, but the backend sends only one token of each type to each account.
To see the tokens that an account has, you can check the ledger in the contract's storage.
The ledger has entries that are indexed by the account address and the token type.
For example, this ledger entry shows that account tz1eQQnDbkTpTnu3FXix28xKdaWYRqrsZcZv has one token of type 16:
The contract ledger on Better Call Dev, showing one entry
The contract uses standard FA2 entrypoints including transfer, plus other custom entrypoints for this implementation.
You can see these entrypoints on block explorers: https://better-call.dev/mainnet/KT1TSZfPJ5uZW1GjcnXmvt1npAQ2nh5S1FAj/interact.
User data
The game uses the Unity SDK to get player data from the backend and work with it locally.
The UserDataManager.cs file manages this player data, which includes:
The tokens that the account owns
The player's statistics
Information about the active game session
The player's currently equipped equipment
Pending rewards, which represent in-game items that the user has earned but has not received a token for yet
Some of this information (such as the tokens that the player owns) comes from Tezos and other information (such as the player's statistics) comes from the backend.
Information about the current game session and pending rewards are non-persistent data that are stored by the Unity application.
The UserDataManager class responds to events such as when the user connects their wallet and then loads information from the backend and from Tezos directly.
Opening the sample game
Follow these steps to open the sample game in the Unity editor:
Clone the sample game repository at https://github.com/baking-bad/tezos-unity-game.
In Unity Hub, click Add > Add project from disk.
Select the repository folder and click Add Project.
If Unity Hub prompts you to install a specific version of Unity Editor, follow the prompts to install that version.
Click the project in Unity Hub to open it in Unity Editor.
Unity SDK prefabs
The Tezos Unity SDK provides these prefabs:
TezosManager
This prefab sets the metadata for the scene, such as the application name that users see in their wallet applications before connecting to the project.
It also initializes the Tezos SDK for use in the scene and creates an instance of the TezosSDK.Tezos.Tezos class, which provides access to the SDK objects such as the Wallet and EventManager objects.
Its fields control what users see in their wallet applications before connecting to the project, as shown in this picture of the Inspector panel:
The transfer tutorial scene uses the TokenContract.Transfer() method to transfer the token:
This ledger of token ownership is stored in a big-map data type, which is serialized on Tezos to save space.
IPFSUpload scene
This scene shows how to upload files to IPFS with the Pinata API.
The InterPlanetary File System (IPFS) is a protocol and peer-to-peer network for storing and sharing data in a distributed file system.
Blockchain developers use it to store data such as token images and metadata.
To use the scene, create instances of the TezosConfigSO and DataProviderConfigSO objects and connect them to the scene:
Get a Pinata API key from Pinata and copy the JWT for the key.
In the Project view, right-click Assets and then click Create > Tezos > Data Provider Configuration.
In the Project view, right-click Assets and then click Create > Tezos > Configuration.
With the new TezosConfigSO object selected, go to the Inspector panel and put your Pinata JWT (not your key or secret key) in the Pinata Api Key field.
With the TezosConfigSO object still selected, drag the DataProviderConfigSO object to the Data Provider Config field.
The Inspector panel for the TezosConfigSO object looks like this, with your Pinata API key:
Open the IPFSUpload scene.
In the Hierarchy panel, select the TezosManager object.
The TezosManager object opens in the Inspector panel.
From the Assets folder in the Project panel, drag the TezosConfigSO object with your Pinata key to the config field of the TezosManager object.
Now you can run the scene and use your Pinata key to upload files to IPFS.
When you run the scene, it shows a button that opens a file selection window, uploads that file to IPFS, and returns the IPFS URI that you can use to access the file later.
The relevant code is in the UploadImageButton.cs script that is bound to the upload button:
Sample game
The sample game for the Unity SDK is a single-player third-person shooter with survival elements.
Players receive tokens that represent in-game items and the game tracks and transfers them via the Tezos blockchain.
You can import this game into the Unity Editor and work with it yourself.
The game shows how developers might structure a large-scale dApp by separating different features into different components, as described below in Architecture.
In particular, it handles some Tezos interaction from the Unity game itself, including connecting to the user's wallet and prompting them to sign a payload to authenticate.
The rest of the Tezos interaction happens in the backend application, including distributing tokens that represent in-game objects.
The Unity game also allows users to transfer those tokens to other accounts.
The source code for the Unity frontend application is here: https://github.com/baking-bad/tezos-unity-game.
To open it locally, see Opening the sample game.
To play the game, go to https://game.baking-bad.org.
The source code for the backend application is here: https://github.com/k-karuna/tezos_game_back.
A screenshot from within the game interface
Architecture
The sample game uses these main components:
User wallets as a source of user identity and authentication.
The user doesn't make any direct transactions from the wallet and pays no tez to the application or in fees.
For more information about Tezos wallets, see Installing and funding a wallet.
The Unity WebGL application is the front end of the application.
It connects to the user wallet, sends the sign request, runs the game interface, and sends requests to the backend.
The backend application hosts a REST API for the Unity application to call.
The Unity application calls it from the Assets/Scripts/Api/GameApi.cs file for tasks such as these:
Getting the signed payload from the wallet
Verifying the signed payload
Tracking events such as the beginning and end of a game session
Sending tokens to players' accounts
The backend application is responsible for most of the interaction with the smart contract, including transferring tokens to players.
It securely manages the private key for the administrator account, which is responsible for minting and transferring tokens.
This way, the game client itself has no access to the private key.
For information about the REST API endpoints, see this page: https://game.baking-bad.org/back/swagger/.
The backend database stores persistent information about players, such as the number of games they have played.
The smart contract is a program that runs on the Tezos blockchain to manage tokens that represent in-game items.
It maintains a ledger of tokens and owners and allows the backend's administrator account to transfer them to players.
The sample game uses a custom contract, but you can use the SDK's built-in FA2-compliant contract; see Managing contracts.
You can view and interact with the contract on a block explorer, such as tzkt.io: https://tzkt.io/KT1TSZfPJ5uZW1GjcnXmvt1npAQ2nh5S1FAj/operations.
The Interplanetary File System (IPFS) stores metadata for the tokens, including pictures and descriptions.
Links in the smart contract point to this metadata.
This diagram shows the basic interaction between these components:
The architecture of the sample game, showing interaction between the user wallet, the Unity WebGL application, the backend, and the smart contract
Authentication
The game uses the user's Tezos account as a source of authentication.
It prompts the user to connect their Tezos wallet so it can retrieve the user's account address.
For more information about connecting to user wallets, see Connecting accounts.
When the wallet is connected, the game prompts the user to sign a payload to prove that they have the key for the account.
The process follows these general steps:
The user loads the game client and clicks the button to connect.
The game client requests an authentication payload from the backend.
The backend generates a random string and sends it to the Unity application.
The Unity application sends the string as a signing request payload to the wallet.
The user signs the payload in their wallet application.
The Unity application receives the signed payload and sends it to the backend.
The backend verifies that the payload is correctly signed.
The game allows the user to play if validation is successful.
Here is a diagram of the process:
Authentication flow diagram
For more information about signing messages, see Signing messages in the Unity SDK quickstart.
Tokens
The game uses Tezos tokens to represent in-game items, such as weapons, armor, and power-ups.
Because these tokens are compliant with the FA2 standard, players can see their tokens in their wallets and in applications such as block explorers.
They could also set up a third-party platform to show and trade their tokens.
The smart contract that manages the tokens has one token type for each in-game item.
For example, tokens with the ID 1 represent armor:
Example of a token type
The contract pre-mints a supply of 1000 of each token type so tokens are available when players claim them.
When a player claims a token with the Claim Reward button and solves a captcha, the game client calls the backend, which verifies the captcha and calls the contract's transfer entrypoint to send one of that token type to the player's account.
This diagram shows the interaction between the game and the player's wallet:
A diagram of the interaction between the player's wallet and the components of the application, showing how tokens are read from the wallet information and distributed from the smart contract to the wallet
An account can have only one of each token type, which makes the tokens similar to NFTs, but they are not NFTs because any number of accounts can have one of each token.
Therefore, they are technically fungible tokens because tokens of the same type are interchangeable, but the backend sends only one token of each type to each account.
To see the tokens that an account has, you can check the ledger in the contract's storage.
The ledger has entries that are indexed by the account address and the token type.
For example, this ledger entry shows that account tz1eQQnDbkTpTnu3FXix28xKdaWYRqrsZcZv has one token of type 16:
The contract ledger on Better Call Dev, showing one entry
The contract uses standard FA2 entrypoints including transfer, plus other custom entrypoints for this implementation.
You can see these entrypoints on block explorers: https://better-call.dev/mainnet/KT1TSZfPJ5uZW1GjcnXmvt1npAQ2nh5S1FAj/interact.
User data
The game uses the Unity SDK to get player data from the backend and work with it locally.
The UserDataManager.cs file manages this player data, which includes:
The tokens that the account owns
The player's statistics
Information about the active game session
The player's currently equipped equipment
Pending rewards, which represent in-game items that the user has earned but has not received a token for yet
Some of this information (such as the tokens that the player owns) comes from Tezos and other information (such as the player's statistics) comes from the backend.
Information about the current game session and pending rewards are non-persistent data that are stored by the Unity application.
The UserDataManager class responds to events such as when the user connects their wallet and then loads information from the backend and from Tezos directly.
Opening the sample game
Follow these steps to open the sample game in the Unity editor:
Clone the sample game repository at https://github.com/baking-bad/tezos-unity-game.
In Unity Hub, click Add > Add project from disk.
Select the repository folder and click Add Project.
If Unity Hub prompts you to install a specific version of Unity Editor, follow the prompts to install that version.
Click the project in Unity Hub to open it in Unity Editor.
Unity SDK prefabs
The Tezos Unity SDK provides these prefabs:
TezosManager
This prefab sets the metadata for the scene, such as the application name that users see in their wallet applications before connecting to the project.
It also initializes the Tezos SDK for use in the scene and creates an instance of the TezosSDK.Tezos.Tezos class, which provides access to the SDK objects such as the Wallet and EventManager objects.
Its fields control what users see in their wallet applications before connecting to the project, as shown in this picture of the Inspector panel:
 TezosAuthenticator
This prefab provides code to connect to different kinds of Tezos wallets.
If you copy this prefab into your scene and run the scene, it shows a QR code or connection buttons that Tezos wallet applications can scan to connect with the application.
Whether it shows the QR code or buttons depends on whether the project is running in standalone, mobile, or WebGL mode.
You can access these features through the prefab and change how the project manages its connection to users' wallets.
The prefab's LoginPanel object includes objects that connect to wallets in different ways:
The QRCode object shows a QR code that wallet apps can scan to connect
The LoginButtonDeepLink object shows a button that opens a wallet app on a mobile device or a wallet browser extension in a web browser via the Beacon SDK
The SocialLoginButton object shows a button that opens a social wallet, such as Kukai
For details about how the prefab works, see the file TezosAuthenticator.cs.
For an example of the prefab in use, see the WalletConnection tutorial scene.
Connecting accounts
Connecting to a user's wallet is a prerequisite to working with Tezos in any application.
Accessing the wallet allows your project to see the tokens in it and to prompt the user to submit transactions, but it does not give your project direct control over the wallet.
Users still confirm or reject all transactions in their wallet application, so you must handle both of these use cases.
Using a wallet application in this way saves you from having to implement payment processing and security in your application.
Game developers can also use the wallet and its account as a unique account identifier and as the user's inventory.
For an example of connecting to wallets, see the WalletConnection tutorial scene.
For more information about Tezos wallets, see Installing and funding a wallet.
Best practices
When working with wallets, be sure to follow the advice in Best practices and avoiding flaws for wallet connections.
For example, don't force the user to connect their wallet as soon as the application loads.
Instead, let them see the application first.
Also, provide a prominent disconnect button to allow users to disconnect one account and connect a different one.
The TezosAuthenticator prefab
The TezosAuthenticator prefab provides the tools that you need to connect to user's Tezos wallets in a Unity project.
You can copy the TezosAuthenticator and TezosManager prefabs to your scene, and the TezosAuthenticator prefab automatically adds features that connect to users' wallets.
Connection methods
This table shows the ways that the SDK can connect to wallets and which platforms they are appropriate for:
Connection method | Description | Web platform (WebGL) | Mobile apps | Standalone applications
--- | --- | --- | --- | ---
QR code | Users scan a QR code with a wallet app | Yes | No | Yes
Deep link | The application opens the user's wallet app directly | Yes | Yes | No
Social wallets | The application opens the user's Kukai web-based wallet | Yes | No | No
Regardless of the connection method, the Tezos Unity SDK runs the WalletConnected or WalletConnectionFailed event, as appropriate.
For more information about events, see the Unity SDK EventManager object.
QR code connections
This method generates a QR code that a user scans with their wallet application:
The Unity application calls the Wallet.Connect() method with the walletProvider parameter set to WalletProviderType.beacon to send a connection request to a wallet application via the TZIP-10 protocol.
The wallet returns a handshake that includes pairing information for the wallet, which triggers the HandshakeReceived event.
From the handshake information, the SDK generates a QR code.
The TezosAuthenticator prefab handles the QR code generation with the QrCodeGenerator class.
The user scans the QR code with their wallet app and approves the connection.
The SDK receives the connection approval, which triggers the WalletConnected event and includes information about the connected account.
Deep link connections
Deep link connections open the user's wallet app directly, which can be a mobile app or a browser extension.
This method relies on the Beacon SDK to interact with wallet apps:
The Unity WebGL application calls the Wallet.Connect() method with the walletProvider parameter set to WalletProviderType.beacon.
The Beacon SDK detects that it is running in a web application and opens a popup window with the wallets that Beacon can connect to:
TezosAuthenticator
This prefab provides code to connect to different kinds of Tezos wallets.
If you copy this prefab into your scene and run the scene, it shows a QR code or connection buttons that Tezos wallet applications can scan to connect with the application.
Whether it shows the QR code or buttons depends on whether the project is running in standalone, mobile, or WebGL mode.
You can access these features through the prefab and change how the project manages its connection to users' wallets.
The prefab's LoginPanel object includes objects that connect to wallets in different ways:
The QRCode object shows a QR code that wallet apps can scan to connect
The LoginButtonDeepLink object shows a button that opens a wallet app on a mobile device or a wallet browser extension in a web browser via the Beacon SDK
The SocialLoginButton object shows a button that opens a social wallet, such as Kukai
For details about how the prefab works, see the file TezosAuthenticator.cs.
For an example of the prefab in use, see the WalletConnection tutorial scene.
Connecting accounts
Connecting to a user's wallet is a prerequisite to working with Tezos in any application.
Accessing the wallet allows your project to see the tokens in it and to prompt the user to submit transactions, but it does not give your project direct control over the wallet.
Users still confirm or reject all transactions in their wallet application, so you must handle both of these use cases.
Using a wallet application in this way saves you from having to implement payment processing and security in your application.
Game developers can also use the wallet and its account as a unique account identifier and as the user's inventory.
For an example of connecting to wallets, see the WalletConnection tutorial scene.
For more information about Tezos wallets, see Installing and funding a wallet.
Best practices
When working with wallets, be sure to follow the advice in Best practices and avoiding flaws for wallet connections.
For example, don't force the user to connect their wallet as soon as the application loads.
Instead, let them see the application first.
Also, provide a prominent disconnect button to allow users to disconnect one account and connect a different one.
The TezosAuthenticator prefab
The TezosAuthenticator prefab provides the tools that you need to connect to user's Tezos wallets in a Unity project.
You can copy the TezosAuthenticator and TezosManager prefabs to your scene, and the TezosAuthenticator prefab automatically adds features that connect to users' wallets.
Connection methods
This table shows the ways that the SDK can connect to wallets and which platforms they are appropriate for:
Connection method | Description | Web platform (WebGL) | Mobile apps | Standalone applications
--- | --- | --- | --- | ---
QR code | Users scan a QR code with a wallet app | Yes | No | Yes
Deep link | The application opens the user's wallet app directly | Yes | Yes | No
Social wallets | The application opens the user's Kukai web-based wallet | Yes | No | No
Regardless of the connection method, the Tezos Unity SDK runs the WalletConnected or WalletConnectionFailed event, as appropriate.
For more information about events, see the Unity SDK EventManager object.
QR code connections
This method generates a QR code that a user scans with their wallet application:
The Unity application calls the Wallet.Connect() method with the walletProvider parameter set to WalletProviderType.beacon to send a connection request to a wallet application via the TZIP-10 protocol.
The wallet returns a handshake that includes pairing information for the wallet, which triggers the HandshakeReceived event.
From the handshake information, the SDK generates a QR code.
The TezosAuthenticator prefab handles the QR code generation with the QrCodeGenerator class.
The user scans the QR code with their wallet app and approves the connection.
The SDK receives the connection approval, which triggers the WalletConnected event and includes information about the connected account.
Deep link connections
Deep link connections open the user's wallet app directly, which can be a mobile app or a browser extension.
This method relies on the Beacon SDK to interact with wallet apps:
The Unity WebGL application calls the Wallet.Connect() method with the walletProvider parameter set to WalletProviderType.beacon.
The Beacon SDK detects that it is running in a web application and opens a popup window with the wallets that Beacon can connect to:
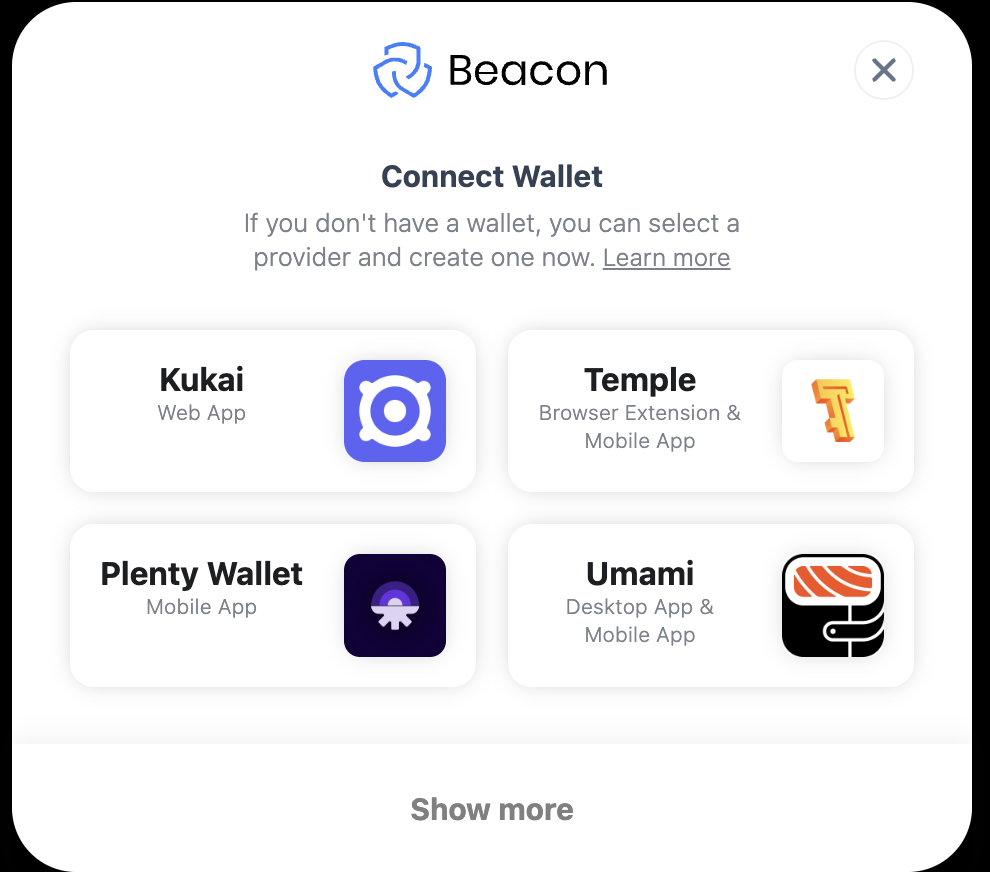 The Beacon SDK handles the process of connecting to the wallet.
The SDK receives the connection approval, which triggers the WalletConnected event and includes information about the connected account.
Social connections
Social wallets exist as accounts managed by web apps such as Kukai.
To connect to a social wallet, the Unity WebGL application calls Wallet.Connect() with the walletProvider parameter set to WalletProviderType.kukai.
Disconnecting
It's important to provide a disconnect button so the user can disconnect when they are finished with the application or if they want to connect with a different account.
To disconnect the active wallet, call the Wallet.Disconnect() method.
Managing contracts
Smart contracts are backend programs that run on the Tezos blockchains.
Smart contracts can do many tasks, but for gaming they have two main purposes:
They handle tokens, which are digital assets stored on the blockchain
They provide backend logic that users can trust because it cannot change
For more information about contracts, see Smart contracts.
You can create your own smart contracts or use the built-in contract that the SDK provides for managing tokens in Unity projects.
The Contract tutorial scene shows how to deploy a copy of the built-in contract from a Unity project.
The built-in contract
The SDK includes a built-in contract that you can use to manage tokens for your Unity projects.
The contract has entrypoints that allow you to create and transfer tokens.
See Managing tokens.
The Michelson source code of the built-in contract is in the Resources/Contracts folder of the SDK, but it isn't very human-readable.
For a list of the entrypoints in the contract, see TokenContract object.
For an example of a deployed contract, see https://ghostnet.tzkt.io/KT1Nhr9Bmhy7kcUmezRxbbDybh5buNnrVLTY/entrypoints.
Deploying the built-in contract
To deploy the built-in contract, call the TokenContract.Deploy() method and pass a callback function:
The project sends the deployment transaction to the connected wallet, which must approve the transaction and pay the related fees.
The callback function receives the address of the deployed contract, which the project uses to send requests to the contract.
It can take a few minutes for the contract to deploy and be confirmed in multiple blocks on the blockchain.
The address that deployed the contract becomes the administrator of the contract and is the only account that can create tokens.
The SDK provides information about the contract such as its address in the TokenContract object.
You can use block explorers such as Better Call Dev to see information about the deployed contract.
For information about using the built-in contract, see Managing tokens.
Getting the contract address
When you deploy a contract with the TokenContract.Deploy() method, the SDK saves the contract address by running this code:
Then during SDK initialization, the SDK saves the address to the TokenContract.Address property.
To retrieve the address of contracts that you haven't deployed through the project, you can use the API.GetOriginatedContractsForOwner() method.
Calling contracts
The built-in contract has convenience methods for minting and transferring tokens; see Managing tokens.
To call the contract's other entrypoints, use the Wallet.CallContract() method.
For example, to call the contract's set_administrator entrypoint to set a new administrator account, use this code:
For information about the entrypoints in the built-in contract, see Unity SDK TokenContract object.
You can call any other contract by using its address, entrypoint name, and parameter value, as in this example:
This example passes the value 12 to the entrypoint in the variable entryPointName.
Note that the parameter is encoded as a Michelson value.
For information about encoding more complex parameters, see Encoding parameters.
To get the hash of the transaction, use the ContractCallCompleted event.
Encoding parameters
When you call contract entrypoints or views with the Wallet.CallContract() or Wallet.ReadView() methods, you must encode the parameter as a Micheline value.
For example, if an entrypoint accepts two integers and one string as parameters, you must pass a list of two Netezos.Encoding.MichelineInt values and one Netezos.Encoding.MichelineString value:
You can also use the value of the parameters in Michelson JSON.
The previous example looks like this with a JSON parameter value:
Some block explorers allow you to fill in parameter values for an entrypoint and then download the Michelson JSON to use in your code.
You can build more complex parameters out of Netezos.Encoding objects.
For example, the built-in contract has an entrypoint named update_operators, which is an FA2 standard entrypoint that gives an account control over another account's tokens.
It accepts a list of changes to make to token operators, each including these fields in this order:
Either "add_operator" or "remove_operator"
The address of the operator, which will be able to control the owner's tokens of the specified ID.
The ID of the token
The address of the token owner
This is the Michelson parameter type for the endpoint:
In this case, you set the "add_operator" value by passing a PrimType.Left Michelson primitive or the "remove_operator" value by passing a PrimType.Right primitive.
The values in the primitive are a series of nested pairs called a right comb, as in this example:
The code to create a list of these elements to pass to the entrypoint looks like this:
Deploying other contracts
To deploy a contract from Unity, you must compile the contract to Michelson in JSON format.
For example, to compile a contract in LIGO to Michelson JSON, run this code:
Then, ensure that the code of the code and initial storage value of the contract are wrapped in code and storage fields at the root of the file, as in this example:
To deploy the contract from the Unity project, use the Wallet.OriginateContract() method, as in this example:
To get the address of the deployed contract, use the ContractCallCompleted event.
Managing tokens
The SDK's built-in contract is compatible with the FA2 token standard, which means that you can use a single smart contract to manage any number of types of tokens, including:
Fungible tokens, which are collections of interchangeable tokens with a quantity that you define.
Fungible tokens can be quantifiable commodities like in-game currency, fuel, ammunition, or energy, or they can be identical items with a limited quantity.
Non-fungible tokens (NFTs), which are unique assets with only one unit.
Games use NFTs for items that are unique and must not be duplicated.
You can create as many tokens and types of tokens as you need in one contract, but each transaction to create or transfer tokens incurs fees.
Creating (minting) tokens
To create a token type, call the contract's mint entrypoint and pass these parameters:
A callback function to run when the token is created
The metadata for the token, which includes a name and description, URIs to preview media or thumbnails, and how many decimal places the token can be broken into
The destination account that owns the new tokens, which can be a user account, this smart contract, or any other smart contract
The number of tokens to create
For example, this code creates a token type with a quantity of 100:
For a complete example of creating tokens, see the file TezosSDK/Examples/Contract/Scripts/MintToken.cs and the Contract tutorial scene.
Transferring tokens
To transfer tokens, call the contract's Transfer entrypoint and pass these parameters:
A callback function to run when the transfer is complete
The account to transfer the tokens to
The ID of the token
The amount of tokens to transfer
This example transfers 12 tokens with the ID 5 to the account in the variable destinationAccountAddress.
For a complete example, see the Transfer tutorial scene.
Getting token balances
To get the tokens that the connected account owns, call the API.GetTokensForOwner() method in a coroutine.
This example prints information about the tokens that the account owns to the log:
Destroying (burning) tokens
The built-in contract does not have a burn entrypoint, so you can't destroy its tokens.
If you want to make tokens unusable, send them to an address that doesn't exist or to an account that you can't use.
For example, you can create an account in a wallet app, send the tokens to it, and delete the private key for the account.
Unity SDK reference
The Tezos Unity SDK provides several objects that your Unity project can use to work with Tezos.
These pages provide reference for the most important of these objects:
API object: Provides information about the Tezos blockchain, such as what tokens accounts or contracts control
DAppMetadata object: Provides read-only properties that describe the project
DataProviderConfigSO scriptable object: Sets the indexer to get information about Tezos from
EventManager object: Provides events that you can add listeners to, such as when users connect their wallets
TezosConfigSO scriptable object: Stores information about connecting to Tezos, including the RPC node and Pinata API key to use
TokenContract object: Provides a built-in FA2-compatible smart contract and convenience methods to work with it
Wallet object: Provides methods to connect to wallets and send transactions from the connected account
The SDK also provides Unity prefabs that are prerequisites for the SDK; see Prefabs.
Unity SDK API object
The Unity SDK class TezosSDK.Tezos.API.TezosAPI, which is available at runtime as the TezosManager.Instance.Tezos.API object, provides information about the Tezos blockchain, such as what tokens accounts or contracts control.
Properties
None.
Methods
GetTezosBalance()
Returns the balance of the specified account address in mutez.
Example:
ReadView()
Returns the response from a contract view.
Note that the input parameter must be a Michelson-encoded object, as in the following example, which passes an integer and string parameter to the view:
Example:
GetTokensForOwner()
Gets the tokens that an account owns.
Example:
GetOwnersForToken()
Gets the accounts that own the specified token.
Example:
GetOwnersForContract()
Gets the accounts that own tokens on the specified contract.
Example:
IsHolderOfContract()
Returns true if the specified account owns any token in the specified contract.
Example:
IsHolderOfToken()
Returns true if the specified account owns the specified token in the specified contract.
Example:
GetTokenMetadata()
Gets the metadata for the specified token.
Example:
GetContractMetadata()
Gets the metadata for the specified contract.
Most contracts, including the built-in FA2 contract, do not have metadata.
Example:
GetTokensForContract()
Gets the tokens in a contract.
Example:
The callback returns a list of tokens, but not all of the fields in the Token objects are populated by default.
You can populate the fields you want to retrieve by editing the GetTokensForContract method of the TezosSDK.Tezos.API.TezosAPI class.
The methods in this class retrieves information about Tezos via the TZKT block explorer.
To change the information that the GetTokensForContract method retrieves, update the URL to add fields.
The default URL looks like this:
To get the total supply of each token type, add the totalSupply field to the URL, like this:
Now when you run the GetTokensForContract method, the data passed to the callback includes the total supply of each token:
For information about what fields you can add to this URL, see the TZKT API reference.
GetOperationStatus()
Returns true if the specified operation was successful, false if it failed, or null (or HTTP 204) if it doesn't exist.
Example:
GetLatestBlockLevel()
Returns the block level, or the number of blocks since the genesis block.
Example:
GetAccountCounter()
Returns the counter for implicit accounts, which is a unique number that you can use to ensure that transactions are not duplicated.
Example:
GetOriginatedContractsForOwner()
Gets the contracts that the specified account deployed (originated).
Optionally, you can pass the hash of a contract to return only contracts that match that hash.
For example, the hash of the contract in the TokenContract object is in the Resources/Contracts/FA2TokenContractCodeHash.txt file.
Example:
Unity SDK DAppMetadata object
The Unity SDK class TezosSDK.Tezos.DAppMetadata, which is available at runtime as the TezosManager.Instance.Tezos.DAppMetadata object, provides read-only properties that provide access to the values that you set on the TezosManager prefab in the Unity Editor.
Properties
These properties are read-only:
Name: The name of the project, which is shown in wallet applications when users connect to the project
Url: The home page of the project
Icon: The URL to a favicon for the project
Description: A description of the project
Methods
None.
DataProviderConfigSO scriptable object
The DataProviderConfigSO scriptable object sets the indexer that the SDK uses to get information about Tezos, such as an account's token balances.
Some Tezos dApps use a custom indexer to provide specific information that they need.
To use this object, create an instance of it, put your information in its fields, and then drag this instance to the Data Provider Config field of the TezosConfigSO scriptable object object, as in this picture:
Properties
Script: The attached script that implements the object
Network: A variable that lets you select which network to use, such as Tezos Mainnet or the Ghostnet testnet
Base Url Format: The URL of the indexer to use; this value replaces the variable {network} with the value of the Network field
Request Timeout Seconds: The time in seconds to wait for a response from the indexer
Documentation Url: A link to the API reference for the indexer
For more information about indexers, see Indexers.
Unity SDK EventManager object
The Unity SDK class TezosSDK.Beacon.WalletEventManager, which is available at runtime as the TezosManager.Instance.EventManager object, provides events that you can add listeners to.
These events are asynchronous.
For example, if your project makes multiple calls to smart contracts, the ContractCallCompleted event runs multiple times, not necessarily in the order that you called the contracts.
Example
This code adds a listener for the WalletConnected and WalletDisconnected events:
Events
public event Action WalletConnected
Runs when a wallet connects successfully.
Returns a TezosSDK.Beacon.WalletInfo object with information that includes the address of the connected account.
public event Action WalletConnectionFailed
Runs when a connection to a wallet fails.
Returns a TezosSDK.Beacon.ErrorInfo object with an error message.
public event Action WalletDisconnected
Runs when a wallet disconnects successfully.
Returns a TezosSDK.Beacon.WalletInfo object with information that includes the address of the connected account.
public event Action ContractCallCompleted
Runs when a call to a smart contract is confirmed on the blockchain.
Returns a TezosSDK.Beacon.OperationResult object with the hash of the transaction.
public event Action ContractCallFailed
Runs when a call to a smart contract fails.
Returns a TezosSDK.Beacon.ErrorInfo object with an error message.
public event Action ContractCallInjected
Runs when a call to a smart contract is sent to Tezos but before it has been included in a block and confirmed.
Returns a TezosSDK.Beacon.OperationResult object with the hash of the transaction.
public event Action HandshakeReceived
Runs when a handshake with a user's wallet application is received.
Returns a TezosSDK.Beacon.HandshakeData object with the data that applications need to connect to the wallet.
public event Action PairingCompleted
Runs when the user's wallet is connected to the project but before the user has approved the connection in the wallet app.
Returns a TezosSDK.Beacon.PairingDoneData object with details about the pairing, such as the dApp's public key and the timestamp of pairing completion.
public event Action PayloadSigned
Runs when the user signs a payload.
Returns a TezosSDK.Beacon.PairingDoneData object with the signed payload.
public event void SDKInitialized
Runs when the SDK loads.
TezosConfigSO scriptable object
The TezosConfigSO scriptable object sets the RPC node that the SDK sends Tezos transactions to.
To use this object, create an instance of it, put your information in its fields, and then drag this instance of the TezosConfigSO scriptable object to the Config field of the TezosManager prefab.
Properties
Script: The attached script that implements the object
Network: A variable that lets you select which network to use, such as Tezos Mainnet or the Ghostnet testnet
RPC Url Format: The URL of the RPC node to use; this value replaces the variable {network} with the value of the Network field
Request Timeout Seconds: The time in seconds to wait for a response from the indexer
Pinata Api Key: The Pinata JWT (not the API key or secret key) to use to upload files and data to IPFS
Data Provider Config: The instance of the DataProviderConfig scriptable object to use
For more information about RPC nodes, see The RPC interface.
Unity SDK TokenContract object
The Unity SDK class TezosSDK.Tezos.API.Models.TokenContract, which is available at runtime as the TezosManager.Instance.Tezos.TokenContract object, provides a built-in FA2-compatible smart contract and convenience methods to work with it.
For information about FA2 contracts and tokens, see FA2 tokens.
The Michelson source code of the built-in contract is in the Resources/Contracts folder of the SDK.
Properties
These properties are populated after you deploy the contract with the Deploy() method:
Address: The address of the deployed contract
TokensCount: The total number of token types in the contract
LastActivityTime: The timestamp of the last time tokens were minted or transferred
Entrypoints
The built-in contract has the entrypoints that the FA2 standard requires and a few other entrypoints for the convenience of developers.
transfer: Transfers tokens from a source account to one or more destination accounts.
Its parameters are the address of the source account and a list of destination accounts, each with the token ID and amount to transfer.
For a simpler way to transfer tokens, see the Transfer() method.
mint: Creates a token type and one or more tokens of that type.
Its parameters are the address of the owner of the new tokens, the amount of tokens to create, and the metadata for the token type.
This entrypoint can be called only by the current administrator account.
For a simpler way to create tokens, see the Mint() method.
balance_of: Sends information about an owner's token balance to another contract.
Its parameters are a callback contract that accepts a list of token IDs and the amount that the specified account owns.
For a simpler way to get information about token ownership, see the API.GetTokensForOwner() method.
update_operators: Adds or removes operators for the specified token owners and token IDs.
Its parameters are a list of commands to add or remove operators for token owners and IDs.
For information about operators, see Operators.
set_administrator: Changes the account that can mint tokens.
Its parameter is the address of the new administrator account.
This entrypoint can be called only by the current administrator account.
set_metadata: Creates or changes a metadata field in the specified contract's storage.
Its parameters are a key-value pair for the new or updated metadata value.
This metadata is a value in the contract's storage, which is different from the metadata returned by the API.GetContractMetadata() method.
This entrypoint can be called only by the current administrator account.
set_pause: Sets the value of the paused storage field.
When this field is set to true, tokens can be minted but not transferred between accounts.
This entrypoint can be called only by the current administrator account.
For examples of calling these entrypoints, see Calling the built-in contract.
Constructors
This constructor is for internal use.
To deploy the built-in contract, use the Deploy() method.
Initializes a TokenContract object with a copy of the built-in contract that you have deployed already.
To deploy the built-in contract, use the Deploy() method.
Deploy()
Deploys (originates) a contract based on the built-in contract, including prompting the connected wallet to pay the origination fees.
The SDK stores the address of the contract with the Unity PlayerPrefs.
Parameters:
completedCallback: A callback method to run when the contract is deployed, which receives the address of the new contract
Example:
Mint()
Calls the Mint entrypoint of the contract to create a token type and mint tokens.
Parameters:
completedCallback: A callback method to run when the token is minted, which receives a TokenBalance object with information about the new token
tokenMetadata: A TokenMetadata object with information about the new token
destination: The account that owns the new token, which can be a user account or a smart contract account
amount: The number of tokens of the new type to create
Example:
Transfer()
Transfers tokens from the currently connected account to the destination account.
Parameters:
completedCallback: A callback method to run when the token is minted, which receives the hash of the transfer transaction
destination: The account to send the token to, which can be a user account or a smart contract account
tokenId: The ID of the token to transfer
amount: The number of tokens to transfer
Example:
Unity SDK Wallet object
The Unity SDK class TezosSDK.Tezos.Wallet.WalletProvider, which is available at runtime as TezosManager.Instance.Wallet, provides methods to connect to wallets and send transactions from the connected account.
Properties
IsConnected
Returns true if a wallet is currently connected.
HandshakeData
An object with a field named PairingData with the data that applications need to connect to the wallet.
Methods
Connect()
Sends a request to a user's wallet to connect to the application.
Parameters:
walletProvider: The type of wallet to connect to, including WalletProviderType.beacon for TZIP-10 wallets (most Tezos wallets) and WalletProviderType.kukai for Kukai wallets.
withRedirectToWallet: When running on a mobile platform, whether to open the connected mobile app after connecting to a wallet.
This method triggers the WalletConnected or WalletConnectionFailed events, depending on whether the connection was successful or not.
When the walletProvider parameter is set to WalletProviderType.beacon, this method automatically picks the correct way to connect to wallets:
In WebGL applications, it uses the TezosSDK.Beacon.BeaconConnectorWebGl class to trigger the browser to connect to a wallet app in a browser plugin.
In all other applications, it uses the TezosSDK.Beacon.BeaconConnectorDotNet class to generate a QR code to connect to a wallet app on a mobile device or use a "deep link" to connect to a wallet on the same mobile device that is running the application.
When the walletProvider parameter is set to WalletProviderType.kukai in a WebGL application, it triggers the web browser to open the user's Kukai wallet.
This type of connection is appropriate only for WebGL applications.
Disconnect()
Disconnects from the currently connected wallet.
This method triggers the WalletDisconnected event.
GetWalletAddress()
Returns the address (public key hash) of the currently connected account, or NULL if no wallet is connected.
RequestSignPayload()
Sends a request to the connected wallet to sign a payload string.
Parameters:
signingType: The type of payload, such as raw, operation or micheline.
payload: The payload to send to the wallet to sign.
Signing a message proves that it came from a specific user's wallet because the wallet encrypts the message with the user's account's key.
For example, this code prompts the user to sign the message "This message came from my account."
VerifySignedPayload()
Returns true if most recent response to RequestSignPayload matches the specified payload and is properly signed.
CallContract()
Calls the specified entrypoint of the specified contract.
This method triggers the ContractCallInjected event if the call is successfully sent to Tezos.
Then it triggers ContractCallCompleted or ContractCallFailed events, depending on whether the call succeeded or failed.
OriginateContract()
Deploys (originates) the specified contract.
To use this method, you must compile a contract to Michelson in a JSON file.
For an example, see the code of the built-in contract in Resources/Contracts.
The optional delegateAddress parameter is the address of the account to delegate the contract's tez to.
For more information, see Delegation.
This method triggers the ContractCallInjected event if the call is successfully sent to Tezos.
Then it triggers ContractCallCompleted or ContractCallFailed events, depending on whether the origination operation succeeded or failed.
Documentation style guide
Overall Tezos-related issues
Tezos is decentralized.
There is no official Tezos documentation, no official Tezos strategy, and no official entity in charge of Tezos.
However, there can be official documentation for a Tezos-related tool.
Do not compare Tezos to other specific blockchains.
You can say that Tezos has advantages over other blockchains, but don't say that Tezos is better than or does things differently from another specific blockchain.
Use "tez" to describe the currency instead of "XTZ" unless there is a specific reason to use the ISO code/ticker symbol "XTZ," such as in accounting systems, exchange rates with other currencies, and anything that needs a standardized code.
Avoid using the ꜩ glyph in text.
Do not use the term "initial coin offering (ICO)" or refer to Tezos "investors."
Instead, refer to the Tezos fundraiser.
See https://tezos.gitlab.io/user/key-management.html#getting-keys-for-fundraiser-accounts.
Blockchain terminology
Clients that send transactions to contracts are called "senders."
The fields in a contract's storage are called "properties."
Use the full forms "layer 1" and "layer 2" when talking about layers.
The abbreviations "L1" and "L2" (always capitalized) are acceptable later after you have introduced the concept of layers.
Capitalization
Use sentence case for headings, such as "Connecting to wallets."
Capitalize these terms in text:
Tezos
Smart Rollups
Specific network names such as Mainnet, Ghostnet, and Mumbainet
Data Availability Layer
Sapling
JSON
Web3
Capitalize the "A" in "dApp."
Do not capitalize these terms unless they are the first word in a sentence or if the capitalization style requires all major words to be capitalized:
tez
blockchain
proof of stake
proof of work
smart contract
testnet
Emphasis
Use emphasis sparingly to avoid making the page too visually busy or complex.
Use backticks for file names, variable names, and command names, not to emphasize words or denote technical terms
Use bold for:
Buttons or links that the user must click or interact with
Very sparingly, to highlight important words and phrases, such as the words at the beginning of a definition list, such as in the Glossary
Do not emphasize the names of web sites, pages, or UI elements that the user sees but does not interact with directly
Use admonitions such as notes or warnings sparingly, only to denote warnings and critical issues
Avoid parenthetical expressions
Style and clarity
Use terms and phrasings that are clear to people using translation or to non-native speakers of English.
Use gender-neutral terminology.
Use the same word to represent something, instead of varying words for variety.
For example, use "stake" consistently and do not substitute synonyms such as "deposit" and "retainer" to refer to the same thing.
Do not use "as" or "since" to mean "because," as in "The system shows an error, as you have not connected your wallet yet."
Do not use "once" to mean "after," as in "Once the system shuts down, you can safely remove the drive."
Avoid Latinate abbreviations like e.g. and i.e.
Provide the information about the target of a link.
For example, instead of saying "for information about smart contracts, click here," say "for information about smart contracts, see Smart contracts."
When linking to an external site, consider mentioning the target site, as in "for more information, see Blockchain basics on opentezos.com.
Do not describe documentation in terms of "chapters" or "articles."
Avoid meta-phrases that don't add information.
For example, instead of "We will see how you can deploy smart contracts to Tezos by...," say "You can deploy smart contracts to Tezos by..."
When writing steps that the user must follow, make it clear what the user must do by following these guidelines:
Make each action that the user does a numbered step.
Cover the action that the user does in the first sentence.
Use language that makes it clear that the user must do something and what that action is.
For example, instead of "4. In the file myFile.js:", say "4. Add this code to the file myFile.js."
Structure lists and headings in a consistent way.
For example, make sure each list item is capitalized and punctuated in the same way.
List items should be all complete sentences or all sentence fragments, not a mix.
Links
Use root-relative links, as in [Target page]\(/folder/folder/target), because the target path of relative links as in [Target page]\(./target) can change based on whether the user's browser has a trailing slash in the URL.
Text files
To access the documentation on this site for use with an LLM, download these text files:
All documentation text: allPageSourceFiles.txt
All tutorial text: allTutorials.txt
The Beacon SDK handles the process of connecting to the wallet.
The SDK receives the connection approval, which triggers the WalletConnected event and includes information about the connected account.
Social connections
Social wallets exist as accounts managed by web apps such as Kukai.
To connect to a social wallet, the Unity WebGL application calls Wallet.Connect() with the walletProvider parameter set to WalletProviderType.kukai.
Disconnecting
It's important to provide a disconnect button so the user can disconnect when they are finished with the application or if they want to connect with a different account.
To disconnect the active wallet, call the Wallet.Disconnect() method.
Managing contracts
Smart contracts are backend programs that run on the Tezos blockchains.
Smart contracts can do many tasks, but for gaming they have two main purposes:
They handle tokens, which are digital assets stored on the blockchain
They provide backend logic that users can trust because it cannot change
For more information about contracts, see Smart contracts.
You can create your own smart contracts or use the built-in contract that the SDK provides for managing tokens in Unity projects.
The Contract tutorial scene shows how to deploy a copy of the built-in contract from a Unity project.
The built-in contract
The SDK includes a built-in contract that you can use to manage tokens for your Unity projects.
The contract has entrypoints that allow you to create and transfer tokens.
See Managing tokens.
The Michelson source code of the built-in contract is in the Resources/Contracts folder of the SDK, but it isn't very human-readable.
For a list of the entrypoints in the contract, see TokenContract object.
For an example of a deployed contract, see https://ghostnet.tzkt.io/KT1Nhr9Bmhy7kcUmezRxbbDybh5buNnrVLTY/entrypoints.
Deploying the built-in contract
To deploy the built-in contract, call the TokenContract.Deploy() method and pass a callback function:
The project sends the deployment transaction to the connected wallet, which must approve the transaction and pay the related fees.
The callback function receives the address of the deployed contract, which the project uses to send requests to the contract.
It can take a few minutes for the contract to deploy and be confirmed in multiple blocks on the blockchain.
The address that deployed the contract becomes the administrator of the contract and is the only account that can create tokens.
The SDK provides information about the contract such as its address in the TokenContract object.
You can use block explorers such as Better Call Dev to see information about the deployed contract.
For information about using the built-in contract, see Managing tokens.
Getting the contract address
When you deploy a contract with the TokenContract.Deploy() method, the SDK saves the contract address by running this code:
Then during SDK initialization, the SDK saves the address to the TokenContract.Address property.
To retrieve the address of contracts that you haven't deployed through the project, you can use the API.GetOriginatedContractsForOwner() method.
Calling contracts
The built-in contract has convenience methods for minting and transferring tokens; see Managing tokens.
To call the contract's other entrypoints, use the Wallet.CallContract() method.
For example, to call the contract's set_administrator entrypoint to set a new administrator account, use this code:
For information about the entrypoints in the built-in contract, see Unity SDK TokenContract object.
You can call any other contract by using its address, entrypoint name, and parameter value, as in this example:
This example passes the value 12 to the entrypoint in the variable entryPointName.
Note that the parameter is encoded as a Michelson value.
For information about encoding more complex parameters, see Encoding parameters.
To get the hash of the transaction, use the ContractCallCompleted event.
Encoding parameters
When you call contract entrypoints or views with the Wallet.CallContract() or Wallet.ReadView() methods, you must encode the parameter as a Micheline value.
For example, if an entrypoint accepts two integers and one string as parameters, you must pass a list of two Netezos.Encoding.MichelineInt values and one Netezos.Encoding.MichelineString value:
You can also use the value of the parameters in Michelson JSON.
The previous example looks like this with a JSON parameter value:
Some block explorers allow you to fill in parameter values for an entrypoint and then download the Michelson JSON to use in your code.
You can build more complex parameters out of Netezos.Encoding objects.
For example, the built-in contract has an entrypoint named update_operators, which is an FA2 standard entrypoint that gives an account control over another account's tokens.
It accepts a list of changes to make to token operators, each including these fields in this order:
Either "add_operator" or "remove_operator"
The address of the operator, which will be able to control the owner's tokens of the specified ID.
The ID of the token
The address of the token owner
This is the Michelson parameter type for the endpoint:
In this case, you set the "add_operator" value by passing a PrimType.Left Michelson primitive or the "remove_operator" value by passing a PrimType.Right primitive.
The values in the primitive are a series of nested pairs called a right comb, as in this example:
The code to create a list of these elements to pass to the entrypoint looks like this:
Deploying other contracts
To deploy a contract from Unity, you must compile the contract to Michelson in JSON format.
For example, to compile a contract in LIGO to Michelson JSON, run this code:
Then, ensure that the code of the code and initial storage value of the contract are wrapped in code and storage fields at the root of the file, as in this example:
To deploy the contract from the Unity project, use the Wallet.OriginateContract() method, as in this example:
To get the address of the deployed contract, use the ContractCallCompleted event.
Managing tokens
The SDK's built-in contract is compatible with the FA2 token standard, which means that you can use a single smart contract to manage any number of types of tokens, including:
Fungible tokens, which are collections of interchangeable tokens with a quantity that you define.
Fungible tokens can be quantifiable commodities like in-game currency, fuel, ammunition, or energy, or they can be identical items with a limited quantity.
Non-fungible tokens (NFTs), which are unique assets with only one unit.
Games use NFTs for items that are unique and must not be duplicated.
You can create as many tokens and types of tokens as you need in one contract, but each transaction to create or transfer tokens incurs fees.
Creating (minting) tokens
To create a token type, call the contract's mint entrypoint and pass these parameters:
A callback function to run when the token is created
The metadata for the token, which includes a name and description, URIs to preview media or thumbnails, and how many decimal places the token can be broken into
The destination account that owns the new tokens, which can be a user account, this smart contract, or any other smart contract
The number of tokens to create
For example, this code creates a token type with a quantity of 100:
For a complete example of creating tokens, see the file TezosSDK/Examples/Contract/Scripts/MintToken.cs and the Contract tutorial scene.
Transferring tokens
To transfer tokens, call the contract's Transfer entrypoint and pass these parameters:
A callback function to run when the transfer is complete
The account to transfer the tokens to
The ID of the token
The amount of tokens to transfer
This example transfers 12 tokens with the ID 5 to the account in the variable destinationAccountAddress.
For a complete example, see the Transfer tutorial scene.
Getting token balances
To get the tokens that the connected account owns, call the API.GetTokensForOwner() method in a coroutine.
This example prints information about the tokens that the account owns to the log:
Destroying (burning) tokens
The built-in contract does not have a burn entrypoint, so you can't destroy its tokens.
If you want to make tokens unusable, send them to an address that doesn't exist or to an account that you can't use.
For example, you can create an account in a wallet app, send the tokens to it, and delete the private key for the account.
Unity SDK reference
The Tezos Unity SDK provides several objects that your Unity project can use to work with Tezos.
These pages provide reference for the most important of these objects:
API object: Provides information about the Tezos blockchain, such as what tokens accounts or contracts control
DAppMetadata object: Provides read-only properties that describe the project
DataProviderConfigSO scriptable object: Sets the indexer to get information about Tezos from
EventManager object: Provides events that you can add listeners to, such as when users connect their wallets
TezosConfigSO scriptable object: Stores information about connecting to Tezos, including the RPC node and Pinata API key to use
TokenContract object: Provides a built-in FA2-compatible smart contract and convenience methods to work with it
Wallet object: Provides methods to connect to wallets and send transactions from the connected account
The SDK also provides Unity prefabs that are prerequisites for the SDK; see Prefabs.
Unity SDK API object
The Unity SDK class TezosSDK.Tezos.API.TezosAPI, which is available at runtime as the TezosManager.Instance.Tezos.API object, provides information about the Tezos blockchain, such as what tokens accounts or contracts control.
Properties
None.
Methods
GetTezosBalance()
Returns the balance of the specified account address in mutez.
Example:
ReadView()
Returns the response from a contract view.
Note that the input parameter must be a Michelson-encoded object, as in the following example, which passes an integer and string parameter to the view:
Example:
GetTokensForOwner()
Gets the tokens that an account owns.
Example:
GetOwnersForToken()
Gets the accounts that own the specified token.
Example:
GetOwnersForContract()
Gets the accounts that own tokens on the specified contract.
Example:
IsHolderOfContract()
Returns true if the specified account owns any token in the specified contract.
Example:
IsHolderOfToken()
Returns true if the specified account owns the specified token in the specified contract.
Example:
GetTokenMetadata()
Gets the metadata for the specified token.
Example:
GetContractMetadata()
Gets the metadata for the specified contract.
Most contracts, including the built-in FA2 contract, do not have metadata.
Example:
GetTokensForContract()
Gets the tokens in a contract.
Example:
The callback returns a list of tokens, but not all of the fields in the Token objects are populated by default.
You can populate the fields you want to retrieve by editing the GetTokensForContract method of the TezosSDK.Tezos.API.TezosAPI class.
The methods in this class retrieves information about Tezos via the TZKT block explorer.
To change the information that the GetTokensForContract method retrieves, update the URL to add fields.
The default URL looks like this:
To get the total supply of each token type, add the totalSupply field to the URL, like this:
Now when you run the GetTokensForContract method, the data passed to the callback includes the total supply of each token:
For information about what fields you can add to this URL, see the TZKT API reference.
GetOperationStatus()
Returns true if the specified operation was successful, false if it failed, or null (or HTTP 204) if it doesn't exist.
Example:
GetLatestBlockLevel()
Returns the block level, or the number of blocks since the genesis block.
Example:
GetAccountCounter()
Returns the counter for implicit accounts, which is a unique number that you can use to ensure that transactions are not duplicated.
Example:
GetOriginatedContractsForOwner()
Gets the contracts that the specified account deployed (originated).
Optionally, you can pass the hash of a contract to return only contracts that match that hash.
For example, the hash of the contract in the TokenContract object is in the Resources/Contracts/FA2TokenContractCodeHash.txt file.
Example:
Unity SDK DAppMetadata object
The Unity SDK class TezosSDK.Tezos.DAppMetadata, which is available at runtime as the TezosManager.Instance.Tezos.DAppMetadata object, provides read-only properties that provide access to the values that you set on the TezosManager prefab in the Unity Editor.
Properties
These properties are read-only:
Name: The name of the project, which is shown in wallet applications when users connect to the project
Url: The home page of the project
Icon: The URL to a favicon for the project
Description: A description of the project
Methods
None.
DataProviderConfigSO scriptable object
The DataProviderConfigSO scriptable object sets the indexer that the SDK uses to get information about Tezos, such as an account's token balances.
Some Tezos dApps use a custom indexer to provide specific information that they need.
To use this object, create an instance of it, put your information in its fields, and then drag this instance to the Data Provider Config field of the TezosConfigSO scriptable object object, as in this picture:
Properties
Script: The attached script that implements the object
Network: A variable that lets you select which network to use, such as Tezos Mainnet or the Ghostnet testnet
Base Url Format: The URL of the indexer to use; this value replaces the variable {network} with the value of the Network field
Request Timeout Seconds: The time in seconds to wait for a response from the indexer
Documentation Url: A link to the API reference for the indexer
For more information about indexers, see Indexers.
Unity SDK EventManager object
The Unity SDK class TezosSDK.Beacon.WalletEventManager, which is available at runtime as the TezosManager.Instance.EventManager object, provides events that you can add listeners to.
These events are asynchronous.
For example, if your project makes multiple calls to smart contracts, the ContractCallCompleted event runs multiple times, not necessarily in the order that you called the contracts.
Example
This code adds a listener for the WalletConnected and WalletDisconnected events:
Events
public event Action WalletConnected
Runs when a wallet connects successfully.
Returns a TezosSDK.Beacon.WalletInfo object with information that includes the address of the connected account.
public event Action WalletConnectionFailed
Runs when a connection to a wallet fails.
Returns a TezosSDK.Beacon.ErrorInfo object with an error message.
public event Action WalletDisconnected
Runs when a wallet disconnects successfully.
Returns a TezosSDK.Beacon.WalletInfo object with information that includes the address of the connected account.
public event Action ContractCallCompleted
Runs when a call to a smart contract is confirmed on the blockchain.
Returns a TezosSDK.Beacon.OperationResult object with the hash of the transaction.
public event Action ContractCallFailed
Runs when a call to a smart contract fails.
Returns a TezosSDK.Beacon.ErrorInfo object with an error message.
public event Action ContractCallInjected
Runs when a call to a smart contract is sent to Tezos but before it has been included in a block and confirmed.
Returns a TezosSDK.Beacon.OperationResult object with the hash of the transaction.
public event Action HandshakeReceived
Runs when a handshake with a user's wallet application is received.
Returns a TezosSDK.Beacon.HandshakeData object with the data that applications need to connect to the wallet.
public event Action PairingCompleted
Runs when the user's wallet is connected to the project but before the user has approved the connection in the wallet app.
Returns a TezosSDK.Beacon.PairingDoneData object with details about the pairing, such as the dApp's public key and the timestamp of pairing completion.
public event Action PayloadSigned
Runs when the user signs a payload.
Returns a TezosSDK.Beacon.PairingDoneData object with the signed payload.
public event void SDKInitialized
Runs when the SDK loads.
TezosConfigSO scriptable object
The TezosConfigSO scriptable object sets the RPC node that the SDK sends Tezos transactions to.
To use this object, create an instance of it, put your information in its fields, and then drag this instance of the TezosConfigSO scriptable object to the Config field of the TezosManager prefab.
Properties
Script: The attached script that implements the object
Network: A variable that lets you select which network to use, such as Tezos Mainnet or the Ghostnet testnet
RPC Url Format: The URL of the RPC node to use; this value replaces the variable {network} with the value of the Network field
Request Timeout Seconds: The time in seconds to wait for a response from the indexer
Pinata Api Key: The Pinata JWT (not the API key or secret key) to use to upload files and data to IPFS
Data Provider Config: The instance of the DataProviderConfig scriptable object to use
For more information about RPC nodes, see The RPC interface.
Unity SDK TokenContract object
The Unity SDK class TezosSDK.Tezos.API.Models.TokenContract, which is available at runtime as the TezosManager.Instance.Tezos.TokenContract object, provides a built-in FA2-compatible smart contract and convenience methods to work with it.
For information about FA2 contracts and tokens, see FA2 tokens.
The Michelson source code of the built-in contract is in the Resources/Contracts folder of the SDK.
Properties
These properties are populated after you deploy the contract with the Deploy() method:
Address: The address of the deployed contract
TokensCount: The total number of token types in the contract
LastActivityTime: The timestamp of the last time tokens were minted or transferred
Entrypoints
The built-in contract has the entrypoints that the FA2 standard requires and a few other entrypoints for the convenience of developers.
transfer: Transfers tokens from a source account to one or more destination accounts.
Its parameters are the address of the source account and a list of destination accounts, each with the token ID and amount to transfer.
For a simpler way to transfer tokens, see the Transfer() method.
mint: Creates a token type and one or more tokens of that type.
Its parameters are the address of the owner of the new tokens, the amount of tokens to create, and the metadata for the token type.
This entrypoint can be called only by the current administrator account.
For a simpler way to create tokens, see the Mint() method.
balance_of: Sends information about an owner's token balance to another contract.
Its parameters are a callback contract that accepts a list of token IDs and the amount that the specified account owns.
For a simpler way to get information about token ownership, see the API.GetTokensForOwner() method.
update_operators: Adds or removes operators for the specified token owners and token IDs.
Its parameters are a list of commands to add or remove operators for token owners and IDs.
For information about operators, see Operators.
set_administrator: Changes the account that can mint tokens.
Its parameter is the address of the new administrator account.
This entrypoint can be called only by the current administrator account.
set_metadata: Creates or changes a metadata field in the specified contract's storage.
Its parameters are a key-value pair for the new or updated metadata value.
This metadata is a value in the contract's storage, which is different from the metadata returned by the API.GetContractMetadata() method.
This entrypoint can be called only by the current administrator account.
set_pause: Sets the value of the paused storage field.
When this field is set to true, tokens can be minted but not transferred between accounts.
This entrypoint can be called only by the current administrator account.
For examples of calling these entrypoints, see Calling the built-in contract.
Constructors
This constructor is for internal use.
To deploy the built-in contract, use the Deploy() method.
Initializes a TokenContract object with a copy of the built-in contract that you have deployed already.
To deploy the built-in contract, use the Deploy() method.
Deploy()
Deploys (originates) a contract based on the built-in contract, including prompting the connected wallet to pay the origination fees.
The SDK stores the address of the contract with the Unity PlayerPrefs.
Parameters:
completedCallback: A callback method to run when the contract is deployed, which receives the address of the new contract
Example:
Mint()
Calls the Mint entrypoint of the contract to create a token type and mint tokens.
Parameters:
completedCallback: A callback method to run when the token is minted, which receives a TokenBalance object with information about the new token
tokenMetadata: A TokenMetadata object with information about the new token
destination: The account that owns the new token, which can be a user account or a smart contract account
amount: The number of tokens of the new type to create
Example:
Transfer()
Transfers tokens from the currently connected account to the destination account.
Parameters:
completedCallback: A callback method to run when the token is minted, which receives the hash of the transfer transaction
destination: The account to send the token to, which can be a user account or a smart contract account
tokenId: The ID of the token to transfer
amount: The number of tokens to transfer
Example:
Unity SDK Wallet object
The Unity SDK class TezosSDK.Tezos.Wallet.WalletProvider, which is available at runtime as TezosManager.Instance.Wallet, provides methods to connect to wallets and send transactions from the connected account.
Properties
IsConnected
Returns true if a wallet is currently connected.
HandshakeData
An object with a field named PairingData with the data that applications need to connect to the wallet.
Methods
Connect()
Sends a request to a user's wallet to connect to the application.
Parameters:
walletProvider: The type of wallet to connect to, including WalletProviderType.beacon for TZIP-10 wallets (most Tezos wallets) and WalletProviderType.kukai for Kukai wallets.
withRedirectToWallet: When running on a mobile platform, whether to open the connected mobile app after connecting to a wallet.
This method triggers the WalletConnected or WalletConnectionFailed events, depending on whether the connection was successful or not.
When the walletProvider parameter is set to WalletProviderType.beacon, this method automatically picks the correct way to connect to wallets:
In WebGL applications, it uses the TezosSDK.Beacon.BeaconConnectorWebGl class to trigger the browser to connect to a wallet app in a browser plugin.
In all other applications, it uses the TezosSDK.Beacon.BeaconConnectorDotNet class to generate a QR code to connect to a wallet app on a mobile device or use a "deep link" to connect to a wallet on the same mobile device that is running the application.
When the walletProvider parameter is set to WalletProviderType.kukai in a WebGL application, it triggers the web browser to open the user's Kukai wallet.
This type of connection is appropriate only for WebGL applications.
Disconnect()
Disconnects from the currently connected wallet.
This method triggers the WalletDisconnected event.
GetWalletAddress()
Returns the address (public key hash) of the currently connected account, or NULL if no wallet is connected.
RequestSignPayload()
Sends a request to the connected wallet to sign a payload string.
Parameters:
signingType: The type of payload, such as raw, operation or micheline.
payload: The payload to send to the wallet to sign.
Signing a message proves that it came from a specific user's wallet because the wallet encrypts the message with the user's account's key.
For example, this code prompts the user to sign the message "This message came from my account."
VerifySignedPayload()
Returns true if most recent response to RequestSignPayload matches the specified payload and is properly signed.
CallContract()
Calls the specified entrypoint of the specified contract.
This method triggers the ContractCallInjected event if the call is successfully sent to Tezos.
Then it triggers ContractCallCompleted or ContractCallFailed events, depending on whether the call succeeded or failed.
OriginateContract()
Deploys (originates) the specified contract.
To use this method, you must compile a contract to Michelson in a JSON file.
For an example, see the code of the built-in contract in Resources/Contracts.
The optional delegateAddress parameter is the address of the account to delegate the contract's tez to.
For more information, see Delegation.
This method triggers the ContractCallInjected event if the call is successfully sent to Tezos.
Then it triggers ContractCallCompleted or ContractCallFailed events, depending on whether the origination operation succeeded or failed.
Documentation style guide
Overall Tezos-related issues
Tezos is decentralized.
There is no official Tezos documentation, no official Tezos strategy, and no official entity in charge of Tezos.
However, there can be official documentation for a Tezos-related tool.
Do not compare Tezos to other specific blockchains.
You can say that Tezos has advantages over other blockchains, but don't say that Tezos is better than or does things differently from another specific blockchain.
Use "tez" to describe the currency instead of "XTZ" unless there is a specific reason to use the ISO code/ticker symbol "XTZ," such as in accounting systems, exchange rates with other currencies, and anything that needs a standardized code.
Avoid using the ꜩ glyph in text.
Do not use the term "initial coin offering (ICO)" or refer to Tezos "investors."
Instead, refer to the Tezos fundraiser.
See https://tezos.gitlab.io/user/key-management.html#getting-keys-for-fundraiser-accounts.
Blockchain terminology
Clients that send transactions to contracts are called "senders."
The fields in a contract's storage are called "properties."
Use the full forms "layer 1" and "layer 2" when talking about layers.
The abbreviations "L1" and "L2" (always capitalized) are acceptable later after you have introduced the concept of layers.
Capitalization
Use sentence case for headings, such as "Connecting to wallets."
Capitalize these terms in text:
Tezos
Smart Rollups
Specific network names such as Mainnet, Ghostnet, and Mumbainet
Data Availability Layer
Sapling
JSON
Web3
Capitalize the "A" in "dApp."
Do not capitalize these terms unless they are the first word in a sentence or if the capitalization style requires all major words to be capitalized:
tez
blockchain
proof of stake
proof of work
smart contract
testnet
Emphasis
Use emphasis sparingly to avoid making the page too visually busy or complex.
Use backticks for file names, variable names, and command names, not to emphasize words or denote technical terms
Use bold for:
Buttons or links that the user must click or interact with
Very sparingly, to highlight important words and phrases, such as the words at the beginning of a definition list, such as in the Glossary
Do not emphasize the names of web sites, pages, or UI elements that the user sees but does not interact with directly
Use admonitions such as notes or warnings sparingly, only to denote warnings and critical issues
Avoid parenthetical expressions
Style and clarity
Use terms and phrasings that are clear to people using translation or to non-native speakers of English.
Use gender-neutral terminology.
Use the same word to represent something, instead of varying words for variety.
For example, use "stake" consistently and do not substitute synonyms such as "deposit" and "retainer" to refer to the same thing.
Do not use "as" or "since" to mean "because," as in "The system shows an error, as you have not connected your wallet yet."
Do not use "once" to mean "after," as in "Once the system shuts down, you can safely remove the drive."
Avoid Latinate abbreviations like e.g. and i.e.
Provide the information about the target of a link.
For example, instead of saying "for information about smart contracts, click here," say "for information about smart contracts, see Smart contracts."
When linking to an external site, consider mentioning the target site, as in "for more information, see Blockchain basics on opentezos.com.
Do not describe documentation in terms of "chapters" or "articles."
Avoid meta-phrases that don't add information.
For example, instead of "We will see how you can deploy smart contracts to Tezos by...," say "You can deploy smart contracts to Tezos by..."
When writing steps that the user must follow, make it clear what the user must do by following these guidelines:
Make each action that the user does a numbered step.
Cover the action that the user does in the first sentence.
Use language that makes it clear that the user must do something and what that action is.
For example, instead of "4. In the file myFile.js:", say "4. Add this code to the file myFile.js."
Structure lists and headings in a consistent way.
For example, make sure each list item is capitalized and punctuated in the same way.
List items should be all complete sentences or all sentence fragments, not a mix.
Links
Use root-relative links, as in [Target page]\(/folder/folder/target), because the target path of relative links as in [Target page]\(./target) can change based on whether the user's browser has a trailing slash in the URL.
Text files
To access the documentation on this site for use with an LLM, download these text files:
All documentation text: allPageSourceFiles.txt
All tutorial text: allTutorials.txt